
12 posts tagged with "webpack"

View All Tags

How To Clear Browser Cache When Webpack Bundle Is Updated

· 3 min read

Webpack creates a bundle file from the source files. In webpack configuration file, there is an option to provide the file name of the output bundle file. If the name is static, then the browser loads the file for the first time from the server. From the second time, it will take the file from browser cache. That will create a problem if bundle file is updated in the server.

In this article, we are trying to find a solution for this caching problem and find out what is the best method to cache.

Project Setup

First step is to initialize a NPM package using npm init -y or yarn init -y.

Second step is to install webpack and webpack-cli as dev dependencies.

yarn add -D webpack webpack-cli

As third step, add a build command under scripts in package.json.

"scripts": {
"build": "webpack"
},

Now we are technically ok to try webpack.

Building Source

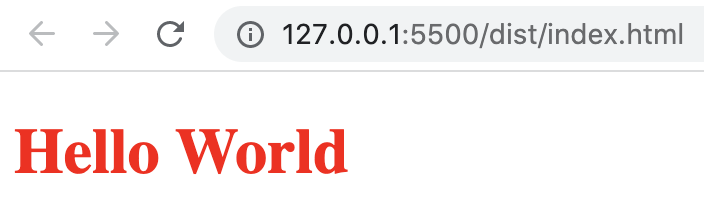
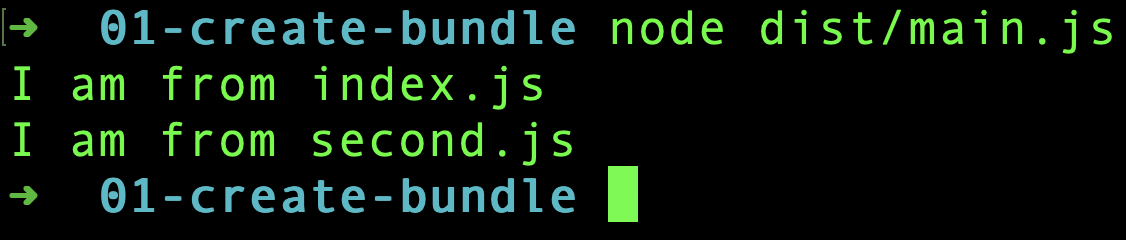
Create a folder src in our project root. We will store all our source code inside this folder. Create an index.js file inside src folder and fill it with below content.

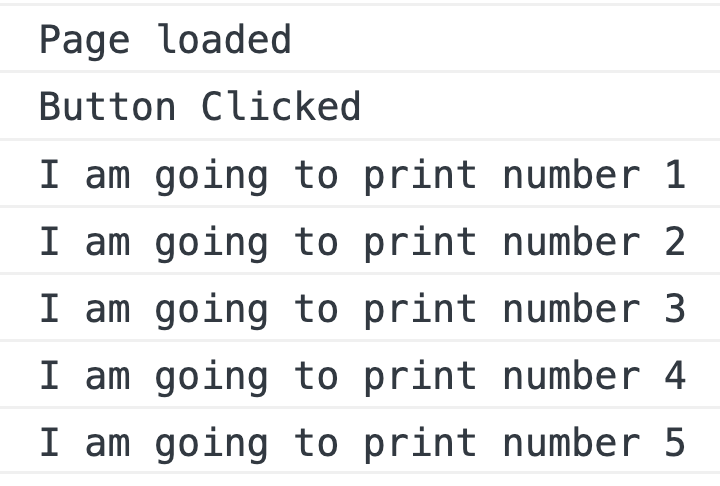
console.log("Hello World!");

Now, take terminal and navigate to our project folder and run:
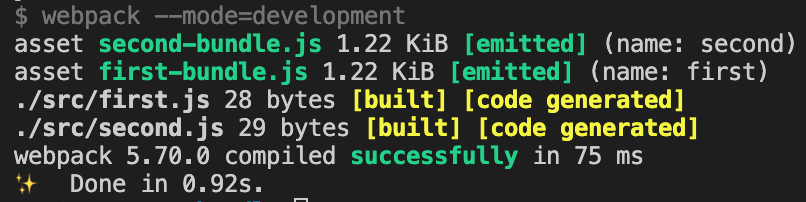
yarn build

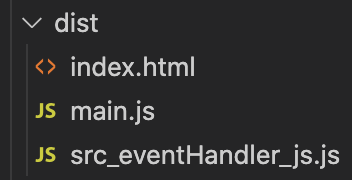
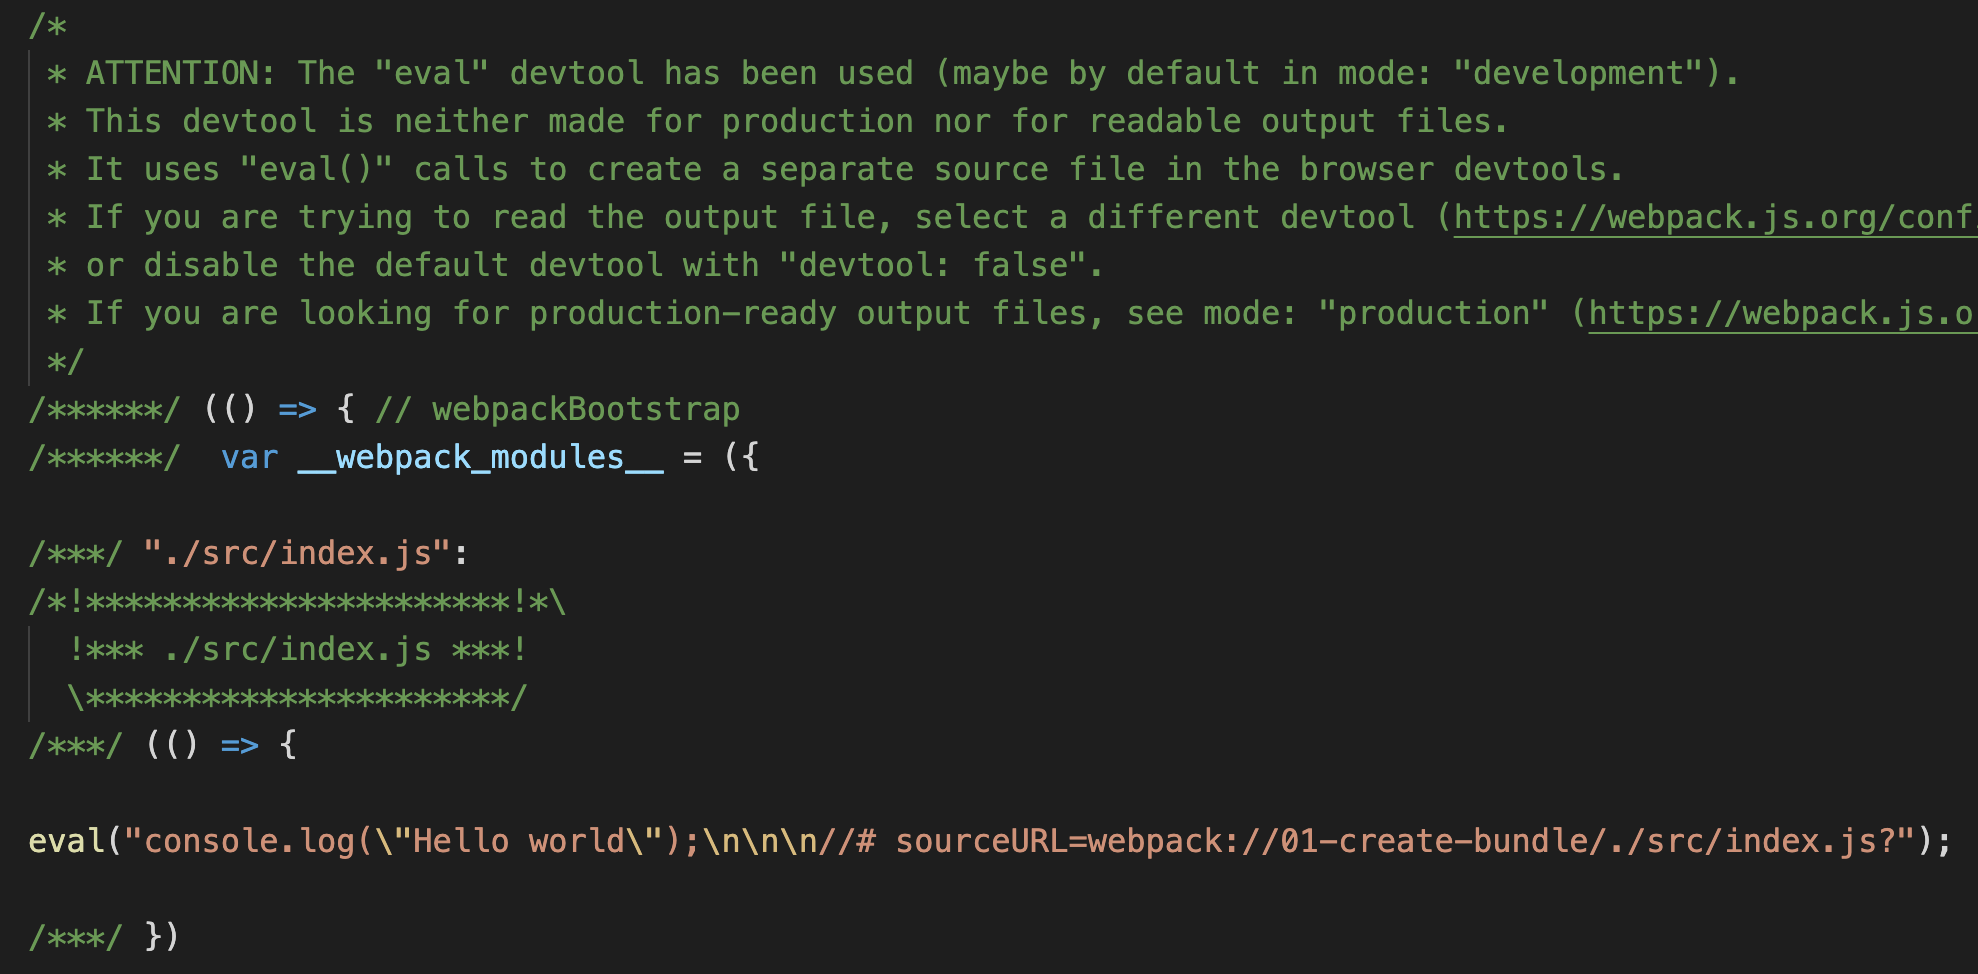
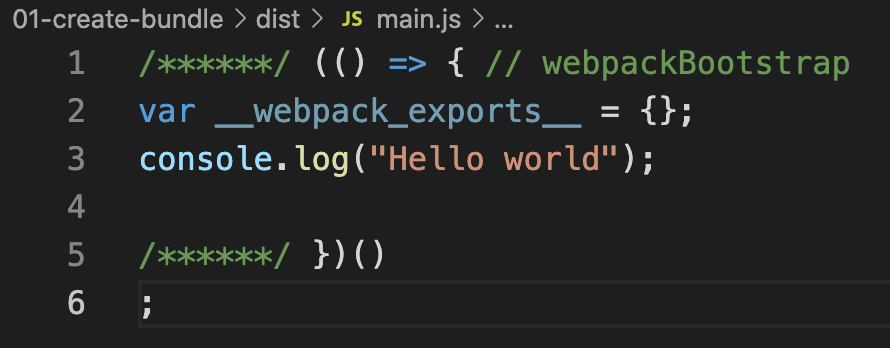
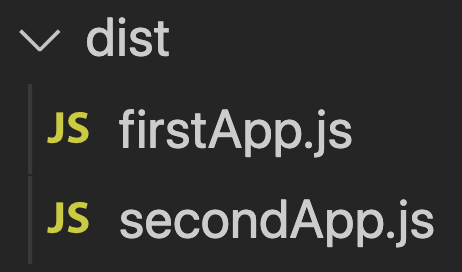
Above command creates a dist folder and places our bundle(main.js) inside it. Assume, we included this main.js file in our HTML file. When a user first visits the page, main.js is downloaded from server. But when the user visits the page next time, the browser will take main.js from browser cache. That is good. right? But there is a problem.

Content Change

What if we change the text in index.js to "Hello universe!!"? Webpack build followed updated main.js. But our browser is still fetching from its cache. How to solve it?

So far, we did not create a webpack.config.js because we were using the default options of webpack. Now, create a webpack.config.js file. Fill it with below content.

module.exports = {
output: {
filename: "main.[contenthash].js",
},
};

[contenthash] acts like a placeholder. Webpack will calculate the hash value of source files included and fill it in [contenthash] placeholder. In our case, when yarn build is run, we can see a file like main.09a3ac0effce240721db.js in dist folder. Again this file will be cached by browser. But, if we make any change to any files and do a build again, the hash value changes. If I change "World" to "Universe" in index.js, I can see that the output bundle file name is now main.ffae18492c7b67357218.js. There is no chance that browser serves the bundle from cache now because the file name itself has changed.

Cleaning Dist Folder

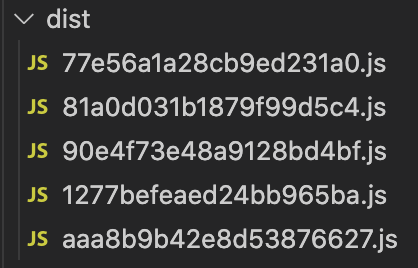
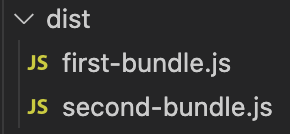
After taking several builds according to new settings, we can see that the dist folder is filling up with lot of bundle files.

Cluttered Dist Folder

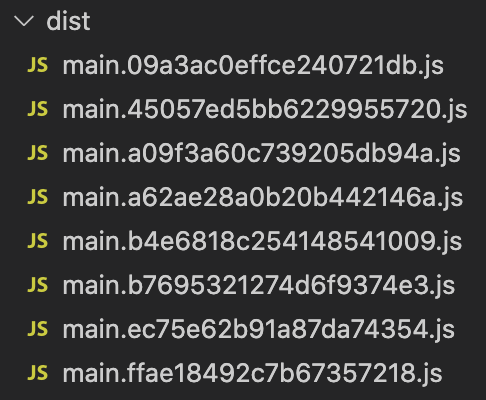
We can easily solve this problem. output configuration in webpack has a clean property. If we set the clean property to true, webpack will clean the dist folder in each build. Here is the updated webpack.config.js file:

module.exports = {
output: {
filename: "main.[contenthash].js",
clean: true, // highlight-line
},
};

Summary

We learned how to efficiently handle caching in webpack. Using [contenthash] placeholder, we can force browsers to fetch latest and updated bundle file after each build. We can also keep our distribution folder clean using the output.clean property. Have fun!.

Code Splitting Using Webpack And Import Function

· 4 min read

Webpack creates a single bundle file including all the source files. If the bundle size is big, it can impact initial page load time. At that time, there is an option to split the bundle to multipe files using Webpack and import() function.

Why Code Splitting?

Before doing code splitting, let us understand why we require it in the first place. Create a folder anywhere in your laptop and initialize a node package using yarn init -y or npm init -y. In order to run yarn command, we need to have yarn installed globally.

Next, create an index.js file under /src folder. Here is the content for that file.

console.log("Page loaded");

document.getElementById("mybtn").addEventListener("click", function () {
console.log("Button Clicked");
console.log("I am going to print number 1");
console.log("I am going to print number 2");
console.log("I am going to print number 3");
console.log("I am going to print number 4");
console.log("I am going to print number 5");
});

Above code logs a message on page load. It also logs some messages when a button is clicked. We have added 5 console log statements just to increase file size.

HTML

In order to see the working of above JavaScript code, we need to create a HTML file in /dist folder. We are creating in /dist folder because after webpack build, the bundle file(main.js) is created there.

Create an index.html file in /dist folder and paste below contents:

<!DOCTYPE html>
<html lang="en">
<head>
<title>Document</title>
</head>
<body>
<button id="mybtn">Click Me!</button>
<script src="./main.js"></script>
</body>
</html>

We have a button added to fire the event we wrote in js file. Also, we placed the script tag at the bottom of file to properly attach the button with the click event.

Build

We now have the source files and HTML ready. Now, let us configure webpack to run in development mode. Here is the content for webpack.config.js file.

module.exports = {
mode: "development",
};

We can also add a command in package.json to run webpack.

"scripts": {
"build": "webpack"
},

Now, go to project folder in terminal and execute yarn build.

Single bundle

A bundle file of size 1.55Kb is created. If we load the HTML in browser and click the button, we can see below output in console.

Single bundle output

If we analyze what just happened, we are loading the full bundle file of 1.55Kb on page load. That slows initial page load time. We can split the button click logic to a separate file. That can improve the site performance. In the next section, we will see how it is done.

Split JS Code

Let us create a separate file under /src folder called eventHandler.js. We then move all the button click logic to that file.

export default () => {
console.log("Button Clicked");
console.log("I am going to print number 1");
console.log("I am going to print number 2");
console.log("I am going to print number 3");
console.log("I am going to print number 4");
console.log("I am going to print number 5");
};

Next, we dynamically import this file in index.js only on button click.

document.getElementById("mybtn").addEventListener("click", function () {
import("./eventHandler").then((mod) => {
mod.default();
});
});

When Webpack sees the dynamic import() statement, it automatically extract the logic to a separate bundle file.

Code split

At the time of page load, only the main.js file is loaded. When the button is clicked, Webpack asynchronously request for src_eventHanlder_js.js and executes the click handler logic.

This is how code splitting is done using import() improves web performance. There are other ways also to implement code splitting.

Hot Reloading Using Webpack Dev Server

· 3 min read

While developing our project using webpack, it is difficult to build each time after every change in code. It is also time consuming to refresh our browser to see the change in output. Webpack Dev Server is a solution for this problem. It brings watch functionality and HMR(Hot Module Reload) feature during development.

Project Setup

To try watch mode and HMR, we need a source file to test. For that, under /src folder, create an index.js file with below content.

console.log("Hi!!");

With the default webpack configuration, when we build the project, an output main.js file is created at /dist folder.

Next, create an index.html file in /dist folder to run the main.js file. Even though there is HTMLWebpackPlugin to generate the HTML file, we are manually creating the file for demo purpose. Fill the HTML file with below content.

<!DOCTYPE html>
<html lang="en">
<head>
<title>Document</title>
<script src="./main.js"></script>
</head>
<body></body>
</html>

So we have now everything in place to welcome webpack-dev-server.

Webpack Dev Server Setup

First we need to install webpack-dev-server using npm or yarn.

yarn add -D webpack-dev-server

webpack-dev-server works closely with Webpack. It can read webpack configuration file and understand the meaning of options written there.

Once the dev server is installed, we need to tell the server about the location of output files. In our case, we need to tell the server to serve files from /dist folder. For that, add devServer property to webpack.config.js file.

module.exports = {
devServer: {
static: "./dist",
},
};

By default, webpack dev server runs the site at http://localhost:8080. If we want to change the default values, there are host and port options for devServer setting.

Running Dev Server

Let us add a script command in package.json to run the dev server.

 "scripts": {
"build": "webpack",
"dev": "webpack serve --open" // highlight-line
}

We can also provide webpack-dev-server --open as the dev command.

Now run the dev command in terminal.

yarn dev

If everything went well, we should see our default browser opening http://localhost:8080 in browser. If we open the browser console, we can also see Hi!! message.

The terminal will be in waiting mode, listening for any changes in source files. Let us change the message to "Hello". As soon as we save the file, Webpack Dev Server automatically builds and refresh our page. We can also see the updated message in console.

Hope you got a basic understanding of Webpack Dev Server and how to start with it.

Understanding Source Maps In Webpack

· 3 min read

Webpack bundles multiple source files to one single bundle file. In some cases, there can be multiple bundle files. But in both cases, if there is an error in one of the source files, it is difficult to track it down from browser console. Source maps connect the bundle file with corresponding source files.

Source maps are not a Webpack only concept. It is a common debugging technique which is respected by all modern browsers. Webpack has the ability to generate source maps.

Let us try generating a source map.

Project Setup

To try source maps, first let us create two source files under /src folder. Name them index.js and util.js.

Here is the content for index.js.

const utils = require("./utils");

console.log(utils.age.someMethod());

Here is the content of utils.js.

module.exports = {
age: 36,
};

We have intentionally set an error in index.js. someMethod() will throw a TypeError.

Default Source Map Behaviour in Production and Development

Now we have two source files. Take the webpack build with default configuration. It is going to be a production build. Include the output main.js in an HTML file and try it in a browser. Let us see how the error appears in browser.

Production error

As we can see, the error is thrown from main.js. The browser is not able to show any information about source files to the developer.

Let us now build the project in development mode.

In order to take the build in development mode, we need to specify mode as development in webpack configuration.

module.exports = {
mode: "development",
};

Take the build. Then, run the main.js bundle in a browser.

Development map

We can see the browser console showing the correct source file and line number. That is because webpack automatically applies a devtool setting of eval in case of development build. More on devtool setting in next section.

Devtool Option

For sourcemap to be generated, we need to pass another property in webpack configuration called devtool. The type of source map changes based on the value given to devtool property.

inline-source-map

One of the several values accepted by devtool configuration is inline-source-map. Let us first modify our webpack.config.js.

module.exports = {
mode: "development",
devtool: "inline-source-map", // highlight-line
};

After build, webpack will generate the source map and include it in the generated bundle file itself. That is why this configuration is called inline source map.

Inline source map

This option is best for development. It is not good for production as it makes bundle size bigger.

source-map

If we aim to use source map in production, we can use source-map value for devtool.

module.exports = {
mode: "development",
devtool: "source-map",
};

Here, webpack stores the source map in a different file. That is why it suits production build. If the bundle name is main.js, then the map file name will be main.js.map.

If we open the main.js bundle, the last line will be:

//# sourceMappingURL=main.js.map

Modern browsers will consider the associate map file by seeing this comment.

There are several other valid values for devtool property. You can find the complete list in webpack docs.

Clean Distribution Folder In Each Webpack Build

· One min read

Webpack creates bundle file and store it in a distribution folder. The default distribution folder is /dist folder. If each bundle is created with different file names, the distribution folder will be crowded with previous version of bundle files.

Here is a webpack configuration that creates output file with the hash value.

module.exports = {
output: {
filename: "[contenthash].js",
},
};

Above configuration, first generates a hash value of the source content. Then the hash value is given as the output bundle file name. This technique is helpful with respect to caching because the output filename changes only when source changes.

But, the problem is that, for each content change, the output /dist folder is filling up.

Ouput dist folder

We can avoid this crowding by adding clean attribute to output configuration.

module.exports = {
output: {
filename: "[contenthash].js",
clean: true, // highlight-line
},
};

Now, after each build, only the generated bundle files will be there in the dist folder.

Mode Option In Webpack Configuration

· 2 min read

One of the configuration options accepted by Webpack is mode. It can have one of the three values.

  1. development
  2. production
  3. none

Webpack generates the bundle in different ways based on the mode type. In development mode, the bundle will be more verbose with comments. In production mode, Webpack does everything to use the bundle for production. It includes minification of the bundle file and other optimizations.

Default value of mode is production.

Setting Mode

In webpack.config.js, we can set bundling mode as shown below.

module.exports = {
mode: "development",
};

We can also pass the mode using command line flags.

webpack --mode=development

Bundle modes

Let us create a small index.js file under ./src folder. Fill it with below content.

console.log("Hello world");

Now let us see, how the output bundle looks like in different modes.

Development mode

Here is the output bundle in development mode.

Development Mode

As we can see, the generated bundle contains lot of comments. We can also see the console.log statement, along with an indicator to original source file.

Production mode

Here is the generated bundle in production mode.

Production Mode

Webpack does not insert anything extra in production mode, just the code that is required.

None mode

By specifying none for mode, we are opting out of any optimizations. In our case, the output bundle file looks like below in none mode.

None mode

Plugins In Webpack And HTML Webpack Plugin

· 3 min read

Loaders and Plugins provide wings to Webpack. We learned about Webpack Loaders earlier. They help webpack to work with files other than JavaScript or JSON. Plugins on the other hand, bring extra capability. Example can be dynamically creating a HTML file with all bundle files referenced in it. Another example can be minifying the output bundle for better page speed.

Using a Plugin

In order to use a Webpack plugin in our project, we need to follow below steps:

  1. The plugin needs to be installed using npm or yarn
  2. The plugin needs to be required in webpack.config.js file
  3. Most of the plugins support options to customize its usage. So, provide any options we have
  4. Since a plugin can be used multiple times in a configuration file, each time the plugin needs to be instantiated using new operator before using.
  5. The plugin instance needs to be pushed to plugins config array

To understand how a plugin works, let us try a commonly used plugin which is html-webpack-plugin.

HTML Webpack Plugin

So far, if we need to test the generated bundle file in a HTML page, we might have created a HTML file in ./dist folder. Then, we might have added the bundle reference using script tag. All these manual work needs to be done again after each bundle creation. html-webpack-plugin makes our life easy in this case.

We are going to install and use html-webpack-plugin as per the steps mentioned in the previous section.

First, install the plugin using:

yarn add -D html-webpack-plugin

Next, require the plugin in webpack.config.js file using require() function.

const HtmlWebpackPlugin = require("html-webpack-plugin");

Next, we need to add an instance of HtmlWebpackPlugin constructor to plugins option. For that, create a plugins property in module.exports if not present. Then add our plugin instance to it. Note that, plugins config is an array which will contain all the used plugins as its elements.

const HtmlWebpackPlugin = require("html-webpack-plugin"); // highlight-line

module.exports = {
module: {
rules: [
{
test: /\.css$/i,
use: ["style-loader", "css-loader"],
},
],
},
plugins: [new HtmlWebpackPlugin({ template: "./src/index.html" })], // highlight-line
};

As you can see, we supplied a template option to the plugin. With that, we are telling the plugin to take the HTML file in src/index.html, inject generated bundles and then place it under ./dist folder.

We need to create the index.html in src folder now. Create the file and copy the below simple html content.

<!DOCTYPE html>
<html lang="en">
<head>
<title>Webpack</title>
</head>
<body></body>
</html>

We are now ready to test our plugin. Go to the terminal and run yarn build. Assuming, the build command is already setup to run webpack.

After building, a new file index.html is created for me under ./dist folder. Here is the content.

<!DOCTYPE html>
<html lang="en">
<head>
<title>Webpack</title>
<script defer src="main.js"></script>
</head>
<body></body>
</html>

You can see the <script defer src="main.js"></script> line added dynamically by webpack plugin.

Hope you all received a taste of how webpack plugin works.

Understanding Loaders In Webpack

· 4 min read

Webpack creates a dependency graph about all the files referenced in our application. It starts with the entry file and go in depth with the help of import or require statments in the code.

So when webpack sees, import React from "react", it adds the React library to the bundle. Out of the box, Webpack can only understand and include JavaScript and JSON files.

CSS Import

What if there is a CSS file import like, import "./styles.css"? Let us try it in our code. Say, we have an index.js file that imports style.css.

Here is our index.js file:

import "./style.css";

console.log("I am good");

And, here is our style.css file:

h1 {
color: red;
}

Our expectation is that, Webpack will bundle both the files and creates a main.js bundle under ./dist folder. We do not require an explicit webpack.config.js file now. Let us try with the default webpack configuration.

When we try to build the source files, we see below error message in console.

Webpack file type error

Webpack tried to include style.css. But it is not able to understand what is written there. It can understand only JavaScript and JSON. That is why webpack clearly says in the error message that:

You may need an appropriate loader to handle this file type, currently no loaders are configured to process this file.

Loaders allow webpack to process other types of files and convert them into valid modules that can be consumed by your application and added to the dependency graph.

As per the definition of loaders, in order to import a CSS file, we need to use a css-loader. Let us add it now.

yarn add -D css-loader

Now, we have the css-loader in place. Let us tell webpack to use it to load CSS files. For that, create the webpack.config.js and add below content.

module.exports = {
module: {
rules: [
{
test: /\.css$/i,
use: ["css-loader"],
},
],
},
};

In the above code, we added a rule for CSS files. So, whenever Webpack sees an CSS import, it uses css-loader to add the CSS as a module to the bundle.

Now, things are ready to take a build. Let us run yarn build again. It creates a main.js bundle under ./dist folder. If we observe the content, we can see our CSS inside the bundle.

CSS Bundle

Let us try the bundle in a HTML file and test if the style is applied to H1 element.

Testing CSS Bundle

Create a HTML file in dist folder. Add script reference to our created main.js file.

<!DOCTYPE html>
<html lang="en">
<head>
<title>Webpack</title>
<script src="main.js"></script>
</head>
<body>
<h1>Hello World</h1>
</body>
</html>

Open the HTML file in a browser. What do you see? Is the H1 tag in red color? No. right. That is because, CSS loader can add a CSS file to bundle. But it cannot inject the style to browser DOM. To inject the style to DOM, we need style-loader.

Style Loader

First step is to add the style-loader.

yarn add -D style-loader

Next, add style-loader to webpack.config.js file.

module.exports = {
module: {
rules: [
{
test: /\.css$/i,
use: ["style-loader", "css-loader"], // highlight-line
},
],
},
};

We can build the project again using yarn build. If we dig deep in the complex main.js, we can see some code that injects style to HEAD tag.

Style Loader

Now, refresh the HTML page again.

HTML

Hooray!, the style is applied. Also, we can see the style inserted to head tag.

Style insert

We learned how to use webpack loader to work with CSS files. There are corresponding loaders for other file types like images, scss files and so on.

Output Option In Webpack Configuration

· 2 min read

Webpack needs to store the bundle file that it created in some location. Webpack also needs to give proper file names to the bundle file to manage caching. Both these functionalities can be managed using output configuration.

Default value of output configuration is ./dist/main.js.

Setting output

If we want to store our bundle file as jam.js under jim folder, we need to add the output config to webpack.config.js as below.

const path = require("path");

module.exports = {
output: {
path: path.resolve(__dirname, "jim"),
filename: "jam.js",
},
};

The value of output always need to be an object. We CANNOT give the path as a string("./jim/jam.js").

Also the path property requires an absolute path. That is why, we have to import path package to resolve the absolute path. path package is part of Node.js and therefore we do not have to install it separately.

If we are setting output config, the only mandatory property is filename. Webpack will then create the bundle in ./dist folder, with the provided file name.

Multiple Entry Points

We learned about multiple entry points in Webpack entry config article. Here we have a webpack.config.js file that handles multiple entry points.

module.exports = {
entry: {
first: "./src/first.js",
second: "./src/second.js",
},
output: {
filename: "bundle.js",
},
};

Here, we explicitly mentioned that the output bundle file name should be bundle.js. But, since there are two entry points, there will be two output bundles. So, how can two bundles have the same name? That is not possible. That is why, if we try to run webpack with above configuration, we will face below error:

Error: Conflict: Multiple chunks emit assets to the same filename bundle.js (chunks first and second)

Our expectation is that, webpack will create first-bundle.js and second-bundle.js under ./dist folder. For that, we can make use of [name] placeholder to provide dynamic naming to output files based on entry points. Here is how the updated config file looks like.

module.exports = {
entry: {
first: "./src/first.js",
second: "./src/second.js",
},
output: {
filename: "[name]-bundle.js", // highlight-line
},
};

We can see from the webpack logs that first-bundle.js and second-bundle.js are emitted. See the green colored text below.

Webpack output log

Now, if we check the dist folder, we can see the two bundle files as expected.

Dist folder

Hope you understood how Webpack output config works.

Entry Option In Webpack Configuration

· 2 min read

Webpack is like a secret agent who enters into a building through the main door and then go deep inside through inner doors. Once the agent comes out, he has all the links in his head as a dependency graph. Based on that graph, he creates a bundle file.

We can configure how Webpack works by passing a set of predefined options. One such option is entry. The entry option tells webpack, which module to start with to generate the dependency graph.

The default value of entry is ./src/index.js.

We can pass the entry option to webpack in multiple ways.

Single Entry Syntax

If we want webpack to start bundling from ./src/app.js, we can set the webpack.config.js file as:

module.exports = {
entry: "./src/app.js",
};

Multi-Main Entry

The entry option can accept an array of files.

// first.js
console.log("I am first");

// second.js
console.log("I am second");

// webpack.config.js
module.exports = {
entry: ["./src/first.js", "./src/second.js"],
};

Here the contents from first.js are first added to bundle. Next, contents from second.js are appended to the bundle.

Here is the generated bundle file. If we look closely, we can see the two console log statements from both JavaScript files.

Multi Main Entry

Object Syntax

In the previous section, the two input files are combined to a single bundle. Now, there is an object syntax way using which we can mention webpack entry.

module.exports = {
entry: {
firstApp: "./src/first.js",
secondApp: "./src/second.js",
},
};

In this syntax, for each object keys, a bundle is formed. In our case, there are two keys: firstApp and secondApp. Due to which, after webpack build, dist folder will contain two bundle files, firstApp.js and secondApp.js.

Object entry output

One use case of object syntax is to separate all of the custom logic and all of the vendor JavaScript. Since the vendor JavaScript bundle will not change frequently, that can be effectively cached.

Webpack Configuration File

· 2 min read

If we are using Webpack to bundle assets in our project, we can supply a set of options to webpack. This can be done either through command line or creating a webpack.config.js file.

From Webpack 4 onwards, it is not mandatory to supply a configuration file. Webpack takes, its own default configuration if none is provided. Default configuration expects the entry point to be src/index.js and bundle destination to be dist/main.js.

webpack.config.js

If a file with name webpack.config.js is present in the project, when webpack is executed, it respects the options present in that file.

Here is a sample config file:

module.exports = {
mode: "development",
entry: "./src/app.js",
};

The config JavaScript file is a CommonJS module. An object is exported from this file which is then considered by Webpack. Above configuration tells following things to webpack while it is running:

  • Build the project in development mode. So the output bundle file will contain comments and non-minimized code. Default project mode is production.
  • The entry point of webpack is set to be app.js under src folder. From there, webpack starts creating the dependency graph. Default entry point is src/index.js.

Using Different Config File

By default, Webpack takes configuration details from webpack.config.js. If for some reasons, we need to tell webpack, to take different file as the configuration file, we can use --config flag.

If our new webpack configuration file is named as production.config.js, we can make use of it by running webpack as shown below.

webpack --config production.config.js

Config Generation Tool

Webpack can help us to generate a config file using webpack-cli tool. To generate the file, we can go to the project root in terminal and run:

npx webpack-cli init

Befor running above command, we need @webpack-cli/generators in our project. If it is not present, install it using npm or yarn.

When running above command, webpack will ask a set of questions. The process is interactive.

Webpack cli init

The process will create a boilerplate code with package.json, index.js and webpack.config.js file. If those files are already created in the project, there is option to overwrite or keep them.

Playground

Createapp.dev is a very interactive online application that gives us the configuration required for different project types. Give it a try.

Introduction to Webpack

· 3 min read

Webpack is a static module bundler for JavaScript. Webpack finds out the required JavaScript files and its dependencies. Later, it creates a single or multiple bundle files to be used in production.

Let us directly dive into how a bundle is formed. Create a folder anywhere to try webpack. Then initialize the folder as a NPM package using:

yarn init -y

We need to install webpack and webpack-cli packages.

yarn add webpack webpack-cli

At the time of writing, Webpack version is 5.70.0.

Next, in package.json we add a script command to run webpack.

"scripts": {
"build": "webpack --mode=development"
}

We are running webpack in development mode. By default, webpack builds the project in production mode. In production mode, the bundle file generated will be minified and uglified. We prefer development mode now to better understand what is happening behind the screens.

Source files

We need two JavaScript files to try webpack. First, create a file index.js under <project_folder>/src and add following content.

// /src/index.js

const second = require("./second");

console.log("I am from index.js");
console.log(second.message);

As we can see, index.js is using an object from second.js. So create second.js file in the same level as that of index.js and add the following content.

// /src/second.js

module.exports = {
message: "I am from second.js",
};

We are done with our coding part.

Running Webpack

We already have a script command in package.json to run webpack. So, go to terminal and run:

yarn build

It creates a new folder /dist and the folder contains a main.js file. This main.js is the bundle file generated by webpack.

If we open main.js file, we can see some complex JavaScript. We do not have to worry about that. It is the way how Webpack bundles. Now, if we search for contents from our index.js and second.js, we can find it in main.js.

Bundle file

So does main.js contains all the logic to execute independently? Let us test that. Go to terminal and directly run the main.js using node.

node dist/main.js

We can see the console outputs in the terminal.

Bundle output

Tree Shaking

We did not write any instructions to webpack about our file structure. Still, webpack first took the index.js file under src folder, resolved dependencies of index.js and finally created a bundle file(main.js) in dist folder. This all worked because we wrote everything as per webpack's default configuration.

From webpack 4 onwards, we do not need to supply explicit configuration file. There are some default configuration. Taking the file from /src/index.js as the starting point is part of the default configuration.

Also, writing the output bundle file as main.js inside dist folder is part of default configuration.

So webpack, like a detective entering a house, enters into our project through index.js. It then climbs to second.js after seeing the require() statement. Like that, it crawls through the entire project and creates the bundle. This crawling process is also termed as Tree Shaking, where the unused code is eliminated.

Hope you got a basic idea about Webpack and its working.