Show Product Preview Page Using Next.js Draft Mode
· 5 min read
In a headless Shopify storefront, you often need to preview a product page before publishing content changes. Next.js Draft Mode gives a clean way to do this in development.
In a headless Shopify storefront, you often need to preview a product page before publishing content changes. Next.js Draft Mode gives a clean way to do this in development.
This post explains how you can quickly generate a Shopify admin token for your app.
Social login has become a standard feature in modern e-commerce applications, offering users a convenient way to sign in without creating new credentials. In this article, we'll explore how to implement Google Social Login in a headless Shopify storefront using Better-Auth and Shopify Multipass.
Note: The live demo site uses a Shopify Partner development store which doesn't support Multipass (Multipass is only available on Shopify Plus plans). However, the complete working implementation of Google social login is available in the GitHub repository. You can refer to the codebase for a fully functional example.
Shopify Multipass is a feature available on Shopify Plus that allows you to authenticate customers from an external identity provider. When a user signs in through a third-party service (like Google), you generate a Multipass token that Shopify uses to create or sign in the customer automatically.
Before implementing Google social login, ensure you have:
If you haven't set up basic Better-Auth authentication yet, check out the article on implementing authentication in headless Shopify.
Add the required environment variables for Google OAuth and Shopify Multipass:
# .env
BETTER_AUTH_URL=http://localhost:3000
BETTER_AUTH_SECRET=your_better_auth_secret

# Google OAuth
GOOGLE_CLIENT_ID=your_google_client_id
GOOGLE_CLIENT_SECRET=your_google_client_secret

# Shopify Multipass
SHOPIFY_MULTIPASS_SECRET=your_shopify_multipass_secret
http://localhost:3000/api/auth/callback/google (for development)https://yourdomain.com/api/auth/callback/google (for production)Update your Better-Auth configuration to include the Google social provider:
// src/lib/auth.ts
import { betterAuth } from "better-auth";
import { nextCookies } from "better-auth/next-js";
import { shopifyAuthPlugin } from "@/lib/shopify-auth-plugin";

export const auth = betterAuth({
  baseURL: process.env.BETTER_AUTH_URL,
  plugins: [nextCookies(), shopifyAuthPlugin()],
  // 👇 Google OAuth configuration
  socialProviders: {
    google: {
      clientId: process.env.GOOGLE_CLIENT_ID as string,
      clientSecret: process.env.GOOGLE_CLIENT_SECRET as string,
    },
  },
  // 👆 Add your Google credentials here
});
This configuration:
nextCookies() for cookie management in Next.jsshopifyAuthPlugin for Shopify-specific auth flowsThe socialProviders.google object is where you configure Google OAuth. Make sure to add your Google Client ID and Client Secret from the Google Cloud Console.
Create a utility function to generate Multipass tokens:
// src/lib/shopify/multipass.ts
import Multipassify from "multipassify";

export const SHOPIFY_MULTIPASS_SECRET = process.env.SHOPIFY_MULTIPASS_SECRET;

export function generateMultipassToken(email: string): string {
  if (!SHOPIFY_MULTIPASS_SECRET) {
    throw new Error("SHOPIFY_MULTIPASS_SECRET is not configured.");
  }

  const multipassify = new Multipassify(SHOPIFY_MULTIPASS_SECRET);

  return multipassify.encode({ email });
}
Install the multipassify package:
pnpm add multipassify
# or
npm install multipassify
Create a GraphQL mutation to exchange the Multipass token for a Shopify customer access token:
# src/integrations/shopify/customer-access-token-create-with-multipass/
# customer-access-token-create-with-multipass.shopify.graphql

mutation customerAccessTokenCreateWithMultipass($multipassToken: String!) {
  customerAccessTokenCreateWithMultipass(multipassToken: $multipassToken) {
    customerAccessToken {
      accessToken
      expiresAt
    }
    customerUserErrors {
      message
      field
    }
  }
}
Create the integration function:
// src/integrations/shopify/customer-access-token-create-with-multipass/index.ts
import {
  CustomerAccessTokenCreateWithMultipassDocument,
  CustomerAccessTokenCreateWithMultipassMutation,
  CustomerAccessTokenCreateWithMultipassMutationVariables,
} from "@/generated/shopifySchemaTypes";
import createApolloClient from "@/integrations/shopify/shopify-apollo-client";

export const customerAccessTokenCreateWithMultipass = async (
  multipassToken: string,
): Promise<CustomerAccessTokenCreateWithMultipassMutation | undefined> => {
  try {
    const client = createApolloClient();
    const { data } = await client.mutate<
      CustomerAccessTokenCreateWithMultipassMutation,
      CustomerAccessTokenCreateWithMultipassMutationVariables
    >({
      mutation: CustomerAccessTokenCreateWithMultipassDocument,
      variables: { multipassToken },
    });

    if (!data) {
      throw new Error(
        "No data returned from customerAccessTokenCreateWithMultipass mutation",
      );
    }

    return data;
  } catch (error) {
    console.error(
      "Error creating customer access token with multipass:",
      error,
    );
  }
};
Create a Next.js API route that handles the Multipass authentication flow:
// src/app/api/shopify/multipass/route.ts
import { NextResponse } from "next/server";
import { z } from "zod";

import { customerAccessTokenCreateWithMultipass } from "@/integrations/shopify/customer-access-token-create-with-multipass";
import { generateMultipassToken } from "@/lib/shopify/multipass";

const requestSchema = z.object({
  email: z.string(),
});

export async function POST(request: Request) {
  const parsed = requestSchema.safeParse(
    await request.json().catch(() => ({})),
  );

  if (!parsed.success) {
    return NextResponse.json(
      { error: "Invalid request body." },
      { status: 400 },
    );
  }

  const { email } = parsed.data;

  let multipassToken: string;

  try {
    multipassToken = generateMultipassToken(email);
  } catch (error) {
    console.error("Error generating multipass token:", error);
    return NextResponse.json(
      { error: "Multipass is not configured." },
      { status: 500 },
    );
  }

  try {
    const result = await customerAccessTokenCreateWithMultipass(multipassToken);
    const payload = result?.customerAccessTokenCreateWithMultipass;
    const userErrors = payload?.customerUserErrors ?? [];
    const token = payload?.customerAccessToken?.accessToken;
    const expiresAt = payload?.customerAccessToken?.expiresAt;

    if (userErrors.length || !token) {
      return NextResponse.json(
        { error: userErrors[0]?.message || "Unable to create access token." },
        { status: 401 },
      );
    }

    const response = NextResponse.json({ accessToken: token, expiresAt });

    response.cookies.set("shopifyCustomerAccessToken", token, {
      httpOnly: true,
      secure: process.env.NODE_ENV === "production",
      sameSite: "lax",
      path: "/",
      expires: expiresAt ? new Date(expiresAt) : undefined,
    });

    return response;
  } catch (error) {
    console.error("Error creating access token with multipass:", error);
    return NextResponse.json(
      { error: "Unable to create access token." },
      { status: 500 },
    );
  }
}
This endpoint:
Now create the login page that integrates Google OAuth:
// src/app/account/login/page.tsx
"use client";
import React, { useCallback, useEffect, useState } from "react";
import Link from "next/link";
import { authClient } from "@/lib/auth-client";
import Cookies from "js-cookie";
export default function LoginPage() {
const { data: session } = authClient.useSession();
const [loading, setLoading] = useState(false);
const [googleLoading, setGoogleLoading] = useState(false);
const [processedSocialEmail, setProcessedSocialEmail] = useState<
string | null
>(null);
const [error, setError] = useState<string | null>(null);
const updateCartBuyerIdentity = useCallback(async () => {
const cartId = Cookies.get("cart_id");
if (!cartId) {
return;
}
await fetch("/api/shopify/cart-buyer-identity", {
method: "POST",
headers: {
"Content-Type": "application/json",
},
body: JSON.stringify({ cartId }),
});
}, []);
useEffect(() => {
const socialEmail = session?.user?.email;
if (!socialEmail || socialEmail === processedSocialEmail) {
return;
}
let cancelled = false;
async function authenticateSocialUserWithMultipass() {
setGoogleLoading(true);
setError(null);
try {
const response = await fetch("/api/shopify/multipass", {
method: "POST",
headers: {
"Content-Type": "application/json",
},
body: JSON.stringify({ email: socialEmail }),
});
const payload = (await response.json().catch(() => ({}))) as {
error?: string;
};
if (!response.ok) {
throw new Error(payload.error || "Unable to sign in with Google.");
}
if (cancelled) {
return;
}
setProcessedSocialEmail(socialEmail);
await updateCartBuyerIdentity();
window.location.href = "/";
} catch (err) {
if (cancelled) {
return;
}
setError(
err instanceof Error ? err.message : "Unable to sign in with Google.",
);
} finally {
if (!cancelled) {
setGoogleLoading(false);
}
}
}
authenticateSocialUserWithMultipass();
return () => {
cancelled = true;
};
}, [processedSocialEmail, session?.user?.email, updateCartBuyerIdentity]);
async function onGoogleSignIn() {
setError(null);
setGoogleLoading(true);
try {
const socialSignInResult = await authClient.signIn.social({
provider: "google",
callbackURL: "/account/login",
});
const socialSignInError = (
socialSignInResult as { error?: { message?: string } }
)?.error?.message;
if (socialSignInError) {
setError(socialSignInError || "Unable to start Google sign in.");
}
} catch {
setError("Unable to start Google sign in.");
} finally {
setGoogleLoading(false);
}
}
async function onSubmit(e: React.FormEvent<HTMLFormElement>) {
e.preventDefault();
setError(null);
setLoading(true);
const form = e.currentTarget;
const email = (form.elements.namedItem("email") as HTMLInputElement).value;
const password = (form.elements.namedItem("password") as HTMLInputElement)
.value;
try {
const shopifyAuth = await authClient.shopifySignIn({
email,
password,
});
const shopifyError = (shopifyAuth as { error?: { message?: string } })
?.error?.message;
if (shopifyError) {
setError(shopifyError || "Invalid email or password.");
return;
}
const shopifyData = (shopifyAuth as { data?: { ok?: boolean } })?.data;
if (!shopifyData?.ok) {
setError("Invalid email or password.");
return;
}
await updateCartBuyerIdentity();
window.location.href = "/";
} catch {
setError("Unable to sign in. Please try again.");
} finally {
setLoading(false);
}
}
return (
<div className="border-box px-5 py-8 lg:px-10 min-h-[60vh] flex items-center justify-center">
<div className="w-full max-w-md">
<h1 className="text-2xl font-semibold text-gray-900 text-center mb-8 ">
Login
</h1>
<form className="flex flex-col gap-4" onSubmit={onSubmit}>
<div className="flex flex-col gap-2">
<label htmlFor="email" className="text-gray-900">
Email
</label>
<input
type="email"
id="email"
name="email"
className="border border-gray-200 px-4 py-2 text-gray-900 focus:outline-none focus:border-gray-400"
placeholder="you@example.com"
required
/>
</div>
<div className="flex flex-col gap-2">
<label htmlFor="password" className="text-gray-900">
Password
</label>
<input
type="password"
id="password"
name="password"
className="border border-gray-200 px-4 py-2 text-gray-900 focus:outline-none focus:border-gray-400"
placeholder="••••••••"
required
/>
</div>
{error && (
<p className="text-sm text-red-600" role="alert">
{error}
</p>
)}
<button
type="submit"
disabled={loading || googleLoading}
className="mt-4 bg-gray-900 text-white py-3 px-4 hover:bg-gray-800 transition-colors cursor-pointer uppercase disabled:opacity-60"
>
{loading ? "Signing In..." : "Sign In"}
</button>
<button
type="button"
onClick={onGoogleSignIn}
disabled={loading || googleLoading}
className="border border-gray-900 text-gray-900 py-3 px-4 hover:bg-gray-100 transition-colors cursor-pointer uppercase disabled:opacity-60"
>
{googleLoading
? "Signing In With Google..."
: "Sign In with Google"}
</button>
</form>
<div className="mt-6 flex flex-col items-center gap-4">
<Link
href="/account/forgot-password"
className="text-gray-600 hover:text-gray-900 font-light"
>
Forgot your password?
</Link>
<p className="text-gray-500 font-light">
Don't have an account?{" "}
<Link
href="/account/register"
className="text-gray-600 hover:text-gray-900 font-light"
>
Create one
</Link>
</p>
</div>
</div>
</div>
);
}
useEffect hook watches for Better-Auth session changes after Google OAuth callbackprocessedSocialEmail state prevents duplicate Multipass callsCreate a session provider to manage user state across your application:
// src/providers/session-provider.tsx
"use client";

import {
  createContext,
  useCallback,
  useContext,
  useEffect,
  useState,
} from "react";
import { getCurrentUser } from "@/lib/shopify/getCurrentUser";

type SessionUser = Awaited<ReturnType<typeof getCurrentUser>>;

type SessionContextValue = {
  user: SessionUser;
  loading: boolean;
  error: string | null;
  refresh: () => Promise<void>;
};

const SessionContext = createContext<SessionContextValue | undefined>(
  undefined,
);

export function SessionProvider({ children }: { children: React.ReactNode }) {
  const [user, setUser] = useState<SessionUser>(null);
  const [loading, setLoading] = useState(true);
  const [error, setError] = useState<string | null>(null);

  const refresh = useCallback(async () => {
    try {
      setLoading(true);
      setError(null);
      const currentUser = await getCurrentUser();
      setUser(currentUser);
    } catch (err) {
      setError(err instanceof Error ? err.message : "Failed to load user");
      setUser(null);
    } finally {
      setLoading(false);
    }
  }, []);

  useEffect(() => {
    refresh();
  }, [refresh]);

  return (
    <SessionContext.Provider value={{ user, loading, error, refresh }}>
      {children}
    </SessionContext.Provider>
  );
}

export function useSession() {
  const context = useContext(SessionContext);
  if (!context) {
    throw new Error("useSession must be used within a SessionProvider");
  }
  return context;
}
Create the getCurrentUser utility:
// src/lib/shopify/getCurrentUser.ts
export const getCurrentUser = async () => {
  try {
    const response = await fetch("/api/shopify/customer", {
      credentials: "include",
      headers: {
        "Content-Type": "application/json",
      },
    });

    if (!response.ok) {
      if (response.status === 401) {
        return null;
      }
      return null;
    }

    const data = await response.json();
    const customer = data?.customer ?? null;

    if (!customer) {
      return null;
    }

    const name = [customer.firstName, customer.lastName]
      .filter(Boolean)
      .join(" ")
      .trim();

    return {
      ...customer,
      name: name || undefined,
    };
  } catch {
    return null;
  }
};
Let's break down what happens when a user clicks "Sign In with Google":
authClient.signIn.social({
  provider: "google",
  callbackURL: "/account/login",
});
/account/login with auth tokensauthClient.useSession() hook detects the new sessionconst multipassToken = generateMultipassToken(email);
customerAccessTokenCreateWithMultipass(multipassToken);
response.cookies.set("shopifyCustomerAccessToken", token, {
  httpOnly: true,
  secure: process.env.NODE_ENV === "production",
  sameSite: "lax",
  path: "/",
});
Implementing Google social login in a headless Shopify storefront requires coordinating several technologies:
This architecture provides a secure, user-friendly authentication experience while maintaining compatibility with Shopify's customer system. The approach can be extended to other OAuth providers (GitHub, Facebook, etc.) using the same Multipass integration pattern.
Password recovery is an essential feature for any e-commerce application. When users forget their passwords, they need a secure and straightforward way to reset them. In this article, we'll implement a complete forgot password and reset password flow for a headless Shopify storefront using Better-Auth and Next.js.
Live Demo: https://headless-shopify-site.vercel.app/
This article builds upon the authentication system covered in Authentication in Headless Shopify Using Better-Auth and Next.js. Make sure you have:
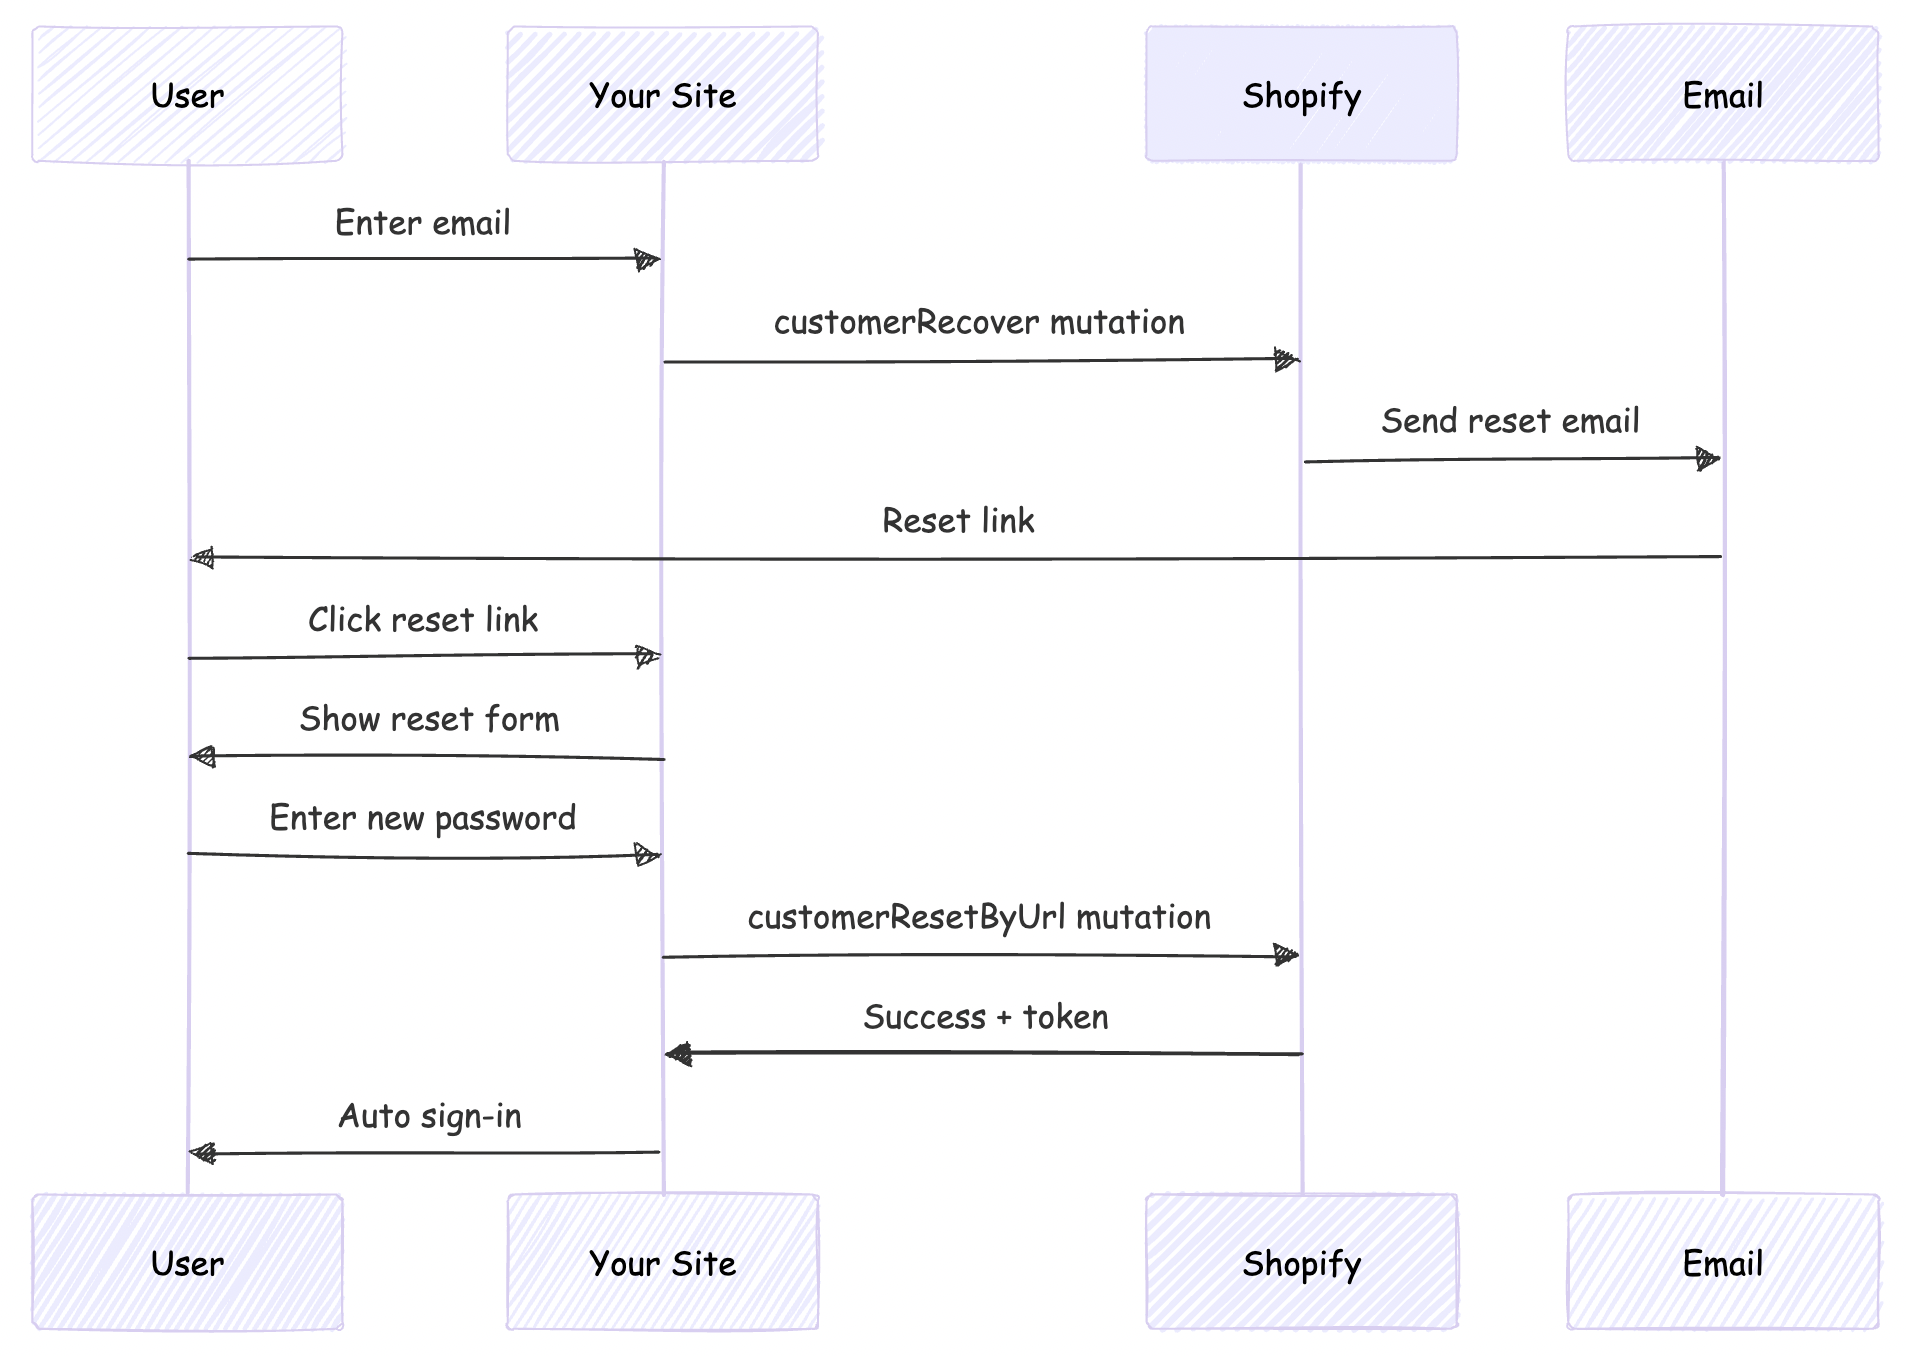
Shopify provides two mutations for password recovery:
customerRecover: Sends a password reset email to the customercustomerResetByUrl: Resets the password using the URL from the emailThe flow works like this:
This scenario is applicable only if your headless site domain is different from that given as primary domain in Shopify
By default, Shopify's password reset emails point to the Shopify-hosted store (your-store.myshopify.com). For a headless storefront, we need these emails to point to your custom domain instead.
We'll solve this by:
First, create the GraphQL mutation file for customerRecover:
# src/integrations/shopify/customer-recover/customer-recover.shopify.graphql
mutation customerRecover($email: String!) {
  customerRecover(email: $email) {
    customerUserErrors {
      message
      field
    }
  }
}
This mutation triggers Shopify to send a password reset email to the customer.
Create the TypeScript integration function:
// src/integrations/shopify/customer-recover/index.ts
import {
  CustomerRecoverDocument,
  CustomerRecoverMutation,
  CustomerRecoverMutationVariables,
} from "@/generated/shopifySchemaTypes";
import createApolloClient from "@/integrations/shopify/shopify-apollo-client";

export const customerRecover = async (
  email: string,
): Promise<CustomerRecoverMutation | undefined> => {
  try {
    const client = createApolloClient();
    const { data } = await client.mutate<
      CustomerRecoverMutation,
      CustomerRecoverMutationVariables
    >({
      mutation: CustomerRecoverDocument,
      variables: { email },
    });

    if (!data) {
      throw new Error("No data returned from customerRecover mutation");
    }

    return data;
  } catch (error) {
    console.error("Error sending password reset email:", error);
  }
};
Note: Run your GraphQL codegen after creating the mutation file:
npm run codegen
Update your Shopify auth plugin to include the forgot password endpoint:
// src/lib/shopify-auth-plugin.ts
export type ShopifyForgotPasswordInput = {
  email: string;
};
import * as z from "zod";

const forgotPasswordSchema = z.object({
  email: z.email().min(1),
});
import { customerRecover } from "@/integrations/shopify/customer-recover";

export const shopifyAuthPlugin = () => {
  return {
    id: "shopify-auth",
    endpoints: {
      // ... existing signIn and signUp endpoints

      forgotPassword: createAuthEndpoint(
        "/shopify-auth/forgot-password",
        {
          method: "POST",
          body: forgotPasswordSchema,
        },
        async (ctx) => {
          const { email } = ctx.body;

          const result = await customerRecover(email);

          if (!result) {
            throw new APIError("BAD_REQUEST", {
              message: "Unable to send password reset email.",
            });
          }

          const payload = result.customerRecover;
          const userErrors = payload?.customerUserErrors ?? [];

          if (userErrors.length) {
            throw new APIError("BAD_REQUEST", {
              message:
                userErrors[0]?.message ||
                "Unable to send password reset email.",
            });
          }

          return ctx.json({ ok: true });
        },
      ),
    },
  } satisfies BetterAuthPlugin;
};
Update your auth client plugin to expose the forgot password action:
// src/lib/shopify-auth-client.ts
import type {
  ShopifyForgotPasswordInput,
} from "@/lib/shopify-auth-plugin";

export const shopifyAuthClientPlugin = () => {
  return {
    id: "shopify-auth",
    $InferServerPlugin: {} as ReturnType<typeof shopifyAuthPlugin>,
    getActions: ($fetch) => {
      return {
        // ... existing shopifySignIn and shopifySignUp

        shopifyForgotPassword: async (
          data: ShopifyForgotPasswordInput,
          fetchOptions?: BetterFetchOption,
        ) => {
          return $fetch("/shopify-auth/forgot-password", {
            method: "POST",
            body: data,
            ...fetchOptions,
          });
        },
      };
    },
  } satisfies BetterAuthClientPlugin;
};
Create a user-friendly forgot password page:
// src/app/account/forgot-password/page.tsx
"use client";

import React, { useState } from "react";
import Link from "next/link";
import { authClient } from "@/lib/auth-client";

export default function ForgotPasswordPage() {
  const [loading, setLoading] = useState(false);
  const [error, setError] = useState<string | null>(null);
  const [success, setSuccess] = useState(false);

  async function onSubmit(e: React.FormEvent<HTMLFormElement>) {
    e.preventDefault();
    setError(null);
    setSuccess(false);
    setLoading(true);

    const form = e.currentTarget;
    const email = (form.elements.namedItem("email") as HTMLInputElement).value;

    try {
      const result = await authClient.shopifyForgotPassword({ email });

      const shopifyError = (result as { error?: { message?: string } })?.error
        ?.message;
      if (shopifyError) {
        setError(shopifyError || "Unable to send password reset email.");
        return;
      }

      const shopifyData = (result as { data?: { ok?: boolean } })?.data;
      if (!shopifyData?.ok) {
        setError("Unable to send password reset email.");
        return;
      }

      setSuccess(true);
    } catch {
      setError("Unable to send password reset email. Please try again.");
    } finally {
      setLoading(false);
    }
  }

  return (
    <div className="border-box px-5 py-8 lg:px-10 min-h-[60vh] flex items-center justify-center">
      <div className="w-full max-w-md">
        <h1 className="text-2xl font-semibold text-gray-900 text-center mb-4">
          Forgot Password
        </h1>
        <p className="text-gray-500 text-center mb-8 font-light">
          Enter your email address and we'll send you a link to reset your
          password.
        </p>

        {success ? (
          <div className="bg-green-50 border border-green-200 text-green-800 px-4 py-3 rounded">
            <p className="text-sm">
              If an account exists with this email, you will receive a password
              reset link shortly.
            </p>
          </div>
        ) : (
          <form className="flex flex-col gap-4" onSubmit={onSubmit}>
            <div className="flex flex-col gap-2">
              <label htmlFor="email" className="text-gray-900">
                Email
              </label>
              <input
                type="email"
                id="email"
                name="email"
                className="border border-gray-200 px-4 py-2 text-gray-900 focus:outline-none focus:border-gray-400"
                placeholder="you@example.com"
                required
              />
            </div>

            {error && (
              <p className="text-sm text-red-600" role="alert">
                {error}
              </p>
            )}

            <button
              type="submit"
              disabled={loading}
              className="mt-4 bg-gray-900 text-white py-3 px-4 hover:bg-gray-800 transition-colors cursor-pointer uppercase disabled:opacity-50 disabled:cursor-not-allowed"
            >
              {loading ? "Sending..." : "Send Reset Link"}
            </button>
          </form>
        )}

        <div className="mt-6 flex flex-col items-center gap-4">
          <Link
            href="/account/login"
            className="text-gray-600 hover:text-gray-900 font-light"
          >
            Back to Login
          </Link>
        </div>
      </div>
    </div>
  );
}
This is the crucial step that redirects users to your site instead of Shopify's hosted store.
Find the line containing the reset password link (typically):
{{ customer.reset_password_url }}
Replace it with:
https://your-vercel-domain.com/account/reset-password?url={{ customer.reset_password_url | url_encode }}
Example:
<!-- Before -->
<a href="{{ customer.reset_password_url }}">Reset your password</a>

<!-- After -->
<a href="https://headless-shopify-site.vercel.app/account/reset-password?url={{ customer.reset_password_url | url_encode }}">Reset your password</a>
Replace headless-shopify-site.vercel.app with your actual domain.
Now implement the actual password reset page that users land on after clicking the email link.
# src/integrations/shopify/customer-reset-by-url/customer-reset-by-url.shopify.graphql
mutation customerResetByUrl($password: String!, $resetUrl: URL!) {
  customerResetByUrl(password: $password, resetUrl: $resetUrl) {
    customer {
      id
      email
      firstName
      lastName
    }
    customerAccessToken {
      accessToken
      expiresAt
    }
    customerUserErrors {
      message
      field
    }
  }
}
// src/integrations/shopify/customer-reset-by-url/index.ts
import {
  CustomerResetByUrlDocument,
  CustomerResetByUrlMutation,
  CustomerResetByUrlMutationVariables,
} from "@/generated/shopifySchemaTypes";
import createApolloClient from "@/integrations/shopify/shopify-apollo-client";

export const customerResetByUrl = async (
  password: string,
  resetUrl: string,
): Promise<CustomerResetByUrlMutation | undefined> => {
  try {
    const client = createApolloClient();
    const { data } = await client.mutate<
      CustomerResetByUrlMutation,
      CustomerResetByUrlMutationVariables
    >({
      mutation: CustomerResetByUrlDocument,
      variables: { password, resetUrl },
    });

    if (!data) {
      throw new Error("No data returned from customerResetByUrl mutation");
    }

    return data;
  } catch (error) {
    console.error("Error resetting password:", error);
  }
};
Run codegen again:
npm run codegen
// src/lib/shopify-auth-plugin.ts
export type ShopifyResetPasswordInput = {
  password: string;
  resetUrl: string;
};
const resetPasswordSchema = z.object({
  password: z.string().min(5),
  resetUrl: z.string().url(),
});
import { customerResetByUrl } from "@/integrations/shopify/customer-reset-by-url";

export const shopifyAuthPlugin = () => {
  return {
    id: "shopify-auth",
    endpoints: {
      // ... existing endpoints

      resetPassword: createAuthEndpoint(
        "/shopify-auth/reset-password",
        {
          method: "POST",
          body: resetPasswordSchema,
        },
        async (ctx) => {
          const { password, resetUrl } = ctx.body;

          const result = await customerResetByUrl(password, resetUrl);

          if (!result) {
            throw new APIError("BAD_REQUEST", {
              message: "Unable to reset password.",
            });
          }

          const payload = result.customerResetByUrl;
          const userErrors = payload?.customerUserErrors ?? [];
          const token = payload?.customerAccessToken?.accessToken;
          const expiresAt = payload?.customerAccessToken?.expiresAt;

          if (userErrors.length || !token) {
            throw new APIError("BAD_REQUEST", {
              message: userErrors[0]?.message || "Unable to reset password.",
            });
          }

          // Auto sign-in after successful password reset
          ctx.setCookie(SHOPIFY_CUSTOMER_TOKEN_COOKIE, token, {
            httpOnly: true,
            secure: process.env.NODE_ENV === "production",
            sameSite: "lax",
            path: "/",
            expires: expiresAt ? new Date(expiresAt) : undefined,
          });

          return ctx.json({ ok: true });
        },
      ),
    },
  } satisfies BetterAuthPlugin;
};
// src/lib/shopify-auth-client.ts
import type {
  ShopifyResetPasswordInput,
} from "@/lib/shopify-auth-plugin";

export const shopifyAuthClientPlugin = () => {
  return {
    id: "shopify-auth",
    getActions: ($fetch) => {
      return {
        // ... existing actions

        shopifyResetPassword: async (
          data: ShopifyResetPasswordInput,
          fetchOptions?: BetterFetchOption,
        ) => {
          return $fetch("/shopify-auth/reset-password", {
            method: "POST",
            body: data,
            ...fetchOptions,
          });
        },
      };
    },
  } satisfies BetterAuthClientPlugin;
};
Create a comprehensive reset password page with validation:
// src/app/account/reset-password/page.tsx
"use client";

import React, { useState, useEffect } from "react";
import Link from "next/link";
import { useSearchParams } from "next/navigation";
import { authClient } from "@/lib/auth-client";

export default function ResetPasswordPage() {
  const searchParams = useSearchParams();
  const [loading, setLoading] = useState(false);
  const [error, setError] = useState<string | null>(null);
  const [success, setSuccess] = useState(false);
  const [resetUrl, setResetUrl] = useState<string | null>(null);

  useEffect(() => {
    // Extract the full reset URL from query params
    const url = searchParams.get("url");
    if (url) {
      setResetUrl(decodeURIComponent(url));
    } else {
      setError("Invalid or missing reset link.");
    }
  }, [searchParams]);

  async function onSubmit(e: React.FormEvent<HTMLFormElement>) {
    e.preventDefault();
    setError(null);
    setLoading(true);

    const form = e.currentTarget;
    const password = (form.elements.namedItem("password") as HTMLInputElement)
      .value;
    const confirmPassword = (
      form.elements.namedItem("confirmPassword") as HTMLInputElement
    ).value;

    // Validate passwords match
    if (password !== confirmPassword) {
      setError("Passwords do not match.");
      setLoading(false);
      return;
    }

    // Validate password length
    if (password.length < 5) {
      setError("Password must be at least 5 characters.");
      setLoading(false);
      return;
    }

    if (!resetUrl) {
      setError("Invalid reset link.");
      setLoading(false);
      return;
    }

    try {
      const result = await authClient.shopifyResetPassword({
        password,
        resetUrl,
      });

      const shopifyError = (result as { error?: { message?: string } })?.error
        ?.message;
      if (shopifyError) {
        setError(shopifyError || "Unable to reset password.");
        return;
      }

      const shopifyData = (result as { data?: { ok?: boolean } })?.data;
      if (!shopifyData?.ok) {
        setError("Unable to reset password.");
        return;
      }

      setSuccess(true);

      // Redirect to home after successful reset and auto sign-in
      setTimeout(() => {
        window.location.href = "/";
      }, 2000);
    } catch {
      setError("Unable to reset password. Please try again.");
    } finally {
      setLoading(false);
    }
  }

  if (!resetUrl && !error) {
    return (
      <div className="border-box px-5 py-8 lg:px-10 min-h-[60vh] flex items-center justify-center">
        <div className="w-full max-w-md text-center">
          <p className="text-gray-500">Loading...</p>
        </div>
      </div>
    );
  }

  return (
    <div className="border-box px-5 py-8 lg:px-10 min-h-[60vh] flex items-center justify-center">
      <div className="w-full max-w-md">
        <h1 className="text-2xl font-semibold text-gray-900 text-center mb-4">
          Reset Password
        </h1>
        <p className="text-gray-500 text-center mb-8 font-light">
          Enter your new password below.
        </p>

        {success ? (
          <div className="bg-green-50 border border-green-200 text-green-800 px-4 py-3 rounded">
            <p className="text-sm">
              Your password has been reset successfully! Redirecting...
            </p>
          </div>
        ) : (
          <form className="flex flex-col gap-4" onSubmit={onSubmit}>
            <div className="flex flex-col gap-2">
              <label htmlFor="password" className="text-gray-900">
                New Password
              </label>
              <input
                type="password"
                id="password"
                name="password"
                className="border border-gray-200 px-4 py-2 text-gray-900 focus:outline-none focus:border-gray-400"
                placeholder="••••••••"
                minLength={5}
                required
                disabled={!resetUrl}
              />
            </div>

            <div className="flex flex-col gap-2">
              <label htmlFor="confirmPassword" className="text-gray-900">
                Confirm New Password
              </label>
              <input
                type="password"
                id="confirmPassword"
                name="confirmPassword"
                className="border border-gray-200 px-4 py-2 text-gray-900 focus:outline-none focus:border-gray-400"
                placeholder="••••••••"
                minLength={5}
                required
                disabled={!resetUrl}
              />
            </div>

            {error && (
              <p className="text-sm text-red-600" role="alert">
                {error}
              </p>
            )}

            <button
              type="submit"
              disabled={loading || !resetUrl}
              className="mt-4 bg-gray-900 text-white py-3 px-4 hover:bg-gray-800 transition-colors cursor-pointer uppercase disabled:opacity-50 disabled:cursor-not-allowed"
            >
              {loading ? "Resetting..." : "Reset Password"}
            </button>
          </form>
        )}

        <div className="mt-6 flex flex-col items-center gap-4">
          <Link
            href="/account/login"
            className="text-gray-600 hover:text-gray-900 font-light"
          >
            Back to Login
          </Link>
        </div>
      </div>
    </div>
  );
}
Your final project structure should look like this:
src/
├── app/
│   └── account/
│       ├── forgot-password/
│       │   └── page.tsx          # Forgot password form
│       └── reset-password/
│           └── page.tsx           # Reset password form
├── integrations/
│   └── shopify/
│       ├── customer-recover/
│       │   ├── customer-recover.shopify.graphql
│       │   └── index.ts
│       └── customer-reset-by-url/
│           ├── customer-reset-by-url.shopify.graphql
│           └── index.ts
└── lib/
    ├── auth-client.ts             # Better-Auth client
    ├── shopify-auth-plugin.ts     # Server plugin with endpoints
    └── shopify-auth-client.ts     # Client plugin with actions
You now have a complete, secure password recovery system for your headless Shopify storefront!
If you have questions or run into issues implementing this flow, feel free to:
Happy coding! 🚀
Authentication is a critical component of any e-commerce application. When building a headless Shopify storefront with Next.js, you need a robust authentication solution that integrates seamlessly with Shopify's customer API. In this article, we'll explore how to implement authentication using Better-Auth, a modern authentication library for Next.js applications.
Live Demo: https://headless-shopify-site.vercel.app/
Better-Auth is a flexible, type-safe authentication library for Next.js that provides a plugin-based architecture. It offers:
When building a headless Shopify storefront, you need to integrate with Shopify's Customer API for authentication. Better-Auth's plugin system makes it perfect for this use case because:
Our authentication implementation consists of several key components:
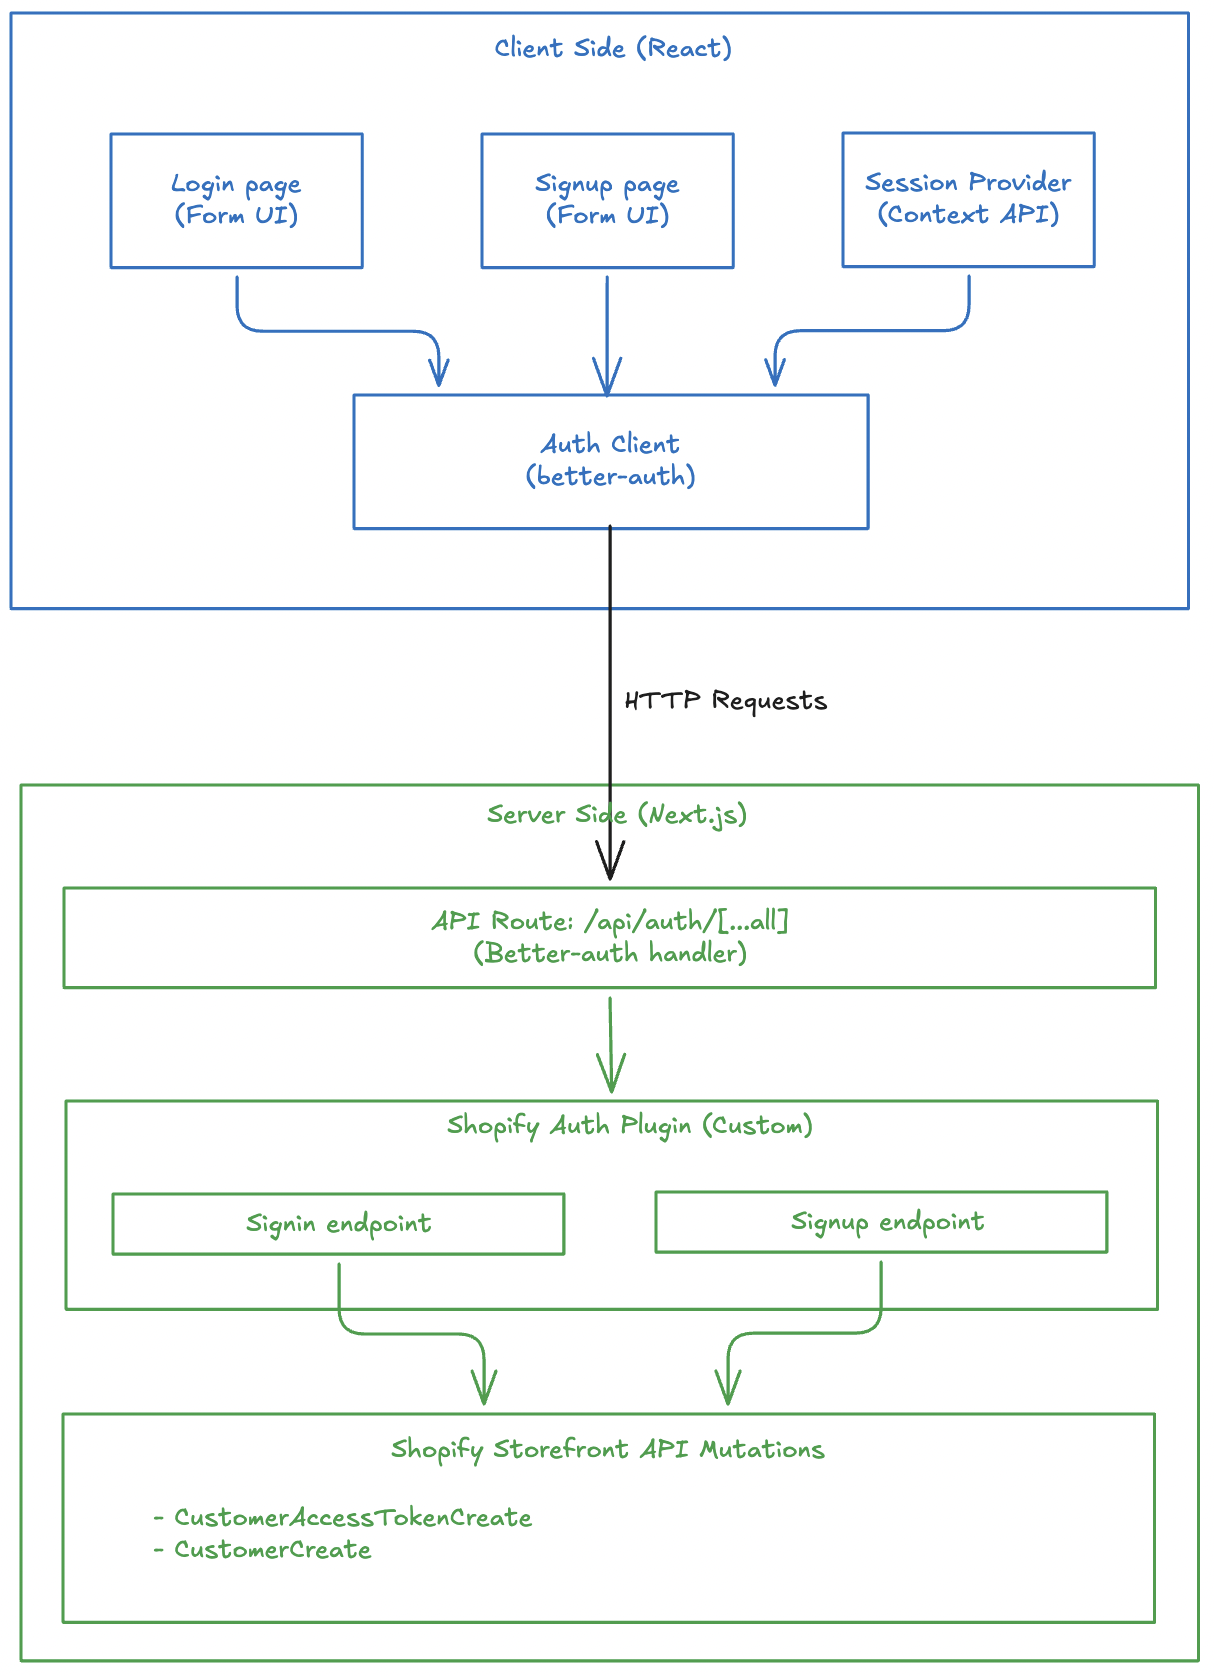
Before implementing authentication with Better-Auth, ensure you have:
customerAccessTokenCreate, customerCreate, etc.) via Shopify's Storefront APIThis article focuses specifically on integrating Better-Auth with Shopify and does not cover Next.js setup or Shopify API integration basics.
First, install the required dependencies:
pnpm add better-auth
# or
npm install better-auth
# or
yarn add better-auth
Add the required environment variable for Better-Auth:
# .env
BETTER_AUTH_SECRET=your_secret_key_here
Generate a secure secret key using:
openssl rand -base64 32
Your project might have other environment variables like Shopify Graphql endpoint, storefront access token. I am not writing everything here to stick to the auth logic.
The Shopify auth plugin is the heart of our authentication system. It creates custom endpoints that integrate with Shopify's Customer API.
First, define TypeScript types for sign-in and sign-up inputs:
// src/lib/shopify-auth-plugin.ts
export type ShopifySignInInput = {
  email: string;
  password: string;
};

export type ShopifySignUpInput = {
  email: string;
  password: string;
  firstName?: string;
  lastName?: string;
  acceptsMarketing?: boolean;
  autoSignIn?: boolean;
};
You might not need this if you are not using TypeScript.
Use Zod to validate incoming requests:
import * as z from "zod";

const signInSchema = z.object({
  email: z.email().min(1),
  password: z.string().min(1),
});

const signUpSchema = z.object({
  email: z.email().min(1),
  password: z.string().min(1),
  firstName: z.string().min(1).optional(),
  lastName: z.string().min(1).optional(),
  acceptsMarketing: z.boolean().optional(),
  autoSignIn: z.boolean().optional(),
});
Zod is optional. You can skip this if you are not concerned about input validation. Not a mandatory thing for better-auth.
The sign-in endpoint calls Shopify's customerAccessTokenCreate mutation and stores the token in an HTTP-only cookie:
import { APIError, createAuthEndpoint } from "better-auth/api";

const SHOPIFY_CUSTOMER_TOKEN_COOKIE = "shopifyCustomerAccessToken";

export const shopifyAuthPlugin = () => {
  return {
    id: "shopify-auth",
    endpoints: {
      signIn: createAuthEndpoint(
        "/shopify-auth/sign-in",
        {
          method: "POST",
          body: signInSchema,
        },
        async (ctx) => {
          const { email, password } = ctx.body;

          // Call Shopify's customer access token create mutation
          const result = await customerAccessTokenCreate({ email, password });

          if (!result) {
            throw new APIError("BAD_REQUEST", {
              message: "Shopify sign-in failed.",
            });
          }

          // Extract token and errors from response
          const payload = result.customerAccessTokenCreate;
          const userErrors = payload?.customerUserErrors ?? [];
          const token = payload?.customerAccessToken?.accessToken;
          const expiresAt = payload?.customerAccessToken?.expiresAt;

          if (userErrors.length || !token) {
            throw new APIError("UNAUTHORIZED", {
              message: userErrors[0]?.message || "Invalid email or password.",
            });
          }

          // Store token in secure HTTP-only cookie
          ctx.setCookie(SHOPIFY_CUSTOMER_TOKEN_COOKIE, token, {
            httpOnly: true,
            secure: process.env.NODE_ENV === "production",
            sameSite: "lax",
            path: "/",
            expires: expiresAt ? new Date(expiresAt) : undefined,
          });

          return ctx.json({ ok: true });
        },
      ),
      // ... signUp endpoint
    },
  };
};
The sign-in flow:
customerAccessTokenCreate mutationI have not given the details of customerAccessTokenCreate() function to keep this article stick to auth related logic. You can visit the Github repo of headless-shopify to get that function and see how it works.
This section should go inside the endpoints object, just like signIn.
The sign-up endpoint creates a new customer in Shopify and optionally signs them in:
signUp: createAuthEndpoint(
  "/shopify-auth/sign-up",
  {
    method: "POST",
    body: signUpSchema,
  },
  async (ctx) => {
    const { email, password, firstName, lastName, acceptsMarketing, autoSignIn } = ctx.body;

    // Create customer in Shopify
    const result = await customerCreate({
      email,
      password,
      firstName,
      lastName,
      acceptsMarketing,
    });

    const payload = result.customerCreate;
    const userErrors = payload?.customerUserErrors ?? [];
    const customer = payload?.customer;

    if (userErrors.length || !customer) {
      throw new APIError("BAD_REQUEST", {
        message: userErrors[0]?.message || "Unable to create customer.",
      });
    }

    // Optionally sign in the user immediately after signup
    if (autoSignIn) {
      const signInResult = await customerAccessTokenCreate({ email, password });
      const token = signInResult?.customerAccessTokenCreate?.customerAccessToken?.accessToken;

      if (token) {
        ctx.setCookie(SHOPIFY_CUSTOMER_TOKEN_COOKIE, token, {
          httpOnly: true,
          secure: process.env.NODE_ENV === "production",
          sameSite: "lax",
          path: "/",
        });
      }
    }

    return ctx.json({ ok: true, customer });
  },
),
The sign-up flow:
customerCreate mutationautoSignIn is true, immediately signs in the userCreate the Better-Auth server instance:
// src/lib/auth.ts
import { betterAuth } from "better-auth";
import { nextCookies } from "better-auth/next-js";
import { shopifyAuthPlugin } from "@/lib/shopify-auth-plugin";

export const auth = betterAuth({
  plugins: [nextCookies(), shopifyAuthPlugin()],
});
Create a catch-all API route for Better-Auth:
// src/app/api/auth/[...all]/route.ts
import { auth } from "@/lib/auth";
import { toNextJsHandler } from "better-auth/next-js";

export const { GET, POST } = toNextJsHandler(auth);
This creates the following endpoints:
POST /api/auth/shopify-auth/sign-in - Sign inPOST /api/auth/shopify-auth/sign-up - Sign upA better-auth client-side plugin consumes the APIs created by server-side plugin.
Create the client-side plugin:
// src/lib/shopify-auth-client.ts
import type { BetterAuthClientPlugin } from "better-auth/client";
import type { BetterFetchOption } from "@better-fetch/fetch";
import type {
  shopifyAuthPlugin,
  ShopifySignInInput,
  ShopifySignUpInput,
} from "@/lib/shopify-auth-plugin";

export const shopifyAuthClientPlugin = () => {
  return {
    id: "shopify-auth",
    $InferServerPlugin: {} as ReturnType<typeof shopifyAuthPlugin>,
    getActions: ($fetch) => {
      return {
        shopifySignIn: async (
          data: ShopifySignInInput,
          fetchOptions?: BetterFetchOption,
        ) => {
          return $fetch("/shopify-auth/sign-in", {
            method: "POST",
            body: data,
            ...fetchOptions,
          });
        },
        shopifySignUp: async (
          data: ShopifySignUpInput,
          fetchOptions?: BetterFetchOption,
        ) => {
          return $fetch("/shopify-auth/sign-up", {
            method: "POST",
            body: data,
            ...fetchOptions,
          });
        },
      };
    },
  } satisfies BetterAuthClientPlugin;
};
Create the auth client instance:
// src/lib/auth-client.ts
import { createAuthClient } from "better-auth/react";
import { shopifyAuthClientPlugin } from "@/lib/shopify-auth-client";

export const authClient = createAuthClient({
  plugins: [shopifyAuthClientPlugin()],
});
Now let's build the login UI that uses our auth client.
// src/app/account/login/page.tsx
"use client";

import React, { useState } from "react";
import { authClient } from "@/lib/auth-client";
import { useRouter } from "next/navigation";

export default function LoginPage() {
  const [loading, setLoading] = useState(false);
  const [error, setError] = useState<string | null>(null);
  const router = useRouter();
  // ... form handler
}
The form handler calls the shopifySignIn method from our auth client:
async function onSubmit(e: React.FormEvent<HTMLFormElement>) {
  e.preventDefault();
  setError(null);
  setLoading(true);

  const form = e.currentTarget;
  const email = (form.elements.namedItem("email") as HTMLInputElement).value;
  const password = (form.elements.namedItem("password") as HTMLInputElement)
    .value;

  try {
    const shopifyAuth = await authClient.shopifySignIn({
      email,
      password,
    });

    // Check for errors in the response
    const shopifyError = (shopifyAuth as { error?: { message?: string } })
      ?.error?.message;
    if (shopifyError) {
      setError(shopifyError || "Invalid email or password.");
      return;
    }

    // Verify successful sign-in
    const shopifyData = (shopifyAuth as { data?: { ok?: boolean } })?.data;
    if (!shopifyData?.ok) {
      setError("Invalid email or password.");
      return;
    }

    // Redirect to account page on success
    router.push("/account");
  } catch (err) {
    setError("An error occurred. Please try again.");
  } finally {
    setLoading(false);
  }
}
Create a simple, accessible form:
return (
  <div className="max-w-md mx-auto mt-8 p-6">
    <h1 className="text-2xl font-bold mb-6">Sign In</h1>

    <form onSubmit={onSubmit} className="space-y-4">
      <div>
        <label htmlFor="email" className="block text-sm font-medium mb-2">
          Email
        </label>
        <input
          id="email"
          name="email"
          type="email"
          required
          className="w-full px-3 py-2 border rounded-md"
        />
      </div>

      <div>
        <label htmlFor="password" className="block text-sm font-medium mb-2">
          Password
        </label>
        <input
          id="password"
          name="password"
          type="password"
          required
          className="w-full px-3 py-2 border rounded-md"
        />
      </div>

      {error && <div className="text-red-600 text-sm">{error}</div>}

      <button
        type="submit"
        disabled={loading}
        className="w-full bg-blue-600 text-white py-2 rounded-md"
      >
        {loading ? "Signing in..." : "Sign In"}
      </button>
    </form>
  </div>
);
Similarly, let's create the signup page that allows new users to create accounts.
// src/app/account/register/page.tsx
"use client";

import React, { useState } from "react";
import { authClient } from "@/lib/auth-client";

export default function RegisterPage() {
  const [loading, setLoading] = useState(false);
  const [error, setError] = useState<string | null>(null);
  // ... form handler
}
The form handler calls shopifySignUp with the new customer information:
async function onSubmit(e: React.FormEvent<HTMLFormElement>) {
  e.preventDefault();
  setError(null);
  setLoading(true);

  const form = e.currentTarget;
  const firstName = (form.elements.namedItem("firstName") as HTMLInputElement)
    .value;
  const lastName = (form.elements.namedItem("lastName") as HTMLInputElement)
    .value;
  const email = (form.elements.namedItem("email") as HTMLInputElement).value;
  const password = (form.elements.namedItem("password") as HTMLInputElement)
    .value;

  try {
    const shopifyAuth = await authClient.shopifySignUp({
      email,
      password,
      firstName,
      lastName,
      acceptsMarketing: false,
      autoSignIn: true, // Automatically sign in after signup
    });

    // Check for errors
    const shopifyError = (shopifyAuth as { error?: { message?: string } })
      ?.error?.message;
    if (shopifyError) {
      setError(shopifyError || "Unable to create account.");
      return;
    }

    // Verify success
    const shopifyData = (shopifyAuth as { data?: { ok?: boolean } })?.data;
    if (!shopifyData?.ok) {
      setError("Unable to create account.");
      return;
    }

    // Redirect to home page on success
    window.location.href = "/";
  } catch {
    setError("Unable to create account. Please try again.");
  } finally {
    setLoading(false);
  }
}
Note the autoSignIn: true option - this automatically signs in the user after successful registration, providing a seamless onboarding experience.
Create a registration form with fields for first name, last name, email, and password:
return (
  <div className="max-w-md mx-auto mt-8 p-6">
    <h1 className="text-2xl font-bold mb-6">Create Account</h1>

    <form onSubmit={onSubmit} className="space-y-4">
      <div>
        <label htmlFor="firstName" className="block text-sm font-medium mb-2">
          First Name
        </label>
        <input
          id="firstName"
          name="firstName"
          type="text"
          required
          className="w-full px-3 py-2 border rounded-md"
        />
      </div>

      <div>
        <label htmlFor="lastName" className="block text-sm font-medium mb-2">
          Last Name
        </label>
        <input
          id="lastName"
          name="lastName"
          type="text"
          required
          className="w-full px-3 py-2 border rounded-md"
        />
      </div>

      <div>
        <label htmlFor="email" className="block text-sm font-medium mb-2">
          Email
        </label>
        <input
          id="email"
          name="email"
          type="email"
          required
          className="w-full px-3 py-2 border rounded-md"
        />
      </div>

      <div>
        <label htmlFor="password" className="block text-sm font-medium mb-2">
          Password
        </label>
        <input
          id="password"
          name="password"
          type="password"
          required
          className="w-full px-3 py-2 border rounded-md"
        />
      </div>

      {error && <div className="text-red-600 text-sm">{error}</div>}

      <button
        type="submit"
        disabled={loading}
        className="w-full bg-blue-600 text-white py-2 rounded-md"
      >
        {loading ? "Creating Account..." : "Create Account"}
      </button>
    </form>
  </div>
);
A session provider manages user authentication state across your application using React Context.
// src/providers/session-provider.tsx
"use client";

import {
  createContext,
  useCallback,
  useContext,
  useEffect,
  useState,
} from "react";
import { getCurrentUser } from "@/lib/shopify/queries/customers/getCurrentUser";

type SessionUser = Awaited<ReturnType<typeof getCurrentUser>>;

type SessionContextValue = {
  user: SessionUser;
  loading: boolean;
  error: string | null;
  refresh: () => Promise<void>;
};
const SessionContext = createContext<SessionContextValue | undefined>(
  undefined,
);

export function SessionProvider({ children }: { children: React.ReactNode }) {
  const [user, setUser] = useState<SessionUser>(null);
  const [loading, setLoading] = useState(true);
  const [error, setError] = useState<string | null>(null);

  const refresh = useCallback(async () => {
    try {
      setLoading(true);
      setError(null);
      const currentUser = await getCurrentUser();
      setUser(currentUser);
    } catch (err) {
      setError(err instanceof Error ? err.message : "Failed to load user");
      setUser(null);
    } finally {
      setLoading(false);
    }
  }, []);

  useEffect(() => {
    refresh();
  }, [refresh]);

  return (
    <SessionContext.Provider value={{ user, loading, error, refresh }}>
      {children}
    </SessionContext.Provider>
  );
}
The provider automatically fetches the current user on mount and provides a refresh method to reload user data.
useSession() provides access to session-related data and functionality throughout your application.
export function useSession() {
  const context = useContext(SessionContext);
  if (context === undefined) {
    throw new Error("useSession must be used within a SessionProvider");
  }
  return context;
}
Add the SessionProvider to your root layout:
// src/app/layout.tsx
import { SessionProvider } from "@/providers/session-provider";

export default function RootLayout({
  children,
}: {
  children: React.ReactNode;
}) {
  return (
    <html lang="en">
      <body>
        <SessionProvider>{children}</SessionProvider>
      </body>
    </html>
  );
}
Use the useSession hook in any component to access authentication state:
"use client";

import { useSession } from "@/providers/session-provider";

export function UserProfile() {
  const { user, loading, error } = useSession();

  if (loading) return <div>Loading...</div>;
  if (error) return <div>Error: {error}</div>;
  if (!user) return <div>Not logged in</div>;

  return (
    <div>
      <h2>Welcome, {user.firstName}!</h2>
      <p>Email: {user.email}</p>
    </div>
  );
}
The session hook provides:
user - Current user data or nullloading - Boolean indicating if user data is being fetchederror - Error message if fetching failedrefresh() - Function to manually reload user dataThe access token is stored in an HTTP-only cookie, making it inaccessible to JavaScript:
ctx.setCookie(SHOPIFY_CUSTOMER_TOKEN_COOKIE, token, {
  httpOnly: true, // Prevents XSS attacks
  secure: process.env.NODE_ENV === "production", // HTTPS only in production
  sameSite: "lax", // CSRF protection
  path: "/",
  expires: expiresAt ? new Date(expiresAt) : undefined,
});
All inputs are validated using Zod schemas before processing:
const signInSchema = z.object({
  email: z.email().min(1),
  password: z.string().min(1),
});
Proper error handling prevents information leakage:
if (userErrors.length || !token) {
  throw new APIError("UNAUTHORIZED", {
    message: userErrors[0]?.message || "Invalid email or password.",
  });
}
Implementing authentication in a headless Shopify storefront using Better-Auth provides a secure, type-safe, and developer-friendly solution. The plugin-based architecture allows you to create custom authentication flows that integrate perfectly with Shopify's Customer API while maintaining security best practices.
The complete implementation includes:
You can find the complete implementation in the Headless Shopify repository.
Your Next.js version is 14 and you are getting below error when running yarn dev.
ReferenceError: Request is not defined
Upgrade your Node.js version to 20+.
If we are using Node.js, there is already an AWS SDK that can write a file to S3.
This article explains how to do it without the SDK. The generic steps to be followed are given in this AWS documentation.
For me it took a while and help from various other articles to finally implement the same using Node.js. Main challenge was in finding the right encryption methods.
We need crypto package to make use of different hashing algorithms. We need axios to make API requests.
const crypto = require("crypto");
import axios from "axios";
This function comes handy to do the hmac encryption with a key.
async function sign(key, msg) {
  // Convert the key and data to ArrayBuffer
  let keyBuffer = key;
  if (typeof key === "string") {
    keyBuffer = new TextEncoder().encode(key);
  }
  const dataBuffer = new TextEncoder().encode(msg);

  // Import the key
  const importedKey = await crypto.subtle.importKey(
    "raw",
    keyBuffer,
    { name: "HMAC", hash: { name: "SHA-256" } },
    false,
    ["sign"],
  );

  // Sign the data
  const signature = await crypto.subtle.sign(
    { name: "HMAC", hash: "SHA-256" },
    importedKey,
    dataBuffer,
  );

  return Buffer.from(signature);
  //console.log(crypto.createHmac('sha256', key).update(msg, 'utf8').digest())
}
async function contentHash(content) {
  const msgUint8 = new TextEncoder().encode(content);
  const hashBuffer = await crypto.subtle.digest("SHA-256", msgUint8);
  const hashArray = Array.from(new Uint8Array(hashBuffer)); // convert buffer to byte array
  const hashHex = hashArray
    .map((b) => b.toString(16).padStart(2, "0"))
    .join("");
  //const hash = crypto.createHash('sha256').update(content).digest('hex')
  return hashHex;
}
async function getSignatureKey(key, dateStamp, regionName, serviceName) {
  const kDate = await sign(`AWS4${key}`, dateStamp);
  const kRegion = await sign(kDate, regionName);
  const kService = await sign(kRegion, serviceName);
  const kSigning = await sign(kService, "aws4_request");
  return kSigning;
}
function createStringToSign(datetime, region, service, requestHash) {
  const algorithm = "AWS4-HMAC-SHA256";
  const credentialScope = `${datetime.substring(
    0,
    8,
  )}/${region}/${service}/aws4_request`;
  const stringToSign = `${algorithm}\n${datetime}\n${credentialScope}\n${requestHash}`;
  return stringToSign;
}
// Function to get the current date in the required format
function getFormattedDate() {
  const now = new Date();
  const year = now.getUTCFullYear();
  const month = ("0" + (now.getUTCMonth() + 1)).slice(-2);
  const day = ("0" + now.getUTCDate()).slice(-2);
  const hour = ("0" + now.getUTCHours()).slice(-2);
  const minute = ("0" + now.getUTCMinutes()).slice(-2);
  const second = ("0" + now.getUTCSeconds()).slice(-2);
  return {
    date: `${year}${month}${day}`,
    dateTime: `${year}${month}${day}T${hour}${minute}${second}Z`,
    utcString: `${now.toUTCString()}`,
  };
}
This function sets the values like bucket name, accessKey, secret etc and starts the call stack.
async function init(contentArg, fileNameArg) {
  console.log({ contentArg, fileNameArg });
  const dateObj = getFormattedDate();
  console.log(dateObj);

  // Example usage
  const accessKey = "AKIA5Q3DN3MWQRKB7865";
  const secretKey = "uvzQGk14YWY0LX8RPwm9JZu2example/4qCFBL";
  const dateStamp = dateObj.date; // Replace with the current date in YYYYMMDD format
  const regionName = "us-east-1"; // Replace with your AWS region
  const serviceName = "s3"; // Replace with the AWS service you are using
  const datetime = dateObj.dateTime; // Replace with the timestamp of the request
  const bucketname = "your-bucket-name";
  const fileName = fileNameArg;
  const content = contentArg;
  const hashedContent = await contentHash(content);

  // Example Canonical Request (replace with your actual canonical request)
  const canonicalRequest = `PUT
/${fileName}

date:${dateObj.utcString}
host:${bucketname}.s3.amazonaws.com
x-amz-content-sha256:${hashedContent}
x-amz-date:${dateObj.dateTime}

date;host;x-amz-content-sha256;x-amz-date
${hashedContent}`;

  // Step 1: Calculate the Signature Key
  const signingKey = await getSignatureKey(
    secretKey,
    dateStamp,
    regionName,
    serviceName,
  );

  // Step 2: Create the String to Sign
  const requestHash = crypto
    .createHash("sha256")
    .update(canonicalRequest)
    .digest("hex");
  const stringToSign = createStringToSign(
    datetime,
    regionName,
    serviceName,
    requestHash,
  );

  // Step 3: Calculate the Signature
  const signature = (await sign(signingKey, stringToSign)).toString("hex");

  console.log(signature);

  const authHeader = `AWS4-HMAC-SHA256 Credential=${accessKey}/${dateObj.date}/us-east-1/s3/aws4_request,SignedHeaders=date;host;x-amz-content-sha256;x-amz-date,Signature=${signature}`;

  console.log(authHeader);

  const url = "https://your-bucket-name.s3.amazonaws.com/" + fileName;
  const authorizationHeader = authHeader;
  const contentSha256Header = hashedContent;
  const amzDateHeader = dateObj.dateTime;
  const dateHeader = dateObj.utcString;
  const data = content;

  const response = await axios.put(url, data, {
    headers: {
      Authorization: authorizationHeader,
      "x-amz-content-sha256": contentSha256Header,
      "x-amz-date": amzDateHeader,
      date: dateHeader,
    },
  });

  console.log(response.status);
  console.log(response.data);
}

init("hello world content", "filename.txt");
const keyword is used to declare variables in JavaScript.
const a = 10;
We can declare multiple constants at the same time.
const a = 10,
  b = 20;
We can use create-react-app command to setup a React project with all the necessary tools. We can even setup a React project with TypeScript support.
As per the official documentation, the command to spin-up a new React project in my-app folder is:
In order to use or try Decorators in TypeScript, we need to enable it. Enabling Decorators can be done from tsconfig.json file.
If the tsconfig.json file has been created using tsc init command, the file would have a default configuration. The file also has many configurations that are commented.
keyof constraint in TypeScript generics make sure that the value passed is a key of another object.
Here is a simple function that returns the value of an object property passed:
We can set constraints to Generic types. Constraints allow us to accept only certain types that can be passed as generic types.
Here is a generic function:
We can create a generic function in TypeScript. That means, it will be a function that takes the argument and return type dynamically.
To understand better, here we have a normal typed function:
Generics allows us to provide types to other types. Oh wow? It went above my head :)
Let us try to understand from an example.
Intersection types allow us to combine other types.
Say, we have an interface for Person:
We can mark a particular property in an object as optional in TypeScript.
Consider following JavaScript object:
Interfaces in TypeScript can also be used to define the type of a function.
Without interface, we can define the type of a function as below:
type sumFn = (a: number, b: number) => number;
We can implement inheritance in interfaces.
Say we have an interface for Person:
interface Person {
  name: string;
}
When defining the structure of an object using interface keyword, we can specify readonly modifier.
interface Car {
  readonly model: string;

  show(message: string): void;
}
I try to write one article for each day. When I get time, I write articles for future dates also. I then keep each future articles in their own branch names like 2023-02-04, 2023-02-05. On the day of publishing, I merge the corresponding branch to master branch.
Interfaces defines the structure of an object. Here is a structure of a Car object using interface.
interface Car {
  model: string;
  year: number;

  show(message: string): void;
}
An interface describes the structure of an object. We create an interface using interface keyword. interface keyword exists only in TypeScript, not in vanilla JavaScript.
Let us define the structure of a car object using interface.
noImplicitAny is an option under compilerOptions in tsconfig.json.
In order to understand the meaning of noImplicitAny option, consider the following TypeScript code. I have taken screenshot from VS Code to show the highlighted red error.
Stack is a pile of objects. In real world, we can see stack of plates, stack of books and so on. Here, I have drawn a stack of 5 books:

Book 5 is on top and Book 1 is at the bottom.
If strict compilation is enabled in TypeScript, TypeScript will be more strict in checking certain rules. Strict mode is enabled by default. It can be found under compilerOptions in tsconfig.json.
noEmitOnError is a compiler option in tsconfig.json file. If the value of this property is set to true, TypeScript will not generate output JavaScript file if there is any TypeScript error.
{
  "compilerOptions": {
    //...
    "noEmitOnError": true
  }
}
When project get bigger rootDir and outDir helps to organize our project. One of the normal convention is to keep all source files in src folder and keep all distribution or the output files in dist folder.
When tsconfig.json file is generated, it contains a commented line for sourcemap. In order to enable source maps in a TypeScript project, we need to uncomment the line.
{
  "compilerOptions": {
    //...
    "sourceMap": true
  }
}
When we do tsc --init to initialize a TypeScript project, it generates a tsconfig.json file. We can see a JSON object with compilerOptions property. We can generate ES6 output by setting target to ES6 or ES2015.
If our project is a TypeScript project, when we run tsc command, all the TypeScript files are compiled to JavaScript files. But what if, we want to exclude certain files from compilation?
Say we have three files in our project:
If there is only one TypeScript file, we can compile the file using:
tsc app.ts
Above command will compile the app.ts file and generate app.js file.
When working with a single TypeScript file, we repeatedly compile the file using tsc command. We can use watch mode to automatically compile the file on change.
Here is how you can use watch mode:
never is a type that a function can return.
If you have a function that always throws an error, that function never returns a value.
TypeScript has a type called unknown.
We have a variable here of type unknown.
let input: unknown;
Functions accept callback function as argument. Using TypeScript we can define the type of that function.
Here is a function that accepts another function as callback:
AWS provides aws-sdk npm package to work with AWS services. Below function updateCloudfrontTTL() updates the MaxTTL value of default behavior to 0.
We have learned that Array is a data structure that stores its elements in contiogous memory locations. Look the code below:
const arr = ["Apple", "Banana", "Orange"];
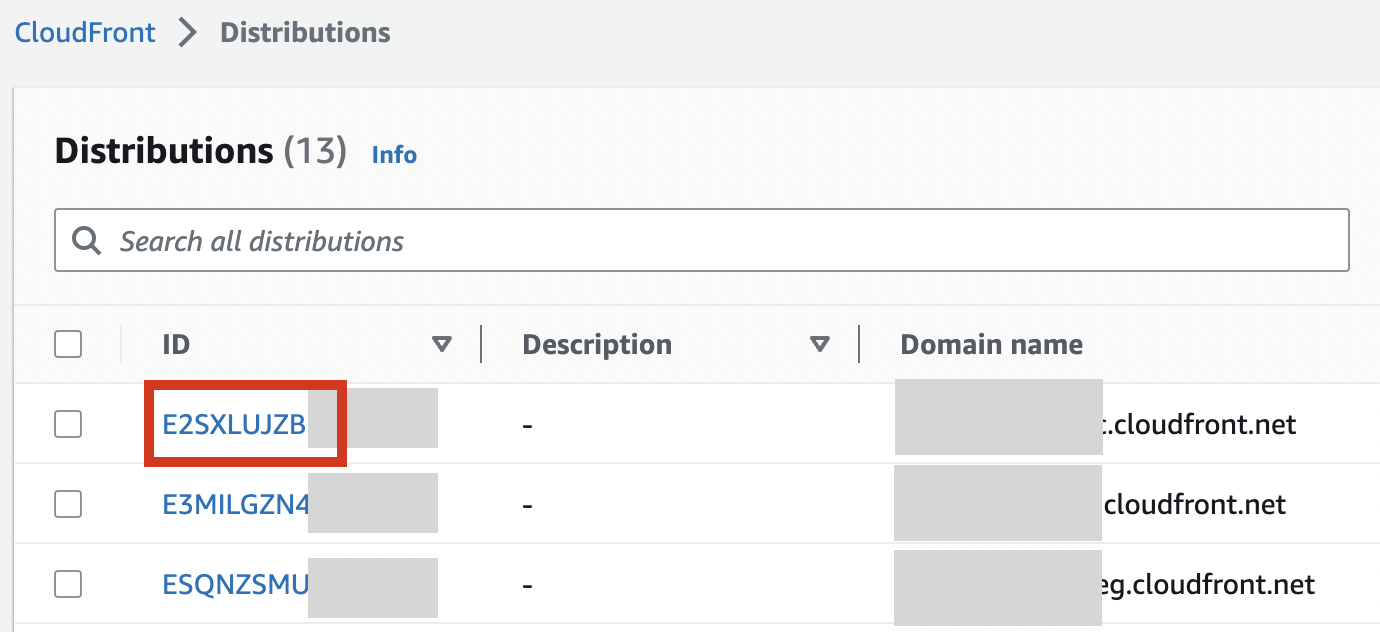
First, Click on the Cloudfront ID for which you want to clear the cache.
Content-Security-Policy is comparitively a new header supported by modern browsers.
What does it do?
Say, a web page is having below Content-Security-Policy header in the response:
When Page Shield is enabled in Cloudflare, CloudFlare automatically adds Content-Security-Policy-Report-Only header to all the pages.
content-security-policy-report-only: script-src 'none'; report-uri https://csp-reporting.cloudflare.com/cdn-cgi/...
CSP stands for Content Security Policy. It is an added layer of security in browsers. Bluetriangle can detect and report those errors.
CSP helps to detect and avoid certain types of attacks like Cross-Site Scripting and data injection attacks. These types of attacks are used for data thefts, site defacement and malware distribution.
Google web store is the marketplace for Chrome extensions. We can search for extensions in the web store. We can also install extensions in our Chrome browser directly from the store. This article explains how to publish our own extension to Google web store.
We are going to publish the Chrome extension we created as part of Introduction to Google Chrome Extension Development. You can also download the extension code from Github.
Google Chrome extension is a piece of code that adds the capabilities of Google Chrome browser. Some of the popular examples of Google Chrome extensions are:
React is the preferred library in most of the web projects. Most of the projects which I come across follow either React directly or through some other flavors of React like Next.js or Gatsby. Therefore, it is important to know different capabilities of React.
The questions and their solutions provided here are more realistic and practical. It is written from my experience of using React in my daily projects and taking several interviews for my company. I am not a supporter of asking tricky or difficult React questions that do not have much use or impact in actual project. I try to test if the candidate can use a feature in React in the most appropriate way. Sometimes, I twist the question little bit just to know if the candidate has actually good handson understanding or they have only theoritical understanding of the subject.
This article is a work in progress. I am re-organizing the existing article and adding more questions in these days.
This section covers basics of React. Most of the questions are suitable for a Junior React developer role. In addition to direct project related questions, we discuss about some concepts, mainly to check, how in-depth a candidate has tried to understand React.
Question 1:
What is virtual DOM? How virtual DOM boosts React performance?
Answer:
Like the actual DOM, the virtual DOM is a node tree that lists elements, their attributes and content as objects and properties. render() method in ReactDOM creates a node tree from React components and updates this tree in response to mutations in the data model caused by actions.
Whenever anything is changed, the entire UI is first re-rendered in virtual DOM representation. The difference between earlier virtual DOM representation and current one is calculated. The real DOM is updated with what has actually changed. Updating virtual DOM is very fast compared to real browser re-render. Hence performance is improved.
Question 2:
Is it possible to write a React application without JSX?
Answer:
Yes. It is possible.
In a React application, React components are created using react.js library. It is then rendered in a browser using react-dom.js. We can include both of these files directly from a CDN and use it.
<script
  crossorigin
  src="https://unpkg.com/react@18/umd/react.development.js"
></script>
<script
  crossorigin
  src="https://unpkg.com/react-dom@18/umd/react-dom.development.js"
></script>
Here is an example of a React component that is written without JSX.
const MyComponent = React.createElement("h1", null, "Hello World!");
ReactDOM.render(MyComponent, document.getElementById("root"));
ReactDOM is taken from react-dom.js library.
Question 3:
When we setup a React project, always we import two libraries, react and react-dom.
import React from "react";
import ReactDOM from "react-dom";
If those two are used together always, why they are kept as two separate files?
Answer:
React library is used to create components. A component is a building block of an application. React library has classes and methods for this purpose.
On the other hand, React-DOM deals with placing the components on browser. It deals with shadow DOM and other efficient rendering techniques.
Now, if we consider React Native development, we again use React to build the app components. But we use React Native to build and publish the app for mobile devices.
We can see that React, as a component library is reused by several platforms like React Native, React 3D or React Art. That is why it is maintained as a separate project and package.
Question 4:
When I ran my React project, I am seeing this error in the browser console:
Warning: Each child in a list should have a unique "key" prop.
What might have happened?
Answer:
We receive this error when we try to render an array of components without a key. React recommends adding a unique key attribute to all the components that are rendered from an array.
reactComponentsArray.map((Component) => <Component key={uniqueId} />);
React internally keeps track of components and their updates using this key. Without the key, each time, React needs to re-render the entire component list which affects the performance. That is why React alerts the developer during the development. This error message will not be displayed when using production build of React library.
Question 5:
What is JSX? and why do we use it in React project?
Answer:
JSX enables us to write React components using a syntax similar to HTML.
Here is a React component created without JSX:
const Pet = (props) => {
  return React.createElement("div", {}, [
    React.createElement("h1", {}, props.name),
    React.createElement("h2", {}, props.animal),
    React.createElement("h2", {}, props.breed),
  ]);
};
Here is the same component written using JSX:
const Pet = (props) => {
  return (
    <div>
      <h1>{props.name}</h1>
      <h2>{props.animal}</h2>
      <h2>{props.breed}</h2>
    </div>
  );
};
JSX adds the readability of the code.
Question 6:
Here is a JSX code snippet:
<div>
  <h1>Hello JSX</h1>
  <h2 label="screen">Sub heading</h2>
</div>
Can you please write down JavaScript equivalent of this code?
This question is to check if the candidate has heard about
React.createElement(). Usually developers jump into a React project and start building components using JSX. Only a curious developer who went to know more about the under the hood details will answer this question. If a candidate answers this question, I will be more interested.
Answer:
JSX is a syntactical sugar for React developers to easily create components. We use transpilers like Babel to convert JSX to JavaScript.
When Babel converts above code to JavaScript, it makes use of React.createElement(). This method accepts 3 parameters.
Here is how the JavaScript output of above code looks like:
React.createElement("div", {}, [
  React.createElement("h1", {}, "Hello JSX"),
  React.createElement(
    "h2",
    {
      label: "screen",
    },
    "Sub heading",
  ),
]);
Question 7:
We have a functional component here:
function Banner(props) {
  return <h1>{props.name}</h1>;
}
Convert above code to a class component.
Answer:
class Banner extends React.Component {
  render() {
    return <h1>{this.props.name}</h1>;
  }
}
In functional components, we can give any name to the props argument. But in class component props are always taken from this.props.
Question 8:
Here is a React component that tries to display a variable:
export default function App() {
  const website = "backbencher.dev"; // highlight-line
  return (
    <div className="App">
      <h1>Hello {website.toUpperCase()}</h1> //highlight-line
    </div>
  );
}
I am trying to print the website name in capital letters directly inside JSX. Will that work?
Answer :
Yes. We can write any valid expression inside the curly bracket. Therefore, in this case the output will be "Hello BACKBENCHER.DEV".
Question 9:
Here we have got a React component. Inside the JSX, we invoke a function.
function capitalize(inputStr) {
  return inputStr.toUpperCase();
}

export default function App() {
  const website = "backbencher.dev";
  return (
    <div className="App">
      <h1>Hello {capitalize(website)}</h1> // highlight-line
    </div>
  );
}
What will be the output? Will this code generate any error?
Answer:
This syntax is perfectly fine. Function invocation is a valid expression. The function is therefore invoked and the output printed will be "Hello BACKBENCHER.DEV".
Question 10:
This is a little advanced question. It requires good understanding of JSX.
What will be printed in the header?
export default function App() {
  const a = <div id="backbencher" />;

  return (
    <div className="App">
      <h1>{a.props.id}</h1>
    </div>
  );
}
Answer:
The code displays "backbencher" inside h1.
Every JSX is converted to a JavaScript object during transpiling. For example <div id="backbencher" /> is converted to below object.
{
  type: "div",
  key: null,
  ref: null,
  props: {
    id: "backbencher"
  },
  // few more
}
That is why we could read the props property and display the value. Due to the same reason, we can use JSX in conditions, function argument or funtion return value. Basically we can use JSX in any place we can use an object.
Question 11:
I have two components <WildAnimals /> and <DomesticAnimals />. If the value of isWildAnimal is true, I need to render <WildAnimals />. Or else, I need to render <DomesticAnimals />. In what all ways I can implement that in JSX?
**Answer: **
One way is to use if..else. When using if..else, the condition statement should be outside JSX because JSX can contain only expressions, not statements.
let componentToRender = <DomesticAnimals />;
if (isWildAnimal) {
  componentToRender = <WildAnimals />;
}
Other technique is to use ternary operator. Since using ternary operator is an expression, we can directly use inside JSX.
<div className="App">
  {isWildAnimal ? <WildAnimals /> : <DomesticAnimals />}
</div>
Question 12:
We have a component <WildAnimals />. We need to show it only if isWildAnimal is true. How can we put that condition in JSX?
Answer:
One way is to use if condition. if condition needs to be outside JSX. So the code would look like:
let wildAnimalComponent = null;
if (isWildAnimal) {
  wildAnimalComponent = <WildAnimals />;
}
return <div className="App">{wildAnimalComponent}</div>;
Another way is to use ternary operator:
return <div className="App">{isWildAnimal ? <WildAnimals /> : null}</div>;
Last way and the normally used one in this case is to use logical AND operator. In JavaScript, in an AND operation, the operand that decides the result of expression is returned. Using that behaviour, we can write the JSX code as follows:
return <div className="App">{isWildAnimal && <WildAnimals />}</div>;
Question 13:
Here we have a React component:
<Banner>
  <img src="hero.png" />
  <caption>Good product</caption>
</Banner>
When the above component renders, it should render below HTML:
<div class="banner">
  <img src="hero.png" />
  <caption>
    Good product
  </caption>
</div>
Please write down the code for <Banner /> component.
Answer:
Here, we are passing the content for Banner component as children. Any content inside a component is passed to the component as props. We can retrieve the children from props using props.children. Here is the code for Banner component.
function Banner({ children }) {
  return <div className="banner">{children}</div>;
}
Question 14:
What are hooks in React?
Answer:
Hooks was introduced in React v16.8. It allows to use all React features without writing class components. For example, before version 16.8, we needed a class component to manage state inside a component. Now we can keep state in a functional component using useState() hook.
Question 15:
Will React hooks work inside class components?
Answer:
No. Hooks will work only inside functional components.
Question 16:
Why React hooks was introduced?
Answer:
One reason to introduce hooks was the complexity in dealing with this keyword inside class components. If not handled properly, this will take some other value. That will result in breaking lines like this.setState() and other event handlers. Using hooks, we avoid that complexity when working with functional components.
Class components do not minify very well and also make hot reloading unreliable. That is another inspiration to bring hooks.
Another reason is that, there is no specific way to reuse stateful component logic. Even though HOC and render props patterns address this problem, that asks for modifying the class component code. Hooks allow to share stateful logic without changing the component hierarchy.
Fourth reason is, in a complex class component, related code are scattered in different lifecycle methods. Example, in case of a data fetching, we do that mainly in componentDidMount() and componentDidUpdate(). Another example is, in case of event listeners, we use componentDidMount() to bind an event and componentWillUnmount() to unbind. Hooks instead helps to place related code together.
Question 17:
How useState hook works? What is/are the arguments accepted by this hook and what is returned by the hook?
Answer:
useState hook is a function which is used to store state value in a functional component. It accepts an argument as the initial value of the state. It returns an array with 2 elements. First element is the current value of state. Second element is a function to update the state.
We import useState first from React by
import React, { useState } from "react";
Later we use useState like:
const [currentStateValue, functionToUpdateState] = useState(initialStateValue);
Question 18:
Here we have a class component with a state value. Each time the button in component is clicked, the count is incremented.
class Counter extends Component {
  state = {
    count: 0,
  };

  incrementCount = () => {
    this.setState({
      count: this.state.count + 1,
    });
  };

  render() {
    return (
      <div>
        <button onClick={this.incrementCount}>Count: {this.state.count}</button>
      </div>
    );
  }
}
Rewrite this component using React hooks.
Answer:
import React, { useState } from "react";

function Counter() {
  const [count, setCount] = useState(0);

  return (
    <div>
      <button
        onClick={() => {
          setCount(count + 1);
        }}
      >
        Count: {count}
      </button>
    </div>
  );
}
Question 19:
Below we have a class component. It contains code to update the state based on previous state value.
class Counter extends Component {
  state = {
    count: 0,
  };

  incrementCount = () => {
    this.setState((prevState) => {
      return {
        count: prevState.count + 1,
      };
    });
  };

  decrementCount = () => {
    this.setState((prevState) => {
      return {
        count: prevState.count - 1,
      };
    });
  };

  render() {
    return (
      <div>
        <strong>Count: {this.state.count}</strong>
        <button onClick={this.incrementCount}>Increment</button>
        <button onClick={this.decrementCount}>Decrement</button>
      </div>
    );
  }
}
Rewrite the above code using React hooks.
Answer:
One can update the value of a state variable just by passing the new value to update function or by passing a callback function. Second technique which accepts a callback function is safe to use.
import React, { useState } from "react";

function Counter() {
  const [count, setCount] = useState(0);

  const incrementCount = () => {
    setCount((prevCount) => {
      return prevCount + 1;
    });
  };

  const decrementCount = () => {
    setCount((prevCount) => {
      return prevCount - 1;
    });
  };

  return (
    <div>
      <strong>Count: {count}</strong>
      <button onClick={incrementCount}>Increment</button>
      <button onClick={decrementCount}>Decrement</button>
    </div>
  );
}
Question 20:
Here we have class component that updates the state using the input from a form.
export class Profile extends Component {
  state = {
    name: "Backbencher",
    age: 23,
  };

  onNameChange = (e) => {
    this.setState({
      name: e.target.value,
    });
  };

  onAgeChange = (e) => {
    this.setState({
      age: e.target.value,
    });
  };

  render() {
    return (
      <div>
        <form>
          <input
            type="text"
            value={this.state.name}
            onChange={this.onNameChange}
          />
          <input
            type="text"
            value={this.state.age}
            onChange={this.onAgeChange}
          />
          <h2>
            Name: {this.state.name}, Age: {this.state.age}
          </h2>
        </form>
      </div>
    );
  }
}
Rewrite the same component using React hooks.
Answer:
import React, { useState } from "react";

function Profile() {
  const [profile, setProfile] = useState({
    name: "Backbencher",
    age: 24,
  });

  const onNameChange = (e) => {
    setProfile({ ...profile, name: e.target.value });
  };

  const onAgeChange = (e) => {
    setProfile({ ...profile, age: e.target.value });
  };

  return (
    <div>
      <form>
        <input type="text" value={profile.name} onChange={onNameChange} />
        <input type="text" value={profile.age} onChange={onAgeChange} />
        <h2>
          Name: {profile.name}, Age: {profile.age}
        </h2>
      </form>
    </div>
  );
}
The setter function of useState() does not automatically merge if an object is stored in state. But in case of setState() method in class components, auto merging happens.
Here we are merging object properties with the help of JavaScript spread operator.
Question 21:
What are the differences in using hooks and class components with respect to state management?
Answer:
When using setState() in class components, always the state variable is an object. Where as, the state variable in hooks can be of any type like number, string, boolean, object or array.
When state variable is an object, setState() in class components automatically merges the new value to the state object. But in case of setter function in useState(), we need to explicitly merge the updated object property using spread operator.
Question 22:
What is the purpose of useEffect hook?
Answer:
The Effect hook lets us to perform side effects in functional components. It helps us to avoid redundant code in different lifecycle methods of a class component. It helps to group related code.
Question 23:
Here is a class component that prints Boom in console whenever it is mounted or updated.
export class Banner extends Component {
  state = {
    count: 0,
  };

  updateState = () => {
    this.setState({
      count: this.state.count + 1,
    });
  };

  componentDidMount() {
    console.log("Boom");
  }

  componentDidUpdate() {
    console.log("Boom");
  }

  render() {
    return (
      <div>
        <button onClick={this.updateState}>State: {this.state.count}</button>
      </div>
    );
  }
}
Remove the redundant console.log statement using React hooks.
Answer:
componentDidMount() and componentDidUpdate() are lifecycle methods. Such side effects can be done using useEffect hook. useEffect hook is a function which accepts a callback function. That callback function is called every time render happens.
The code can be rewritten as:
import React, { useState, useEffect } from "react";

function Banner() {
  const [count, setCount] = useState(0);

  useEffect(() => {
    console.log("Boom");
  });

  const updateState = () => {
    setCount(count + 1);
  };

  return (
    <div>
      <button onClick={updateState}>State: {count}</button>
    </div>
  );
}
Question 24:
Understand the code below:
function Banner() {
  const [count, setCount] = useState(0);
  const [name, setName] = useState("");

  useEffect(() => {
    console.log("Count is updated");
  });

  return (
    <div>
      <button onClick={() => setCount(count + 1)}>State: {count}</button>
      <input
        type="text"
        value={name}
        onChange={(e) => setName(e.target.value)}
      />
    </div>
  );
}
It logs "Count is updated" message even when updating the value in textbox. How can we show the log message only when the count state is updated?
Answer:
useEffect function accepts a second parameter which should be an array. Within this array, we need to pass the props or state we need to watch for. Only if those props or state mentioned in the array change, the effect is executed. So in our code, we add the second argument and specify only count value in the array.
Here is the udpated useEffect code:
useEffect(() => {
  console.log("Count is updated");
}, [count]);
Question 25:
We have got a class component that updates time every second. It uses componentDidMount() to set the timer.
export class Clock extends Component {
  state = {
    date: new Date(),
  };

  componentDidMount() {
    setInterval(() => {
      this.setState({
        date: new Date(),
      });
    }, 1000);
  }

  render() {
    return <div>{this.state.date.toString()}</div>;
  }
}
Convert the above code to React hooks.
Answer:
componentDidMount() is a lifecycle method that executes only once in a component lifecycle. We use useEffect to bring effects of componentDidMount(). But useEffect runs on every props or state updation. To prevent it, we make use of second array argument of useState. We keep that array empty. So for React, there are no props or state to watch for. Therefore useEffect runs only once like componentDidMount().
Here is the code using React hooks.
function Clock() {
  const [date, setDate] = useState(new Date());

  useEffect(() => {
    setInterval(() => {
      setDate(new Date());
    }, 1000);
  }, []);

  return <div>{date.toString()}</div>;
}
Question 26:
We have a code snippet from a class component which registers and remove an event listener.
componentDidMount() {
  window.addEventListener("mousemove", this.handleMousePosition);
}

componentWillUnmount() {
  window.removeEventListener("mousemove", this.handleMousePosition);
}
Convert this code to React hooks format.
Answer:
useEffect(() => {
  window.addEventListener("mousemove", handleMousePosition);

  return () => {
    window.removeEventListener("mousemove", handleMousePosition);
  };
}, []);
Question 27:
When should we use React Context instead of prop-drilling?
prop-drilling refers to the technique where we pass a value from one component to nested components through props.
Answer:
If we have a value that could be accessed anywhere from the application, we can consider Context. Few examples that fit to this condition is:
If the value shared by a component is specific to that component and its children, it is good to use prop-drilling. That improves code readability and the developer can easily identify from where this value is coming.
Question 28:
Here we have a set of 5 React components that is nested one inside other. Component A is passing a value to component E through prop-drilling.
const E = (props) => <h1>{props.fruit}</h1>;
const D = (props) => <E fruit={props.fruit} />;
const C = (props) => <D fruit={props.fruit} />;
const B = (props) => <C fruit={props.fruit} />;
const A = (props) => <B fruit={props.fruit} />;

<A fruit="Apple" />;
How can we rewrite the same code using useContext()?
Answer:
import React, { useContext } from "react";

const FruitContext = React.createContext();

const E = (props) => {
  const fruit = useContext(FruitContext);
  return <h1>{fruit}</h1>;
};

const D = (props) => <E />;
const C = (props) => <D />;
const B = (props) => <C />;

const A = (props) => (
  <FruitContext.Provider value="Apple">
    <B />
  </FruitContext.Provider>
);

export default A;
Question 29:
What is the common application of useRef() hook? Explain the implementation.
Answer:
Normally we use useRef() to hold reference to any DOM element. In order to use it, first we need to import useRef() hook from react package.
import { useRef } from "react";
Next we create a reference object inside the component by invoking useRef() hook.
const divRef = useRef();
Now we can attach the ref variable divRef to any DOM element using the ref attribute. Here is a code snippet that changes the background color of a div element when user clicks on the div block.
import { useRef } from "react";

export default function DOM() {
  const divRef = useRef();

  const clickHandler = () => {
    divRef.current.style.backgroundColor = "red";
  };

  return (
    <div ref={divRef} onClick={clickHandler}>
      Try Clicking Me!
    </div>
  );
}
Question 30:
Other than accessing DOM elements using ref attribute, is there any other use for useRef()?
Answer:
Accessing DOM elements using ref attribute is just one of the use case of useRef(). Basically, useRef() is like a box that can hold a mutable value in its .current property.
Here we have a parent component that can update its state:
export default function Parent() {
  const [stars, setStars] = useState("");

  const clickHandler = () => {
    setStars(stars + "*");
  };

  return (
    <>
      <Child />
      <button onClick={clickHandler}>Update Parent State</button>
    </>
  );
}
The Child component contains a ref object which increments its current value on each render.
export default function Child() {
  const [count, setCount] = useState(0);

  const refCount = useRef(0);
  refCount.current++;

  const updateCount = () => {
    setCount(count + 1);
  };

  return (
    <div
      style={{ border: "1px solid #000", width: "300px", margin: "50px auto" }}
    >
      <h2>State: {count}</h2>
      <h2>Ref: {refCount.current}</h2>
      <button onClick={updateCount}>Update Child State</button>
    </div>
  );
}
Each time when the Child component is rendered, we can see the ref count getting incremented without getting resetting to 0. Here is a GIF image that shows the output.
The double rendering on each button click is due to React running in development mode.
Question 31:
How to measure performance of a React application?
Answer:
One way to measure the performance of a React component is by using Profiler.
Question 32:
For a React project, will you choose Webpack or Parcel?
Answer:
Webpack and Parcel are two tools to bundle files in a React project. We are trying to compare both of them and make better decisions in our React project.
For busy readers, if you are building a big React project or needs to suggest a bundler for an upcoming big project, Webpack is the choice.
Zero Configuration
The main highlight of Parcel bundler is that we can start using Parcel just like that. No configurations are required. But, from Webpack 5 onwards, we can use Webpack also with zero configuration.
Typically there will be a webpack.config.js Webpack config file in a project. In some projects, there will be multiple config files. Then, based on the environment, we take different type of builds.
So regarding configuration, both are good and easy to start. But as more and more customiztion is required in the bundle, we need to go with Webpack.
Code-Splitting
Both performs code splitting. But, Parcel throws out all the output files to a single folder. So sometimes the output folder is a big mess of CSS, JS and html files.
On the other hand, we can tell Webpack to group CSS, JS, Images or HTML to separate folders and keep the project more structured.
Bundling Speed
Parcel is slow for the first build. Then it picks up.
Webpack takes more time based on the configurations we write.
Both tools support live hot reload in their own way.
Community Support
That is everything for a serious project. If something goes wrong, there should be a strong community to support. Webpack is a clear winner there.
If you are looking for a Webpack plugin, 99% it will be there. Sometimes more than one will be available. You just have to pick the one with more stars.
Parcel is a great starter for development, teaching or proof of concepts. In the long run, everyone needs Webpack.
Question 33:
You are going to initialize your React project as a Git repository. What all files or folders you usually add to your .gitignore file?
Answer:
Files or folders added in .gitignore file are avoided by Git while tracking. For a typical React project we add following files or folders in .gitignore.
node_modules
Like any other Node projects, we ignore node_modules/ directory. Including node_modules directory increases the project size to a large extend. Other than the size, it is always good to install the packages from package.json if a new developer is cloning the project.
coverage
When we implement code coverage in our project, all the reports are stored in coverage/ folder. We do not want that to be uploaded to Git server.
DS_Store
Mac OS creates this file in every folder if we open that folder in Finder. DS_Store stands for Desktop Services Store. The file basically stores information about the current folder and other files around it. It does not have any signifance specific to our React project.
Distribution
dist/ is the name of a typical directory used to store distribution files. That is the common naming convention. If your project has another name for output folder, give that name in .gitignore.
IDE Specific
If we are working in Visual Studio Code, it automatically creates a .vscode directory to store the project settings. Other editors like Sublime Text has its own versions of settings file. We can exclude those files or directories from versioning.
Logs
Any logs or directories that contains just log information can be ignored. That folder will keep on getting larger and its totally unnecesary to include it in versioning.
Here is an example .gitignore file.
.idea/
.vscode/
node_modules/
build
.DS_Store
*.tgz
my-app*
template/src/__tests__/__snapshots__/
lerna-debug.log
npm-debug.log*
yarn-debug.log*
yarn-error.log*
/.changelog
.npm/
Other informations we might add to .gitignore are changelogs, snapshots or build zip files.
Question 34:
Which of the following import techniques is better for performance and why?
// Method 1
import Lodash from "lodash";
// Method 2
import { capitalize } from "lodash";
Answer:
In a JavaScript or Node.js project, we can import modules using different ways. Here are two examples which we discuss today.
// Default import
import Lodash from "lodash";
Lodash.capitalize("hello");

// Named import
import { capitalize } from "lodash";
capitalize("hello");
Lodash is just an example used to demonstrate the performance. We all know that lodash contains several utility methods.
Both the types of import works. But the performance of both techniques vary based on the bundler we use. Different bundlers use the different ways for tree shaking.
Tree shaking is the process taken by bundlers to find out what all methods or modules need to be included in the output bundle.
It is always advised to use named imports. It makes sure that only the required modules are loaded to the output bundle.
JavaScript supports Unicode character set. We can name identifiers using unicodes. We can also use unicodes in strings and comments.
Names of variables, constants or functions are examples of identifiers. We normally give meaningful identifier names in English. Since, JavaScript supports unicode, we can even name variables in non-english language like Japanese.
There are different ways to try JavaScript. In order to understand and run JavaScript code, we need a JavaScript compiler. Every browser available in the market has a JavaScript compiler or engine. We also have a standalone JavaScript run time, which is called Node.js.
We are going to understand different ways using which we can run JavaScript and see the output. Here is the JavaScript code that we are going to try:
Visual Studio is a free and light weight IDE maintained by Microsoft. It has good support for Java programming language.
VS Code does not install JDK for you. You can install it separately using tools like Amazon Corretto.
If you do not have VS code installed, download and install it first.
Next, we need to find and install Extension Pack for Java.

Create a folder anywhere to store the Java files. Open the folder in VS Code.
Create a new file HelloWorld.java and paste below content.
public class HelloWorld {
    public static void main(String[] args) {
        System.out.println("Hello World");
    }
}
VS Code comes with a terminal. Open a new terminal. Run below command to build the Java code.
javac HelloWorld.java
If the build is successful, you can see a HelloWorld.class created. Next we can run the program using:
java HelloWorld
We can find the output like below:
In order to compile and run Java programs we need Java Development Kit(JDK). Mine is a Macbook with M1 chip. Here is how I installed JDK.
When creating a page in Next.js, there are code that runs only in server. There are also code that is added to the bundle and returned to the browser.
If you are a beginner in Next.js, it might be difficult to separate one from another. Next.js has come up with a code elimination tool to give more clarity on this.
Next.js initializes all pages using an App component. In other words, this App component acts as a Higher Order Component(HOC) of all pages. Using an App component is part of internal working of Next.js. During build step, Next.js creates a .next folder and stores the output files inside it.
If we open, .next/static/chunks/pages folder, we can see an _app.js automatically generated.
Next.js has a default Document structure using which it renders all pages. We can override that structure using pages/_document.js.
For this article, let us try adding Luckiest Guy Google font. Here is the link code which I got from Google.
Next.js is an isomorphic app framework. If I visit a url directly in the browser, Next.js renders the page in the server. Instead, if we visit the url through a link, then the page is rendered client side just like SPA applications.
It was and still is a miracle for me. I was playing with Next.js and trying to understand how Next.js implement this feature. I can say I am still learning. I am expressing only the very high level knowledge which I got.
Next.js is a React framework to build Isomorphic applications. Isomorphic applications support both client side and server side rendering.
Server side rendering means the complete HTML structure and its contents are gathered and rendered in the server. In case of Next.js, the server is a Node.js server.
Server side pages are usually dynamic. Example, a blog post or a product details page in ecommerce site.
Next.js supports inserting JavaScript code to our project in various ways. We are going to explore how we can add and run a piece of inline JavaScript code in a Next.js component.
Here we have a piece of JavaScript code:
console.log("This is an inline JavaScript");
A session cookie is a browser cookie that has validity only for that session. For example, when the user logs in, we might store the access token in a session cookie.
Here is how we can see a session cookie in browser console:
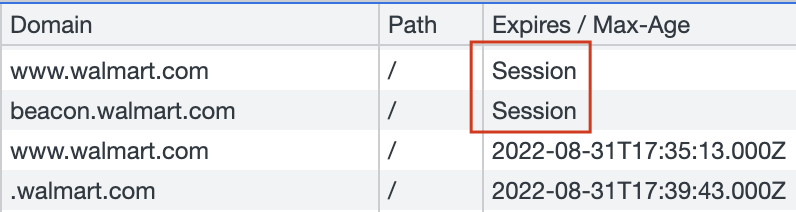
Last day, while working on my client project, all of a sudden I saw a new error in console, at least for me it was new. It said "Refused to connect to URL because it violates the following content security policy directive: 'connect-src none'".
I tried to understand it by creating a POC.
Next.js is a React framework to build websites. Next.js creates page routes based on file and folder structure. For example, if we want to create a url like /contact-us, we need to create a JavaScript file with file name contact-us.js under /pages folder.
Each JavaScript file should export a React Component. Here is an example content that can go inside contact-us.js:
const ContactUs = () => {
  return <h1>Contact us page</h1>;
};

export default ContactUs;
Next.js is a React framework to build web application. Next.js creates page routes based on file and folder structure. We can also set and handle dynamic pages in Next.js.
In order to setup Next.js, it is very easy to start with create-next-app. This command sets up everything in a folder which you mention. Now, if you are person who would like to do everything from bits and pieces, there is also a way for that.
A Next.js project can be easily setup using create-next-app command.
npx create-next-app@latest
But the project created using above command does not support TypeScript. If we want to add TypeScript support, we need to manually add TypeScript related configuration to the project.
While working with Next.js you might face this unhandled runtime error:
ChunkLoadError: Loading chunk node_modules_next_dist_client_dev_noop_js failed.
Question:
When should we use React Context instead of prop-drilling?
prop-drilling refers to the technique where we pass a value from one component to nested components through props.
Answer:
If we have a value that could be accessed anywhere from the application, we can consider Context. Few examples that fit to this condition is:
If the value shared by a component is specific to that component and its children, it is good to use prop-drilling. That improves code readability and the developer can easily identify from where this value is coming.
In React, data flows very explicitly from one component to another. If a parent component wants to pass a data to child, it can pass it through props. Another way to pass value to any nested components is by using context.
JSX is a syntactical sugar for React developers to easily create components. We use transpilers like Babel to convert JSX to JavaScript.
Here we have a JSX snippet:
<div>
  <h1>Hello JSX</h1>
  <h2 label="screen">Sub heading</h2>
</div>
In a JavaScript or Node.js project, we can import modules using different ways. Here are two examples which we discuss today.
// Default import
import Lodash from "lodash";
Lodash.capitalize("hello");

// Named import
import { capitalize } from "lodash";
capitalize("hello");
You have an array of React components. You are trying to render it using a loop. While running the application, everything looks good. But in the browser console you see this error:
VM9:85 Warning: Each child in a list should have a unique "key" prop.

Check the render method of `App`. See https://reactjs.org/link/warning-keys for more information.
This error message appears only when we use development version of React file. We will not see this error in production.
Files or folders added in .gitignore file are avoided by Git while tracking. For a typical React project we add following files or folders in .gitignore.
I was working on a code deployed in AWS Lambda. The code is written in Node.js. Using axios package, we are making a request to a new HTTPS API endpoint. We already had a mail containing different formats of SSL certificates used by the API server.
We took the first certificate format and attached it to our axios request as an http agent object. The request failed and the error we saw is this:
error:0909006C:PEM routines:get_name:no start line
The issue was that, we took the incorrect PEM file from the mail. It did not contain proper header and footer.
In ideal case, the certificate when opened should contain the proper header and footer. If we open the certificate file using a text editor, we should see a proper header and footer like below:
-----BEGIN CERTIFICATE-----
MIIG9jCCBd6gAwIBAgIQEQOjsh7xKPOteKIB7X4PNTANBgkqhkiG9w0BAQsFADCB
lTELMAkGA1UEBhMCR0IxGzAZBgNVBAgTEkdyZWF0ZXIgTWFuY2hlc3RlcjEQMA4G
A1UEBxMHU2FsZm9yZDEYMBYGA1UEChMPU2VjdGlnbyBMaW1pdGVkMT0wOwYDVQQD
EzRTZWN0aWdvIFJTQSBPcmdhbml6YXRpb24gVmFsaWRhdGlvbiBTZWN1cmUgU2Vy
dmVyIENBMB4XDTIyMDYyNzAwMDAwMFoXDTIzMDYyNzIzNTk1OVowajELMAkGA1UE
BhMCVVMxEzARBgNVBAgTCkNhbGlmb3JuaWExKzApBgNVBAoTIlBldGNvIEFuaW1h
bCBTdXBwbGllcyBTdG9yZXMsIEluYy4xGTAXBgNVBAMTEGFlbXBlcmYucGV0Yy5j
b20wggEiMA0GCSqGSIb3DQEBAQUAA4IBDwAwggEKAoIBAQDBCmtN4OtJKsz6oDkP
leXyg3xvS670HV223BBcwoRXiVnhEimolPRPuR+8V5PzjXGhVh2UXvg0/WQvZe3+
bcb4pyNYC84jspwdaiL62PNAAQPhIZnQytxgJMzd7gD3OpFYapbTVCHqV9/fdGsZ
-----END CERTIFICATE-----
In my case, the proper header(-----BEGIN CERTIFICATE-----) and footer(-----END CERTIFICATE-----) were missing. When I used the file with correct header and footer, the axios request worked.
In my project, I am using axios to make request to a HTTPS API endpoint. I had to pass the PEM certificate also to make the request work. When making the request, I was thrown with below error:
error:09091064:PEM routines:PEM_read_bio_ex:bad base64 decode
The reason for this error message is that, the certificate file got corrupted for some reason.
In my case, I was trying to create the PEM file by copying the content from crt file. During this process, I accidently deleted one line. When pasted with the correct content, issue got resolved.
In a typical React project we import two packages, react and react-dom.
import React from "react";
import ReactDOM from "react-dom";
If we are using React CDN, again we add reference to two CDN links.
<script
  crossorigin
  src="https://unpkg.com/react@18/umd/react.development.js"
></script>
<script
  crossorigin
  src="https://unpkg.com/react-dom@18/umd/react-dom.development.js"
></script>
Being a React developer for some time, a question might come to our mind. Why these two files are not combined and shipped as a single file?
React library is used to create components. A component is a building block of an application. React library has classes and methods for this purpose.
On the other hand, React-DOM deals with placing the components on browser. It deals with shadow DOM and other efficient rendering techniques.
Now, if we consider React Native development, we again use React to build the app components. But we use React Native to build and publish the app for mobile devices.
The point I am trying to say is, React, as a component library is reused by several platforms like React Native, React 3D or React Art. That is why it is maintained as a separate project and package.
When browsers access a HTTPS url, it first establishes a secure channel using a certificate. All the major certificates are recognized by modern browsers. If a browser does not recognize a certificate, it will ask the user "do you trust this certificate?".
Axios is a common library used to make AJAX requests from browser. When done from a browser, browser handles the certificate management for axios. But, when we use axios from server or from tools like AWS Lambda, it cannot fetch the response. It throws an error saying "unable to verify the first certificate".
First import https from Node.js.
import * as https from "https";
Create an Https agent using https.Agent() method.
const httpsAgent = new https.Agent({
  rejectUnauthorized: false,
});
Then make the axios call using the above httpsAgent.
const { data } = await axios.get(url, { httpsAgent });
Here we are saying axios to ignore the certificate part. Just get the data from url. This can work in most of the cases. Always it is good to verify the source using valid certifcate.
If we have the certificates available, we can tell axios to use them to verify the url source.
const httpsAgent = new https.Agent({
  rejectUnauthorized: false,
  cert: fs.readFileSync(certificatePath),
});
In the above step we pass the path to certificate file as cert attribute. It can be .crt or .pem file.
In Node.js each .js file is considered as a separate CommonJS module. That means if we declare a variable or function inside a file, we cannot access it from another file. We need to explicitly mention, what all variables and functions can be accessed by other files.
We know that Node.js comes with multiple modules like fs or https out of the box. If we need to use say, fs in our code, here is the syntax.
const fs = require("fs");

// Then use it like..
fs.readFileSync();
If we are rewriting above code in ES Module way, it looks like this:
import * as fs from "fs";

fs.readFileSync();
Above syntax is one of the way in which we use import keyword. It takes all exported variables or functions from fs package and make it available for use.
Here are other ways we use import keyword.
import defaultExport from "module-name";
import * as name from "module-name";
import { export1 } from "module-name";
import { export1 as alias1 } from "module-name";
import { default as alias } from "module-name";
import { export1 , export2 } from "module-name";
import { export1 , export2 as alias2 , [...] } from "module-name";
import { "string name" as alias } from "module-name";
import defaultExport, { export1 [ , [...] ] } from "module-name";
import defaultExport, * as name from "module-name";
import "module-name";
You can read more in this MDN link.
We all might have started to try React either using Create React App or directly jumped into a React project where all the setup is already done. There are JSX, Webpack, Babel and lot of other tools in the project.
If you started web development before 2010 or in that range, you might think about React as little complex in the initial days. That is because there were no build step in frontend years ago. Life was all about including a jQuery script and ta da!
Now the question is, can we create a React component in a simple HTML file? Just like we used jQuery. Yes we can.
We need to first add React and React-DOM files from CDN, just like we do for other libraries like Bootstrap or jQuery.
<script
  crossorigin
  src="https://unpkg.com/react@18/umd/react.development.js"
></script>
<script
  crossorigin
  src="https://unpkg.com/react-dom@18/umd/react-dom.development.js"
></script>
Keep the reference to the bottom of body tag.
Add a div block with any id, say root. This div block is going to be the container of our React component.
<div id="root"></div>
JSX was introduced to give a better syntax for developers to create React component. Even though it is tough, it is possible to create a component using plain JavaScript.
const MyComponent = React.createElement("h1", null, "Hello World!");
ReactDOM.render(MyComponent, document.getElementById("root"));
In the first line we created a React component. In the second line we placed it inside our div.
You will not do this in any of your projects. But it is still a good thing to know that it is possible.
While watching different tutorial videos, one thing which I always noticed is the cool icons in the instructor's IDE. I am using Visual Studio Code IDE. In VS code, we can bring cool icons with the help of an extension called vscode-icons.
First open VS code.
Then click on Extensions tab.
Then search for vscode-icons by VSCode Icons Team.
![]()
Install the extension.
After installation, the icons appear next to each files and folders. The extension itself has more than 11 million downloads so far at the time of writing. Enjoy!.
When starting a HTML5 document, it is quite boring to copy paste or type the basic structure of a HTML5 document. In most of the IDEs there are shortcuts to insert frequently used code snippets. Such shortcuts are called as Emmets.
There is an Emmet for inserting HTML5 document in Visual Studio Code. They are ! and html:5. Here are the steps to use this emmet.
Create or open an empty html document. Then start typing ! or html:5. Visual Studio Code recognizes it as an Emmet.
Here is how we use emmet with !.
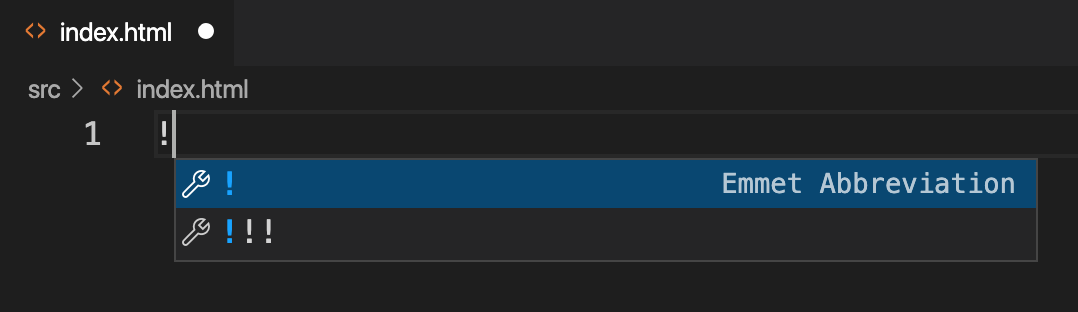
Here is how we use emmet with html:5 short code.
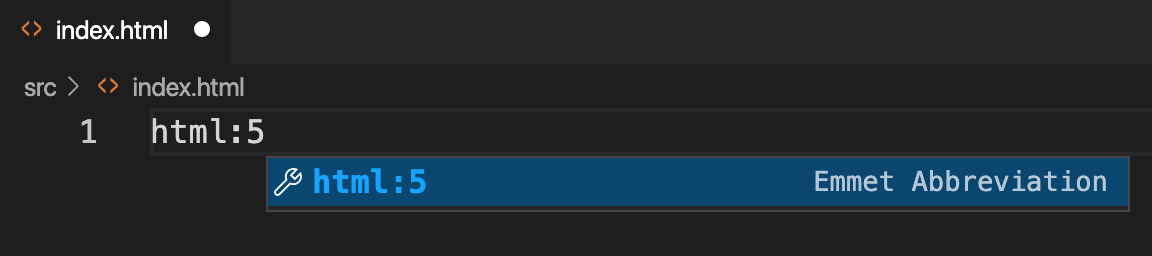
Once we use the emmet by pressing Enter key, this is how the generated HTML code looks like:
Live Server is a Visual Studio Extension that saves a lot of time for me. Initial days, when I need to run a website from live server using a url like http://localhost, I depended on apache server. Sometimes I tried Google extension called 200 Ok.
In order to install this extension, we need to open Visual Studio Code. Then take Extensions tab and search for Live Server.

Then choose the one shown below and click the Install button. In my case, I have already installed. That is why it is showing Uninstall button in the screenshot.

Once the extension is installed, we can easily open a file using Live Server by right clicking the file and open it with Live Server.
Webpack and Parcel are two tools to bundle files in a React project. We are trying to compare both of them and make better decisions in our React project.
For busy readers, if you are building a big React project or needs to suggest a bundler for an upcoming big project, Webpack is the choice.
The main highlight of Parcel bundler is that we can start using Parcel just like that. No configurations are required. But, from Webpack 5 onwards, we can use Webpack also with zero configuration.
Typically there will be a webpack.config.js Webpack config file in a project. In some projects, there will be multiple config files. Then, based on the environment, we take different type of builds.
So regarding configuration, both are good and easy to start. But as more and more customiztion is required in the bundle, we need to go with Webpack.
Both performs code splitting. But, Parcel throws out all the output files to a single folder. So sometimes the output folder is a big mess of CSS, JS and html files.
On the other hand, we can tell Webpack to group CSS, JS, Images or HTML to separate folders and keep the project more structured.
Parcel is slow for the first build. Then it picks up.
Webpack takes more time based on the configurations we write.
Both tools support live hot reload in their own way.
That is everything for a serious project. If something goes wrong, there should be a strong community to support. Webpack is a clear winner there.
If you are looking for a Webpack plugin, 99% it will be there. Sometimes more than one will be available. You just have to pick the one with more stars.
Parcel is a great starter for development, teaching or proof of concepts. In the long run, everyone needs Webpack.
I have two accounts in Bitbucket. One is my personal account which I registered using my personal email account. Other one is my official account registered using my office email. When I moved from HTTP to SSH in Bitbucket, I had to generate two separate SSH keys for both accounts.
So now I have two SSH keys in my laptop. When trying to push code to my personal account, how can Bitbucket know which SSH key to use? I faced this issue. My already working repo start yelling that I do not have access to the repo.
To teach Bitbucket which SSH key to use with which account, we need to do following steps.
First, create a file in ~/.ssh folder with name config. No extensions!. My SSH keys are stored in ~/.ssh folder.
Open config file in some editor and paste following content:
 #Personal account
 Host bitbucket.org-jobyjoseph
     HostName bitbucket.org
     User git
     IdentityFile ~/.ssh/id_ed25519
     IdentitiesOnly yes

 #Official account
 Host bitbucket.org-jobylitmus7
     HostName bitbucket.org
     User git
     IdentityFile ~/.ssh/ed25519_bitbucket_litmus7
     IdentitiesOnly yes
Replace jobyjoseph and jobylitmus7 with your Bitbucket user names. Then replace id_ed25519 and ed25519_bitbucket_litmus7 with the file names of your SSH files.
Modern browsers have event listeners to listen for touchstart, touchmove and so on. These are related to scrolling events. Here is an example that logs hi in console when the touch starts.
document.addEventListener("touchstart", function (e) {
  console.log("hi");
});
We can prevent the default scrolling behavior inside the event listener using e.preventDefault() like shown below.
document.addEventListener("touchstart", function (e) {
  console.log("hi");
  e.preventDefault();
});
Because of this reason, browsers wait for the event listener logic to finish. Then only they actually scroll the page. That will cause an unnecessary bad user experience. If the developer can inform the browser before hand that, there is no code in my listener that prevents scrolling, that will be a big help for browsers.
passive flag helps developers to do that. Here is how we apply the passive flag.
document.addEventListener(
  "touchstart",
  function (e) {
    console.log("hi");
    e.preventDefault();
  },
  { passive: true }, // highlight-line
);
In the above code, even if there is a preventDefault() line, it does not have an impact because will go ahead with the scrolling by seeing the passive flag.
You can find the browser support of passive flag usage here in this MDN page.
Just like CSS is used to style HTML page, Styled Components is one of the way to style React components. How we use Styled Components differs from normal CSS. Styled Components follow a CSS-in-JS approach.
This article is part of setting up a Tambola game. The learnings through the journey is documented in this blog.
The goal is to create a React component that renders a single cell of a Tambola Card.

Here is the TambolaCell component.
const Tambolacell = (props) => {
  return (
    <Cell numberCalled={props.numberCalled}>
      <Helmet>
        <link rel="preconnect" href="https://fonts.googleapis.com" />
        <link rel="preconnect" href="https://fonts.gstatic.com" crossorigin />
        <link
          href="https://fonts.googleapis.com/css2?family=Rubik:wght@400;700&display=swap"
          rel="stylesheet"
        />
      </Helmet>
      12
    </Cell>
  );
};
The Cell component used is a Styled Component which we will see in the next section.
The component uses Rubik Google font. The reference to the font is added in <head> using react-helmet package.
We need to install styled-components. Then import it using:
import styled from "styled-components";
We can then create a React component with style like this:
export const Cell = styled.div`
  background: ${(props) => (props.numberCalled ? "#ffbf00" : "#eee")};
  color: #333;
  font-size: 18px;
  font-family: "Rubik", sans-serif;

  display: flex;
  width: 38px;
  height: 38px;
  justify-content: center;
  align-items: center;

  border-radius: 3px;
`;
This is how the Cell component in previous section was created. The props we pass to Cell component can be read inside the component like:
background: ${(props) => (props.numberCalled ? "#ffbf00" : "#eee")};
Here we use the component with and without props.
<TambolaCell />
<br />
<TambolaCell numberCalled />
And here is the output:

useReducer() is also used to maintain state in a component just like useState(). But, it differs in how it is used. If we are planning to store an object in state, useReducer() will be a better choice in most of the cases.
We are going to store an object in state using useState(). You can see the working demo and code in CodeSandbox. Here is the initial object value that stores RGB color information.
{
  red: 0,
  green: 0,
  blue: 0,
};
The state is set using useState() syntax:
const [rgb, setRGB] = useState({
  red: 0,
  green: 0,
  blue: 0,
});
We have 3 textboxes to update the value of red, green and blue color.
<input
    type="text"
    placeholder="Red"
    onChange={(e) => {
        updateColor("red", e.target.value);
    }}
    value={rgb.red}
/>
<br />
<input
    type="text"
    placeholder="Green"
    onChange={(e) => {
        updateColor("green", e.target.value);
    }}
    value={rgb.green}
/>
<br />
<input
    type="text"
    placeholder="Blue"
    onChange={(e) => {
        updateColor("blue", e.target.value);
    }}
    value={rgb.blue}
/>
All input fields calls the same function, updateColor().
const updateColor = (color, value = 0) => {
  const newRGB = { ...rgb };
  newRGB[color] = value;
  setRGB(newRGB);
};
The function creates a copy of rgb object. Then update the value of the color and set the new value to state.
At any time, we show the color corresponding to rgb object using a div tag.
<div
  className="rgb-container"
  style={{ background: `rgb(${rgb.red},${rgb.green},${rgb.blue})` }}
></div>
Here is the output for our work:
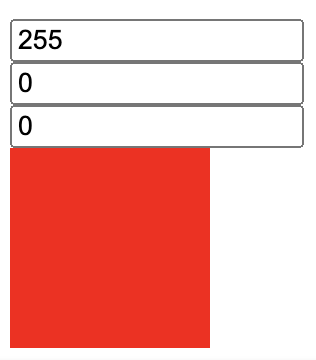
Now let us see how we can implement the same using useReducer() hook. First step is to import useReducer from React.
import { useReducer } from "react";
Next, here is how we use the hook:
const [rgb, dispatch] = useReducer(reducer, {
  red: 0,
  green: 0,
  blue: 0,
});
useReducer() hook accepts two arguments. One is the reducer function and second one being the initial state. The hook returns the state and a function to dispatch actions.
dispatch() function is invoked whenever we need to update the state. When invoking the function, we need to pass an action. Action is simply an object literal. It needs to have a type property. We can have additional properties also. Example, in our RGB project, to update the value of red color, the action object looks like below:
{
  type: "SET_RED",
  value: 200
}
Let us add the dispatch() invocation for our 3 textboxes.
<input
  type="text"
  placeholder="Red"
  onChange={(e) => {
    dispatch({
      type: "SET_RED",
      value: e.target.value
    });
  }}
  value={rgb.red}
/>
<br />
<input
  type="text"
  placeholder="Green"
  onChange={(e) => {
    dispatch({
      type: "SET_GREEN",
      value: e.target.value
    });
  }}
  value={rgb.green}
/>
<br />
<input
  type="text"
  placeholder="Blue"
  onChange={(e) => {
    dispatch({
      type: "SET_BLUE",
      value: e.target.value
    });
  }}
  value={rgb.blue}
/>
<br />
Let us do a walkthrough. When we change the value in Green textbox to say 154, onChange() event is fired. The event calls the dispatch() function with an action object. Everytime, when dispatch() is called, it then calls the reducer() function to update the state. The reducer() function always accepts the current state and the passed action object. The value returned by the reducer() function is set as the new state.
In our example, when the reducer function is invoked, the control jumps to SET_GREEN case. There the value of green is updated to 154 and the new state object is returned.
You can see the working demo and code in CodeSandbox.
We have a React project. We can build the project using Webpack. We can then see the output by running the generated bundle. Each time, when we change anything in the code, we need to repeat the build and reload step. That is quite boring and time consuming during development.
Webpack Dev Server helps developers by automatically building the project and reloading the page in browser. So, when we save the code, we can see the change instantly on the browser.
I am working on a personal project, which is a Tambola game. I have already:
Next step is to setup Webpack Dev Server in my project. That is what I am documenting here. At any time, you can check the status of my development site here.
First, we need to install webpack-dev-server in our project.
npm install --save webpack-dev-server
Next, we need to update webpack.config.js to set dev server options. Append the below code to module.exports.
devServer: {
    static: {
      directory: path.join(__dirname, 'dist'),
    },
    compress: true,
    port: 9000,
  },
Above configuration serves the content from /dist folder.
We want our dev site to run locally on npm run dev command. For that, add a dev script to package.json.
"dev": "webpack-dev-server --open"
The --open flag is to open the site in our default browser.
Try running the dev command. The site will be served from http://localhost:9000. Go and update content of our React component and save the file. Automatically, webpack-dev-server will build and update our page in browser.
We are going to setup a development work-flow using which, our code pushed to Github will be automatically deployed to AWS S3.
If we need to deploy our React application to AWS, we need to use our AWS credentials. In the same line, if Github needs to deploy our applcation to AWS, it needs valid AWS credentials.
For that, we create an IAM user to be used by Github. This IAM user will only have enough permission to deploy our code.
Here is the link to AWS documentation about creating IAM users.
I created a user with username githubuser. You can give any user name. Only programmatic access is required for this user.
Also, I gave permission only to S3 service. My policy json looks like this:
{
  "Version": "2012-10-17",
  "Statement": [
    {
      "Sid": "VisualEditor0",
      "Effect": "Allow",
      "Action": ["s3:*", "s3-object-lambda:*"],
      "Resource": "*"
    }
  ]
}
After creating the IAM user, we will get an Access Key ID and Secret Access. Store it somewhere safe.
When Github does the deployment for us to AWS S3, it requires AWS credentials which we created. These credentials must be stored somewhere safe, but at the same time accessible to Github actions. Github Secrets is the answer.
Go to our repo > Settings > Secrets > Actions. Add two repository secrets with name AWS_ACCESS_KEY_ID and AWS_SECRET_ACCESS_KEY. Provide the credential values to each secrets.

We just set two environment variables in Github environment. We will be using those in Github actions.
Our goal is to build and deploy code from dev branch to AWS S3, when code is pushed to dev branch. Github Actions is a CI/CD platform.
To use Github Actions, create a folder .github/workflows in the project root. We write workflows in YAML files. Create dev-build-deploy.yml file under workflows directory. Paste below YAML code:
# Name of workflow as seen in Github actions tab
name: dev-build-and-deploy
# Run workflow only on push to dev branch
on:
  push:
    branches:
      - dev
jobs:
  # To build the project
  build-tambola:
    runs-on: ubuntu-latest
    steps:
      - name: Checking out code
        uses: actions/checkout@v3
      - name: Installing Node.js
        uses: actions/setup-node@v3
        with:
          node-version: "16"
      - name: Installing dependencies
        run: npm install
      - name: Building project
        run: npm run build
      - name: Configure AWS Credentials
        uses: aws-actions/configure-aws-credentials@v1
        with:
          aws-access-key-id: ${{ secrets.AWS_ACCESS_KEY_ID }}
          aws-secret-access-key: ${{ secrets.AWS_SECRET_ACCESS_KEY }}
          aws-region: us-west-1

      - name: Deploy to S3 bucket
        run: aws s3 sync ./dist/ s3://dev-tambola --delete
We can see above YAML content as the instructions to Github. Where ever we see name key, that will be used by Github Actions console to show the message.
Here are the different steps defined in the YAML file:
dev branchdev branch/dist folder with deployable filesaws-actions/dist folder to our S3 bucketSave the YAML file. Then, push all code to remote dev branch. Immediately, go to Github actions tab in Github site. There we can see our workflow running.

Once all the steps are complete, we can see our S3 link updated with latest changes.
In this article, I hope I could explain things related to:
Tambola is a social game. It is also known as Bingo. I am working to develop an online Tambola game to learn different things related to product development. I am trying to share my findings here.
useEffect() hook brings different life-cycle methods to a functional component. This hook performs side-effects in functional component. If you did not get any idea, do not worry. You can understand in detail by reading below sections.
useEffect() hook comes as part of react package from React v16.8. In order to use useEffect() in our code, first step is to import it from React package.
import { useEffect } from "react";
useEffect() hook accepts two arguments, a callback function and an array.
useEffect(() => {
  console.log("Callback function");
}, []);
The callback function passed to useEffect() is invoked as a side-effect on change of any state variables.
What all state variables we need to track, that information is passed to the second array argument.
We learned that useEffect() accepts two arguments. In that, second argument is called the dependency array. What if we are not passing the second argument?
useEffect(() => {
  console.log("Oh! Side-effect is triggered.");
});
Here, since useEffect() does not have any dependency array to check against, it will invoke the callback function on component load and on every state change.
Here is a code which you can try:
import { useEffect, useState } from "react";

export default function () {
  const [random, setRandom] = useState();

  useEffect(() => {
    console.log("Oh! Side-effect is triggered.");
  });
  const buttonClickHander = () => {
    setRandom(Math.random());
  };

  return <button onClick={buttonClickHander}>Click Me!</button>;
}
Above code updates the value of random state variable on each button click. The "Oh! Side-effect is triggered." message is printed in the console on the component load and on every button click. You can try above code online at CodeSandbox.
Here, we are passing the second dependency array argument as an empty array([]). That is the way of telling React that, there are no state variables to watch for. Therefore, in this case, the useEffect() callback function will run only once when the component loads.
useEffect(() => {
  console.log("Loaded on component load");
}, []);
Above code is equivalent to componentDidMount() lifecycle method in class components.
You can play with useEffect() hook with empty dependency array in CodeSandbox.
Say, we have two state variables in our component. And, we want useEffect() hook to invoke the callback function, only when one of the state variable changes. In this case, we need to pass only that state variable name to the dependency array.
const [color, setColor] = useState();
const [age, setAge] = useState();

useEffect(() => {
  console.log("Color changed!");
}, [color]);
Here is the full component code which changes the color and age values through a button click.
import React, { useEffect, useState } from "react";

export default function () {
  const [color, setColor] = useState();
  const [age, setAge] = useState();

  useEffect(() => {
    console.log("Color changed!");
  }, [color]);

  const colorClickHander = () => {
    setColor(Math.random());
  };

  const ageClickHander = () => {
    setAge(Math.random());
  };

  return (
    <div>
      <button onClick={colorClickHander}>Change Color</button>
      <button onClick={ageClickHander}>Change Age</button>
    </div>
  );
}
Since we are tracking only the color variable, changing the value of age does not have any side effect.
When the above component loads, it prints the "Color changed!" message once. Later, we can see the message logged again only when the value of color changes.
What if we need to use await inside useEffect() callback function? Here is how the code we wish to write:
useEffect(async () => {
  console.log("hi");
  // do something with await
}, []);
Before trying
asyncin your code, ensure that@babel/plugin-transform-runtimeis installed and configured in.babelrcfile.
Using async directly in the callback function is NOT allowed by React. It throws a very detailed error along with a solution approach.
Warning: useEffect must not return anything besides a function, which is used for clean-up.

It looks like you wrote useEffect(async () => ...) or returned a Promise. Instead, write the async function inside your effect and call it immediately
As suggested in the error message, we can go for an IIFE inside the effect to achieve our goal:
useEffect(() => {
  (async () => {
    console.log("hi");
  })();
}, []);
In class components, there is a lifecycle method called ComponentDidUnmount(). The method is fired when a component is removed from the DOM. Usually, some logic like clearing a timer is executed inside this lifecycle method. Now the question is, how can we bring that lifecycle method to a functional component?
As we just learned, useEffect() accepts a callback function and a dependency array. Usually the callback function returns undefined. Instead, we are going to return a function now:
useEffect(() => {
  return () => {
    console.log("The returned function");
  };
}, []);
This returned function is invoked when the component is removed from the DOM.
In order to test this, we need to write a logic in the parent Component to hide this component based on some condition.
const App = () => {
  const [showComponent, setShowComponent] = useState(true);

  return (
    <div>
      {showComponent && <MyComponent />}
      <br />
      <button
        onClick={() => {
          setShowComponent(false);
        }}
      >
        Hide
      </button>
    </div>
  );
};
As we can see, in the parent component, we are hiding our component when the button is clicked. So, when user clicks on the button, we can see "The returned function" in the browser console.
Some of the cases that might need componentDidUnmount are clearing timers, unsubscribe RxJS events or websocket events, detach event handlers.
You can see the working code online at CodeSandbox.
useState() hook brings state to a functional component. Since it is a hook, it can only be used inside a functional component.
In order to use useState() hook, first we need to import it from react package.
import { useState } from "react";
useState() hook returns an array with 2 elements. First element is the initial state value. Second element is a function that can update the state.
const arr = useState();
console.log(arr);
Here is the output.

Usually, in code, we assign the state variable and the setter function to new variables using destructuring. If we need a state variable to store color information, we can create it like below:
const [color, setColor] = useState();
We can pass an argument to useState() which turns to be the initial state value. In the above example, if the state variable color needs to be set with "black" initially, we can update the code as below:
const [color, setColor] = useState("black");
By default, if we do not pass any initial state value, undefined is assigned to color.
setColor is a function. Invoking that function with a new state value, updates the state.
setColor("red");
Each time setColor() is called or in other words, each time when the state is updated, the component is re-rendered.
import { useState } from "react";

export default function App() {
  const [color, setColor] = useState("orange");

  return (
    <button
      onClick={() => {
        setColor("red");
      }}
      style={{ backgroundColor: color }}
    >
      Change Color
    </button>
  );
}
Above code sets "orange" as the default color. On click of the button, the state value is changed to "red". You can try the code online in CodeSandbox.
We can declare more than one state variables inside a functional component using multiple useState() invokations.
const [color, setColor] = useState();
const [width, setWidth] = useState();
const [interest, setInterest] = useState();
ESLint is a opinionated code quality tool. If Prettier is concentrating on the style and formatting of code, ESLint takes care of the quality of the code. For example, if there is an unused variable in code, ESLint throws an error, but Prettier does not have any issue.
There are few areas like spacing which both ESLint and Prettier check. We have ways to handle such issues with only Prettier. Thereby we keep all style related changes assigned to Prettier.
We assume that prettier package is already installed and setup. On top of that, we need to now install eslint and eslint-config-prettier.
npm install -D eslint@7.18.0 eslint-config-prettier@8.1.0
Create a .eslintrc.json file in project root folder. Fill the file with below content.
{
  "extends": ["eslint:recommended", "prettier"],
  "plugins": [],
  "parserOptions": {
    "ecmaVersion": 2021,
    "sourceType": "module",
    "ecmaFeatures": {
      "jsx": true
    }
  },
  "env": {
    "es6": true,
    "browser": true,
    "node": true
  }
}
The order of extends array matters. The first element, "eslint:recommended" turns on a set of rules, including white space rules. The second element, "prettier" turns off any eslint rules which prettier needs to handle. Like that, prettier gains control back from eslint.
Since we are not using any plugins, we gave [] as the value of plugins.
parserOptions specifies the kind of parser to be used. We gave ecmaVersion as 2021. So, that covers all latest syntax. We have also specified jsx syntax for the parser to consider.
"env" tells eslint, in what all environments the code will run. If we set es6 to true, eslint respects keywords like let, arrow functions and other new ES6 syntax. browser environment tells eslint that there will be global variables like window or document. node environment tells eslint to expect keywords like process and global. If we do not specify the environment, eslint throws error when it sees variables like window.
In order to run ESLint, we can add a command in package.json.
 "scripts": {
    "format": "prettier --write \"src/**/*.{js,jsx}\"",
    "lint": "eslint \"src/**/*.{js,jsx}\" --quiet" // highlight-line
  },
Now, let us run our lint command.
npm run lint
If everything goes well, ESlint shows error in terminal if any. Examples of errors can be React not declared, unused variables and so on. As we can see ESLint checks for code logic and suggests areas of improvement.
When working with multiple team members in a project, it will be nice to have everyone following a uniform style guide. For example, everyone ends a JavaScript statement with a semicolon, provide exactly 2 spaces for tabs and so on. Prettier is a tool which helps us in ensuring common style guide. It is an automatic code formatter.
If our project folder is not a Node package, make it as a node package by setting up package.json. For that, go to the project folder in terminal and run:
npm init -y
Then, install prettier package as a dev dependency.
npm install -D prettier
If we are using Visual Studio Code, we might already be using prettier extension. But, having a prettier setup like we are doing helps other developers to run prettier with a simple command.
In the project root folder, create a file with name .prettierrc. Prettier by default has a set of formatting rules. If we need to customize those rules, we can write our own rules in this file. If we are fine with the default rules, just provide an empty object in the .prettierrc file.
{}
We can find all the options available for prettier configuration in this link.
Next, we need to add a command in package.json to run prettier. For that, under scripts object in package.json, add the following command.
"scripts": {
    "format": "prettier --write \"src/**/*.{js,jsx}\""
  },
The long command is to format any js or jsx files under src folder. The --write flag tells prettier to overwrite the actual files with formatted code.
Before testing the command, we need a file to test. For that, create a test.js file in /src folder. Fill the file with below content.
const person = {
  name: "Joby",
  age: 36,
  gender: "Male",
  location: "Cochin",
  ssn: 123456789,
};
We wrote the code in one line. Now go to terminal and run:
npm run format
Above command runs prettier code and formats test.js file. Here is the updated content:
const person = {
  name: "Joby",
  age: 36,
  gender: "Male",
  location: "Cochin",
  ssn: 123456789,
};
If we are using prettier extension in Visual Studio Code, we can tell VS Code to honour the prettier configuration in our project. In that way, when each time we save a file, VS code can automatically format our code based on our project guidelines.
As React developers, we mainly work with JSX. But, after transpiling the code, JSX is entirely converted to pure JavaScript. Each component is created using React.createElement().
Consider the following code in JSX. It has a parent tag with 3 children.
<Student>
  <Name>John Doe</Name>
  <Age>36</Age>
  <Gender>Male</Gender>
</Student>
We can see the output of JSX to JavaScript here. Here is the output:
"use strict";

/*#__PURE__*/
React.createElement(
  Student,
  null,
  /*#__PURE__*/ React.createElement(Name, null, "John Doe"),
  /*#__PURE__*/ React.createElement(Age, null, "36"),
  /*#__PURE__*/ React.createElement(Gender, null, "Male"),
);
As we can see, each child is passed to the parent React.createElement() method as an argument. So, in this case we had to pass total 5 arguments to the parent createElement() invocation.
We can also pass the three children as an array. That means, we are passing only 3 arguments in total and the third argument is an array.
"use strict";

/*#__PURE__*/
React.createElement(Student, null, [
  /*#__PURE__*/ React.createElement(Name, null, "John Doe"),
  /*#__PURE__*/ React.createElement(Age, null, "36"),
  /*#__PURE__*/ React.createElement(Gender, null, "Male"),
]);
This is how we can use React.createElement() to pass multiple child components.
Visual Studio Code is a very popular IDE among web developers. If you are a web developer, you need to fill below code every time a new file is created.
<!DOCTYPE html>
<html lang="en">
  <head>
    <meta charset="UTF-8" />
    <meta http-equiv="X-UA-Compatible" content="IE=edge" />
    <meta name="viewport" content="width=device-width, initial-scale=1.0" />
    <title>Document</title>
  </head>
  <body></body>
</html>
We do not have to write again and again in Visual Studio Code. There is a shortcut to add above content easily to a HTML file.
To try the shortcut, create a new HTML file in Visual Studio Code. Then, start typing html.
From the intellisense dropdown, select html:5 and press Enter key. Visual Studio automatically brings the boilerplate HTML5 code to the file.
The shortcuts like html:5 are called Emmet Abbreviation. If you are working with some libraries like React, and you wish to have a shortcut to create a component, you can search for React emmet plugins in VS Code. It is available. ES7+ React/Redux/React-Native snippets is one such extension.
Webpack creates a bundle file from the source files. In webpack configuration file, there is an option to provide the file name of the output bundle file. If the name is static, then the browser loads the file for the first time from the server. From the second time, it will take the file from browser cache. That will create a problem if bundle file is updated in the server.
In this article, we are trying to find a solution for this caching problem and find out what is the best method to cache.
First step is to initialize a NPM package using npm init -y or yarn init -y.
Second step is to install webpack and webpack-cli as dev dependencies.
yarn add -D webpack webpack-cli
As third step, add a build command under scripts in package.json.
"scripts": {
    "build": "webpack"
  },
Now we are technically ok to try webpack.
Create a folder src in our project root. We will store all our source code inside this folder. Create an index.js file inside src folder and fill it with below content.
console.log("Hello World!");
Now, take terminal and navigate to our project folder and run:
yarn build
Above command creates a dist folder and places our bundle(main.js) inside it. Assume, we included this main.js file in our HTML file. When a user first visits the page, main.js is downloaded from server. But when the user visits the page next time, the browser will take main.js from browser cache. That is good. right? But there is a problem.
What if we change the text in index.js to "Hello universe!!"? Webpack build followed updated main.js. But our browser is still fetching from its cache. How to solve it?
So far, we did not create a webpack.config.js because we were using the default options of webpack. Now, create a webpack.config.js file. Fill it with below content.
module.exports = {
  output: {
    filename: "main.[contenthash].js",
  },
};
[contenthash] acts like a placeholder. Webpack will calculate the hash value of source files included and fill it in [contenthash] placeholder. In our case, when yarn build is run, we can see a file like main.09a3ac0effce240721db.js in dist folder. Again this file will be cached by browser. But, if we make any change to any files and do a build again, the hash value changes. If I change "World" to "Universe" in index.js, I can see that the output bundle file name is now main.ffae18492c7b67357218.js. There is no chance that browser serves the bundle from cache now because the file name itself has changed.
After taking several builds according to new settings, we can see that the dist folder is filling up with lot of bundle files.
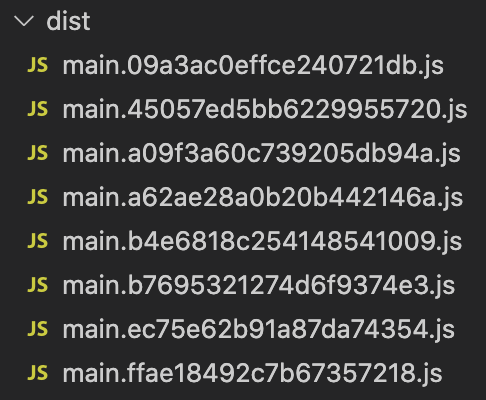
We can easily solve this problem. output configuration in webpack has a clean property. If we set the clean property to true, webpack will clean the dist folder in each build. Here is the updated webpack.config.js file:
module.exports = {
  output: {
    filename: "main.[contenthash].js",
    clean: true, // highlight-line
  },
};
We learned how to efficiently handle caching in webpack. Using [contenthash] placeholder, we can force browsers to fetch latest and updated bundle file after each build. We can also keep our distribution folder clean using the output.clean property. Have fun!.
Webpack creates a single bundle file including all the source files. If the bundle size is big, it can impact initial page load time. At that time, there is an option to split the bundle to multipe files using Webpack and import() function.
Before doing code splitting, let us understand why we require it in the first place. Create a folder anywhere in your laptop and initialize a node package using yarn init -y or npm init -y. In order to run yarn command, we need to have yarn installed globally.
Next, create an index.js file under /src folder. Here is the content for that file.
console.log("Page loaded");

document.getElementById("mybtn").addEventListener("click", function () {
  console.log("Button Clicked");
  console.log("I am going to print number 1");
  console.log("I am going to print number 2");
  console.log("I am going to print number 3");
  console.log("I am going to print number 4");
  console.log("I am going to print number 5");
});
Above code logs a message on page load. It also logs some messages when a button is clicked. We have added 5 console log statements just to increase file size.
In order to see the working of above JavaScript code, we need to create a HTML file in /dist folder. We are creating in /dist folder because after webpack build, the bundle file(main.js) is created there.
Create an index.html file in /dist folder and paste below contents:
<!DOCTYPE html>
<html lang="en">
  <head>
    <title>Document</title>
  </head>
  <body>
    <button id="mybtn">Click Me!</button>
    <script src="./main.js"></script>
  </body>
</html>
We have a button added to fire the event we wrote in js file. Also, we placed the script tag at the bottom of file to properly attach the button with the click event.
We now have the source files and HTML ready. Now, let us configure webpack to run in development mode. Here is the content for webpack.config.js file.
module.exports = {
  mode: "development",
};
We can also add a command in package.json to run webpack.
"scripts": {
    "build": "webpack"
  },
Now, go to project folder in terminal and execute yarn build.

A bundle file of size 1.55Kb is created. If we load the HTML in browser and click the button, we can see below output in console.
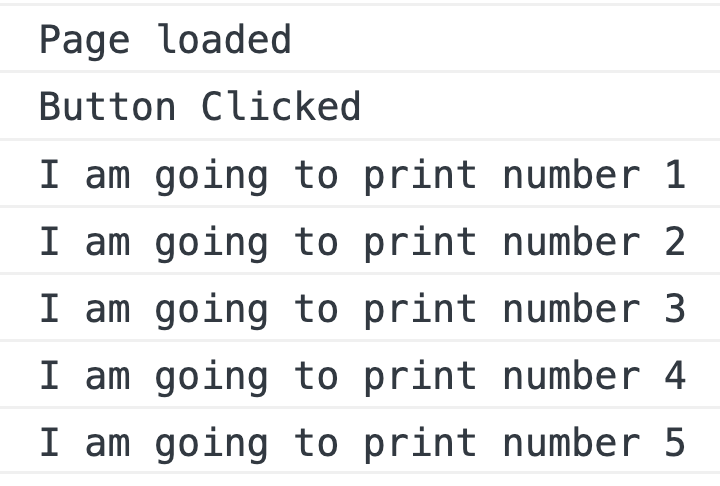
If we analyze what just happened, we are loading the full bundle file of 1.55Kb on page load. That slows initial page load time. We can split the button click logic to a separate file. That can improve the site performance. In the next section, we will see how it is done.
Let us create a separate file under /src folder called eventHandler.js. We then move all the button click logic to that file.
export default () => {
  console.log("Button Clicked");
  console.log("I am going to print number 1");
  console.log("I am going to print number 2");
  console.log("I am going to print number 3");
  console.log("I am going to print number 4");
  console.log("I am going to print number 5");
};
Next, we dynamically import this file in index.js only on button click.
document.getElementById("mybtn").addEventListener("click", function () {
  import("./eventHandler").then((mod) => {
    mod.default();
  });
});
When Webpack sees the dynamic import() statement, it automatically extract the logic to a separate bundle file.
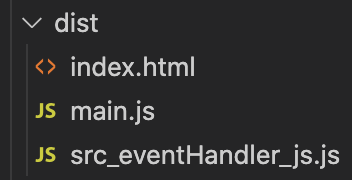
At the time of page load, only the main.js file is loaded. When the button is clicked, Webpack asynchronously request for src_eventHanlder_js.js and executes the click handler logic.
This is how code splitting is done using import() improves web performance. There are other ways also to implement code splitting.
While developing our project using webpack, it is difficult to build each time after every change in code. It is also time consuming to refresh our browser to see the change in output. Webpack Dev Server is a solution for this problem. It brings watch functionality and HMR(Hot Module Reload) feature during development.
To try watch mode and HMR, we need a source file to test. For that, under /src folder, create an index.js file with below content.
console.log("Hi!!");
With the default webpack configuration, when we build the project, an output main.js file is created at /dist folder.
Next, create an index.html file in /dist folder to run the main.js file. Even though there is HTMLWebpackPlugin to generate the HTML file, we are manually creating the file for demo purpose. Fill the HTML file with below content.
<!DOCTYPE html>
<html lang="en">
  <head>
    <title>Document</title>
    <script src="./main.js"></script>
  </head>
  <body></body>
</html>
So we have now everything in place to welcome webpack-dev-server.
First we need to install webpack-dev-server using npm or yarn.
yarn add -D webpack-dev-server
webpack-dev-server works closely with Webpack. It can read webpack configuration file and understand the meaning of options written there.
Once the dev server is installed, we need to tell the server about the location of output files. In our case, we need to tell the server to serve files from /dist folder. For that, add devServer property to webpack.config.js file.
module.exports = {
  devServer: {
    static: "./dist",
  },
};
By default, webpack dev server runs the site at http://localhost:8080. If we want to change the default values, there are host and port options for devServer setting.
Let us add a script command in package.json to run the dev server.
 "scripts": {
    "build": "webpack",
    "dev": "webpack serve --open" // highlight-line
  }
We can also provide webpack-dev-server --open as the dev command.
Now run the dev command in terminal.
yarn dev
If everything went well, we should see our default browser opening http://localhost:8080 in browser. If we open the browser console, we can also see Hi!! message.
The terminal will be in waiting mode, listening for any changes in source files. Let us change the message to "Hello". As soon as we save the file, Webpack Dev Server automatically builds and refresh our page. We can also see the updated message in console.
Hope you got a basic understanding of Webpack Dev Server and how to start with it.
Webpack bundles multiple source files to one single bundle file. In some cases, there can be multiple bundle files. But in both cases, if there is an error in one of the source files, it is difficult to track it down from browser console. Source maps connect the bundle file with corresponding source files.
Source maps are not a Webpack only concept. It is a common debugging technique which is respected by all modern browsers. Webpack has the ability to generate source maps.
Let us try generating a source map.
To try source maps, first let us create two source files under /src folder. Name them index.js and util.js.
Here is the content for index.js.
const utils = require("./utils");

console.log(utils.age.someMethod());
Here is the content of utils.js.
module.exports = {
  age: 36,
};
We have intentionally set an error in index.js. someMethod() will throw a TypeError.
Now we have two source files. Take the webpack build with default configuration. It is going to be a production build. Include the output main.js in an HTML file and try it in a browser. Let us see how the error appears in browser.

As we can see, the error is thrown from main.js. The browser is not able to show any information about source files to the developer.
Let us now build the project in development mode.
In order to take the build in development mode, we need to specify mode as development in webpack configuration.
module.exports = {
  mode: "development",
};
Take the build. Then, run the main.js bundle in a browser.
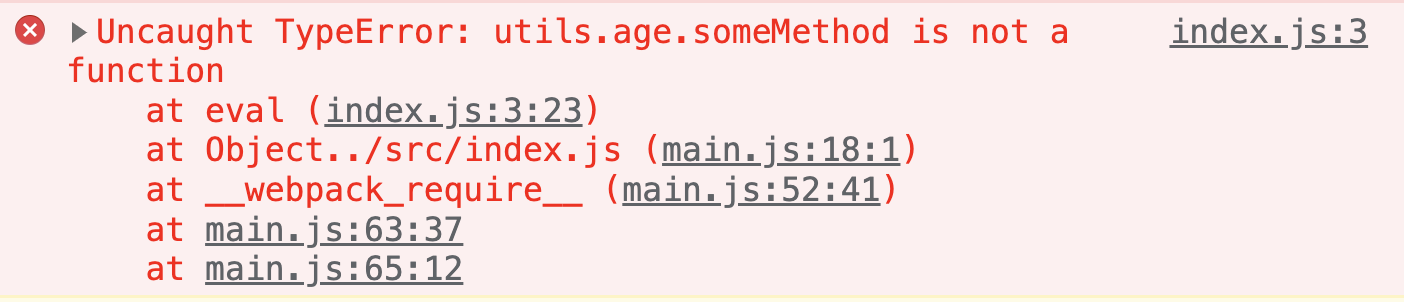
We can see the browser console showing the correct source file and line number. That is because webpack automatically applies a devtool setting of eval in case of development build. More on devtool setting in next section.
For sourcemap to be generated, we need to pass another property in webpack configuration called devtool. The type of source map changes based on the value given to devtool property.
One of the several values accepted by devtool configuration is inline-source-map. Let us first modify our webpack.config.js.
module.exports = {
  mode: "development",
  devtool: "inline-source-map", // highlight-line
};
After build, webpack will generate the source map and include it in the generated bundle file itself. That is why this configuration is called inline source map.
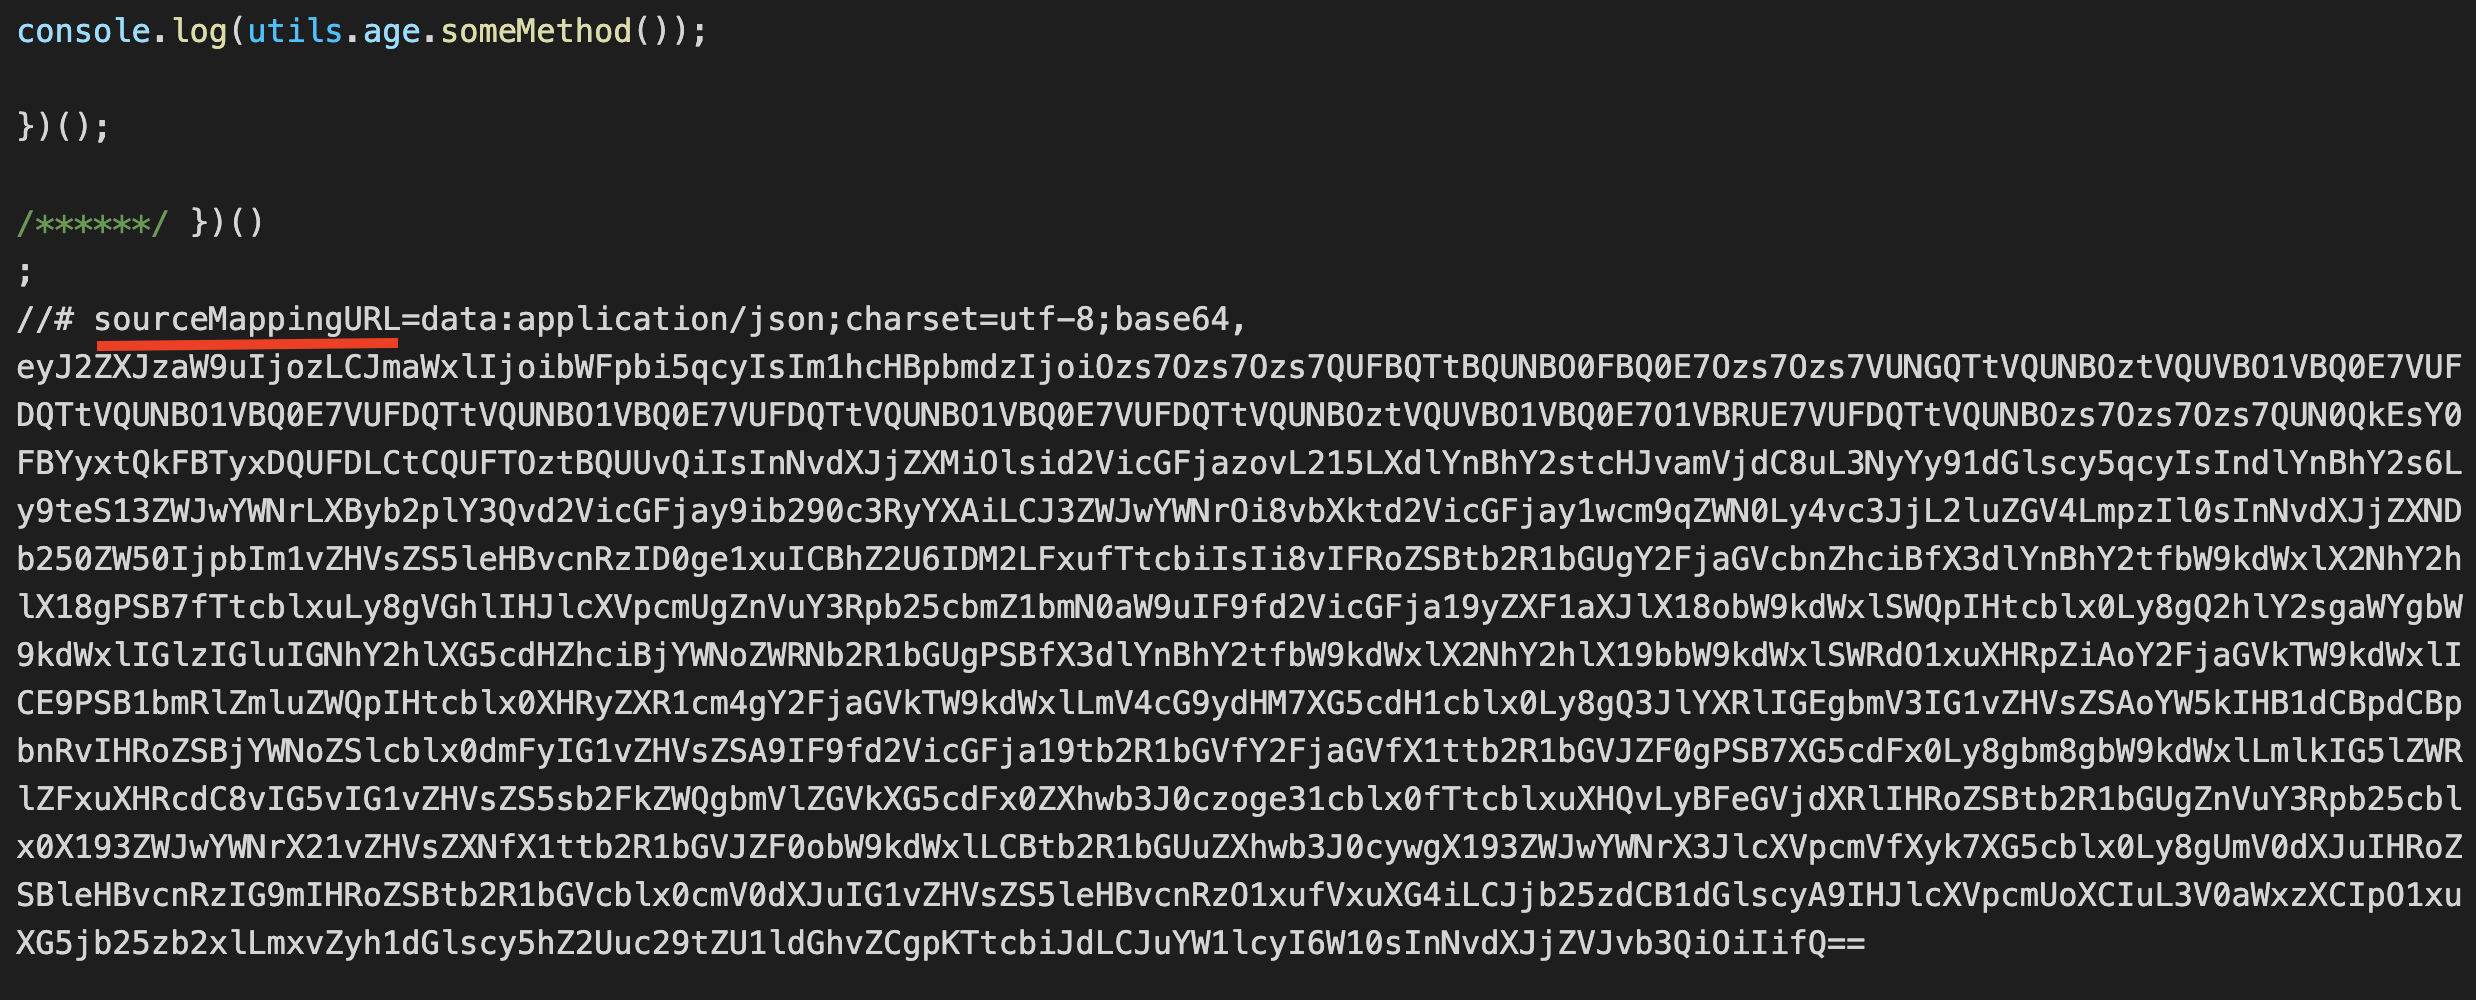
This option is best for development. It is not good for production as it makes bundle size bigger.
If we aim to use source map in production, we can use source-map value for devtool.
module.exports = {
  mode: "development",
  devtool: "source-map",
};
Here, webpack stores the source map in a different file. That is why it suits production build. If the bundle name is main.js, then the map file name will be main.js.map.
If we open the main.js bundle, the last line will be:
//# sourceMappingURL=main.js.map
Modern browsers will consider the associate map file by seeing this comment.
There are several other valid values for devtool property. You can find the complete list in webpack docs.
Webpack creates bundle file and store it in a distribution folder. The default distribution folder is /dist folder. If each bundle is created with different file names, the distribution folder will be crowded with previous version of bundle files.
Here is a webpack configuration that creates output file with the hash value.
module.exports = {
  output: {
    filename: "[contenthash].js",
  },
};
Above configuration, first generates a hash value of the source content. Then the hash value is given as the output bundle file name. This technique is helpful with respect to caching because the output filename changes only when source changes.
But, the problem is that, for each content change, the output /dist folder is filling up.
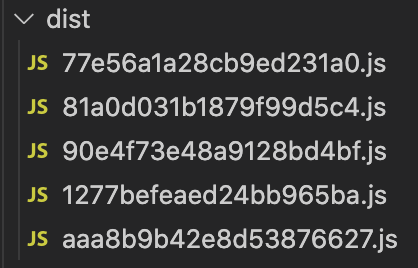
We can avoid this crowding by adding clean attribute to output configuration.
module.exports = {
  output: {
    filename: "[contenthash].js",
    clean: true, // highlight-line
  },
};
Now, after each build, only the generated bundle files will be there in the dist folder.
One of the configuration options accepted by Webpack is mode. It can have one of the three values.
developmentproductionnoneWebpack generates the bundle in different ways based on the mode type. In development mode, the bundle will be more verbose with comments. In production mode, Webpack does everything to use the bundle for production. It includes minification of the bundle file and other optimizations.
Default value of
modeisproduction.
In webpack.config.js, we can set bundling mode as shown below.
module.exports = {
  mode: "development",
};
We can also pass the mode using command line flags.
webpack --mode=development
Let us create a small index.js file under ./src folder. Fill it with below content.
console.log("Hello world");
Now let us see, how the output bundle looks like in different modes.
Here is the output bundle in development mode.
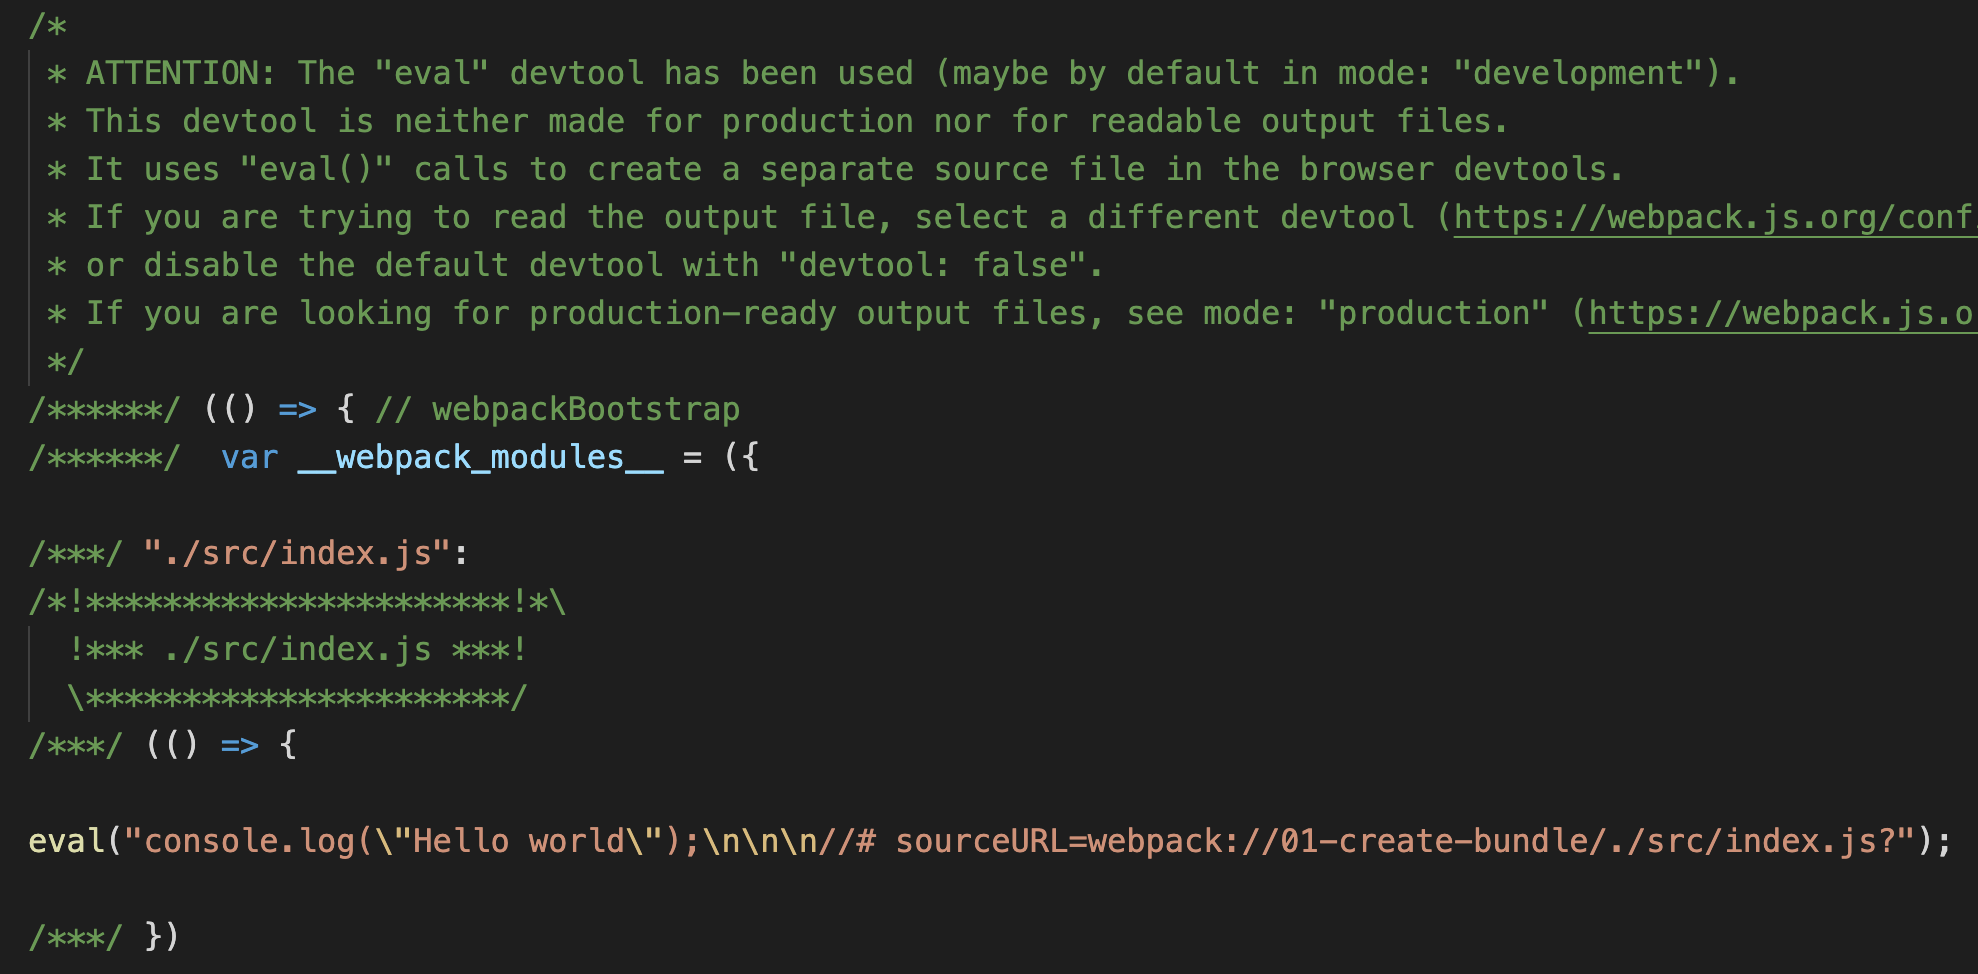
As we can see, the generated bundle contains lot of comments. We can also see the console.log statement, along with an indicator to original source file.
Here is the generated bundle in production mode.

Webpack does not insert anything extra in production mode, just the code that is required.
By specifying none for mode, we are opting out of any optimizations. In our case, the output bundle file looks like below in none mode.
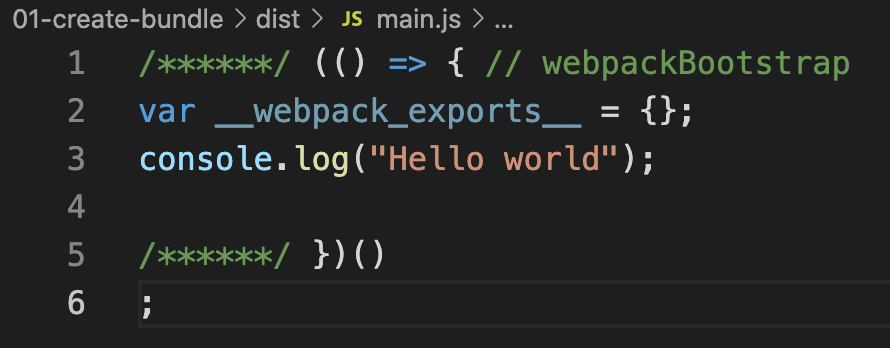
Loaders and Plugins provide wings to Webpack. We learned about Webpack Loaders earlier. They help webpack to work with files other than JavaScript or JSON. Plugins on the other hand, bring extra capability. Example can be dynamically creating a HTML file with all bundle files referenced in it. Another example can be minifying the output bundle for better page speed.
In order to use a Webpack plugin in our project, we need to follow below steps:
npm or yarnwebpack.config.js filenew operator before using.plugins config arrayTo understand how a plugin works, let us try a commonly used plugin which is html-webpack-plugin.
So far, if we need to test the generated bundle file in a HTML page, we might have created a HTML file in ./dist folder. Then, we might have added the bundle reference using script tag. All these manual work needs to be done again after each bundle creation. html-webpack-plugin makes our life easy in this case.
We are going to install and use html-webpack-plugin as per the steps mentioned in the previous section.
First, install the plugin using:
yarn add -D html-webpack-plugin
Next, require the plugin in webpack.config.js file using require() function.
const HtmlWebpackPlugin = require("html-webpack-plugin");
Next, we need to add an instance of HtmlWebpackPlugin constructor to plugins option. For that, create a plugins property in module.exports if not present. Then add our plugin instance to it. Note that, plugins config is an array which will contain all the used plugins as its elements.
const HtmlWebpackPlugin = require("html-webpack-plugin"); // highlight-line

module.exports = {
  module: {
    rules: [
      {
        test: /\.css$/i,
        use: ["style-loader", "css-loader"],
      },
    ],
  },
  plugins: [new HtmlWebpackPlugin({ template: "./src/index.html" })], // highlight-line
};
As you can see, we supplied a template option to the plugin. With that, we are telling the plugin to take the HTML file in src/index.html, inject generated bundles and then place it under ./dist folder.
We need to create the index.html in src folder now. Create the file and copy the below simple html content.
<!DOCTYPE html>
<html lang="en">
  <head>
    <title>Webpack</title>
  </head>
  <body></body>
</html>
We are now ready to test our plugin. Go to the terminal and run yarn build. Assuming, the build command is already setup to run webpack.
After building, a new file index.html is created for me under ./dist folder. Here is the content.
<!DOCTYPE html>
<html lang="en">
  <head>
    <title>Webpack</title>
    <script defer src="main.js"></script>
  </head>
  <body></body>
</html>
You can see the <script defer src="main.js"></script> line added dynamically by webpack plugin.
Hope you all received a taste of how webpack plugin works.
Webpack creates a dependency graph about all the files referenced in our application. It starts with the entry file and go in depth with the help of import or require statments in the code.
So when webpack sees, import React from "react", it adds the React library to the bundle. Out of the box, Webpack can only understand and include JavaScript and JSON files.
What if there is a CSS file import like, import "./styles.css"? Let us try it in our code. Say, we have an index.js file that imports style.css.
Here is our index.js file:
import "./style.css";

console.log("I am good");
And, here is our style.css file:
h1 {
  color: red;
}
Our expectation is that, Webpack will bundle both the files and creates a main.js bundle under ./dist folder. We do not require an explicit webpack.config.js file now. Let us try with the default webpack configuration.
When we try to build the source files, we see below error message in console.
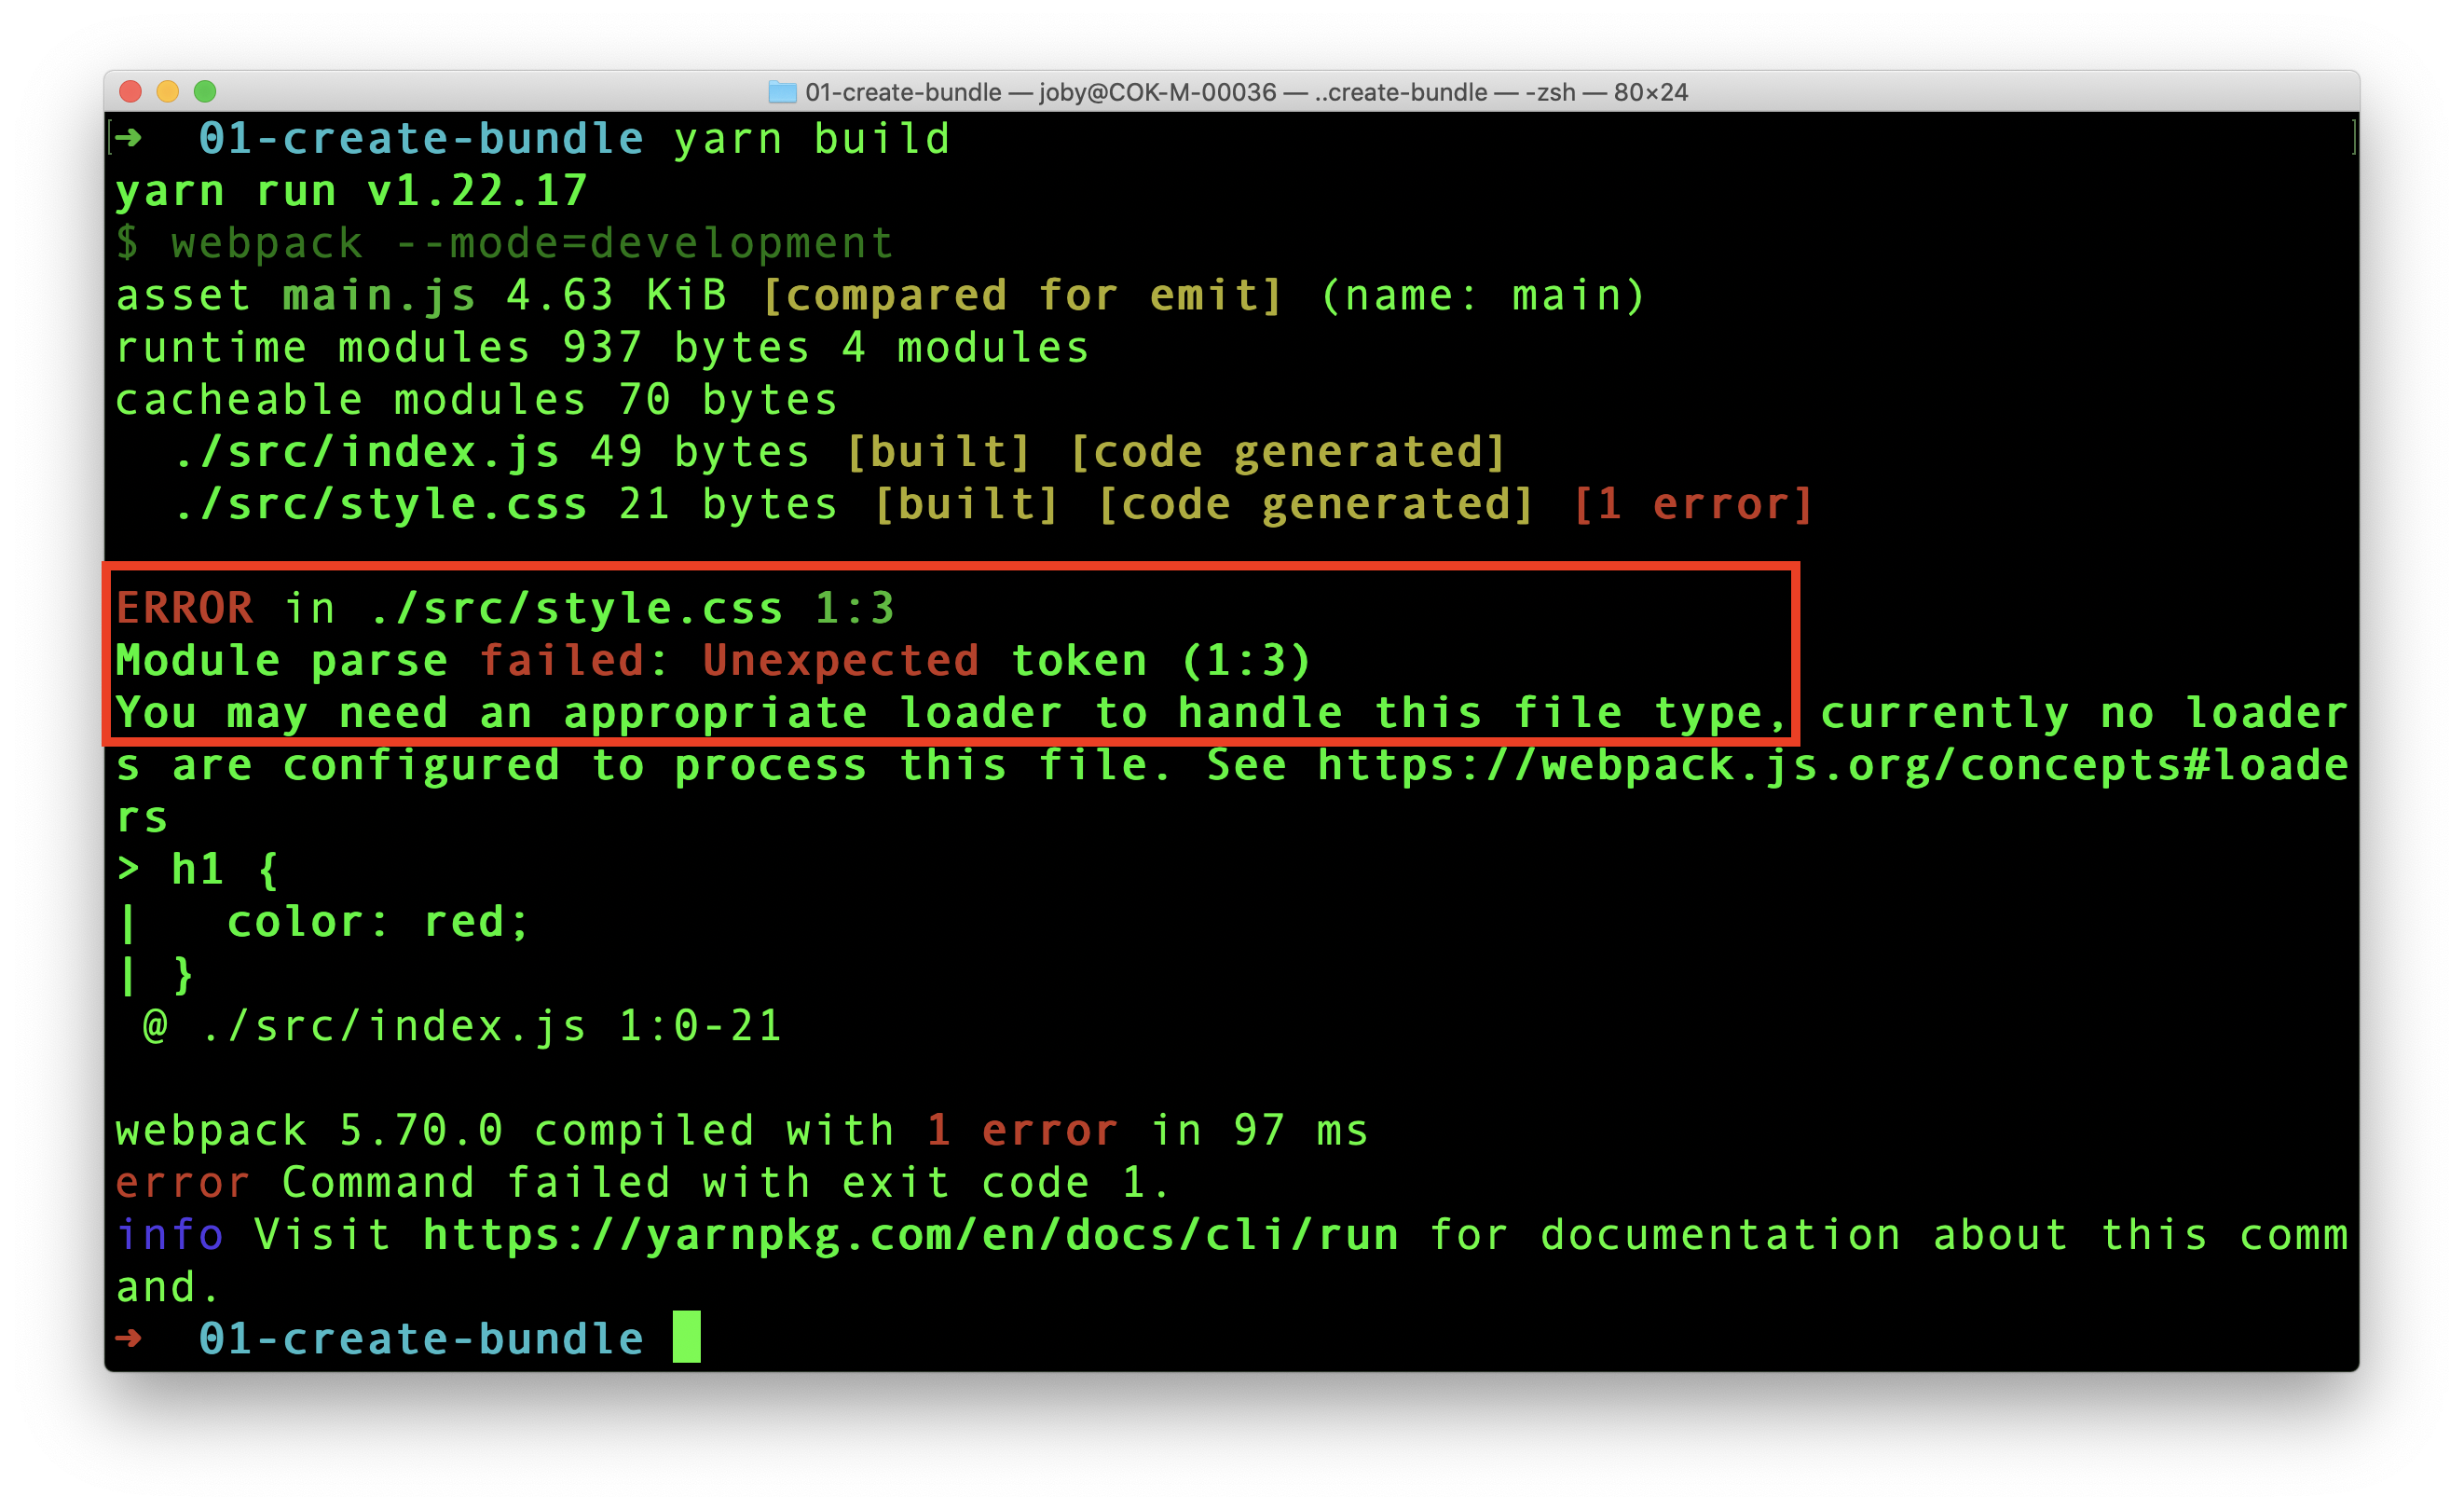
Webpack tried to include style.css. But it is not able to understand what is written there. It can understand only JavaScript and JSON. That is why webpack clearly says in the error message that:
You may need an appropriate loader to handle this file type, currently no loaders are configured to process this file.
Loaders allow webpack to process other types of files and convert them into valid modules that can be consumed by your application and added to the dependency graph.
As per the definition of loaders, in order to import a CSS file, we need to use a css-loader. Let us add it now.
yarn add -D css-loader
Now, we have the css-loader in place. Let us tell webpack to use it to load CSS files. For that, create the webpack.config.js and add below content.
module.exports = {
  module: {
    rules: [
      {
        test: /\.css$/i,
        use: ["css-loader"],
      },
    ],
  },
};
In the above code, we added a rule for CSS files. So, whenever Webpack sees an CSS import, it uses css-loader to add the CSS as a module to the bundle.
Now, things are ready to take a build. Let us run yarn build again. It creates a main.js bundle under ./dist folder. If we observe the content, we can see our CSS inside the bundle.
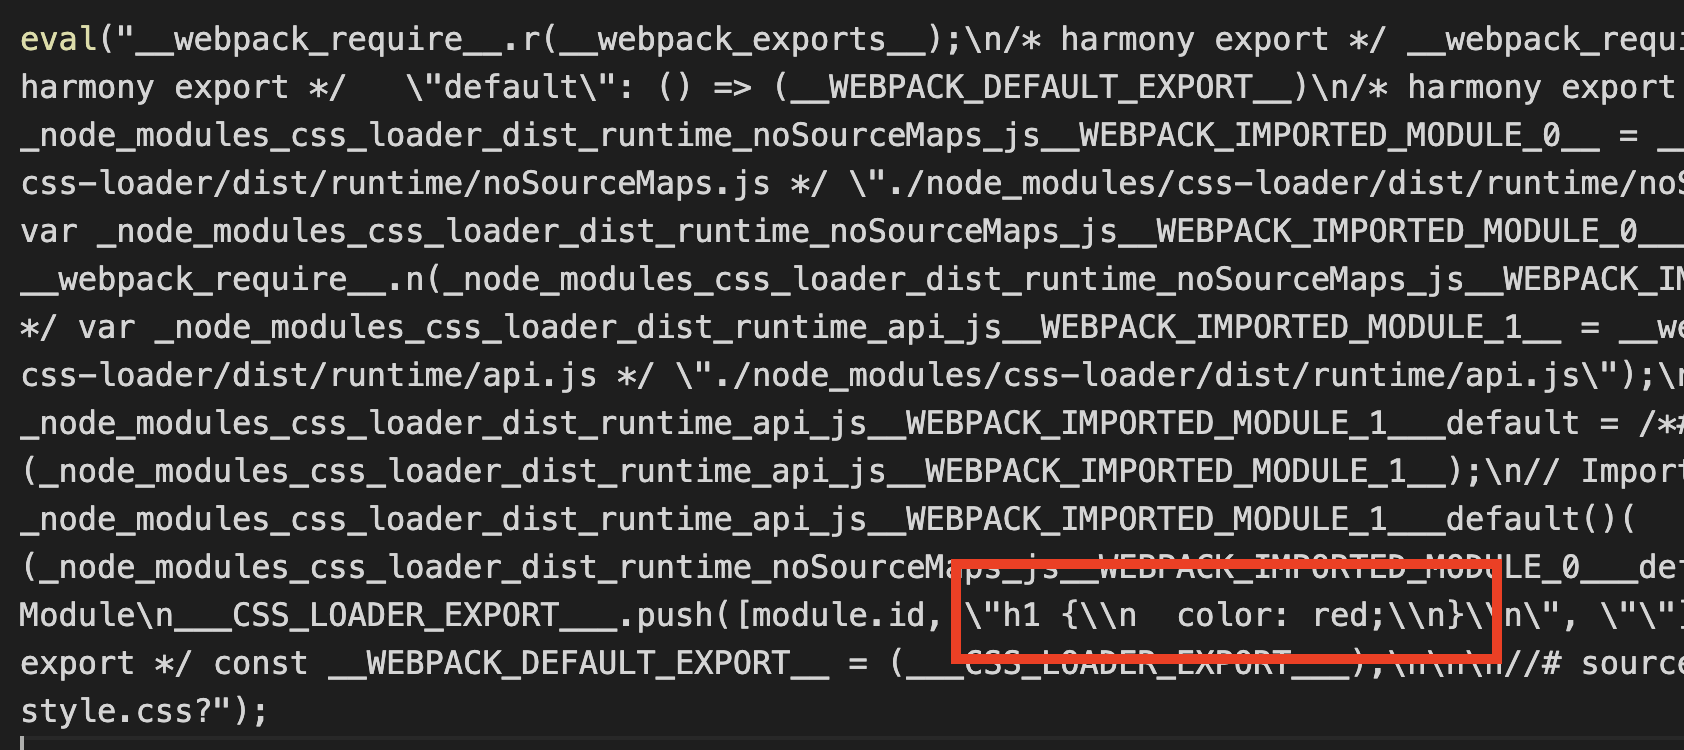
Let us try the bundle in a HTML file and test if the style is applied to H1 element.
Create a HTML file in dist folder. Add script reference to our created main.js file.
<!DOCTYPE html>
<html lang="en">
  <head>
    <title>Webpack</title>
    <script src="main.js"></script>
  </head>
  <body>
    <h1>Hello World</h1>
  </body>
</html>
Open the HTML file in a browser. What do you see? Is the H1 tag in red color? No. right. That is because, CSS loader can add a CSS file to bundle. But it cannot inject the style to browser DOM. To inject the style to DOM, we need style-loader.
First step is to add the style-loader.
yarn add -D style-loader
Next, add style-loader to webpack.config.js file.
module.exports = {
  module: {
    rules: [
      {
        test: /\.css$/i,
        use: ["style-loader", "css-loader"], // highlight-line
      },
    ],
  },
};
We can build the project again using yarn build. If we dig deep in the complex main.js, we can see some code that injects style to HEAD tag.

Now, refresh the HTML page again.

Hooray!, the style is applied. Also, we can see the style inserted to head tag.

We learned how to use webpack loader to work with CSS files. There are corresponding loaders for other file types like images, scss files and so on.
Webpack needs to store the bundle file that it created in some location. Webpack also needs to give proper file names to the bundle file to manage caching. Both these functionalities can be managed using output configuration.
Default value of
outputconfiguration is./dist/main.js.
If we want to store our bundle file as jam.js under jim folder, we need to add the output config to webpack.config.js as below.
const path = require("path");

module.exports = {
  output: {
    path: path.resolve(__dirname, "jim"),
    filename: "jam.js",
  },
};
The value of output always need to be an object. We CANNOT give the path as a string("./jim/jam.js").
Also the path property requires an absolute path. That is why, we have to import path package to resolve the absolute path. path package is part of Node.js and therefore we do not have to install it separately.
If we are setting
outputconfig, the only mandatory property isfilename. Webpack will then create the bundle in./distfolder, with the provided file name.
We learned about multiple entry points in Webpack entry config article. Here we have a webpack.config.js file that handles multiple entry points.
module.exports = {
  entry: {
    first: "./src/first.js",
    second: "./src/second.js",
  },
  output: {
    filename: "bundle.js",
  },
};
Here, we explicitly mentioned that the output bundle file name should be bundle.js. But, since there are two entry points, there will be two output bundles. So, how can two bundles have the same name? That is not possible. That is why, if we try to run webpack with above configuration, we will face below error:
Error: Conflict: Multiple chunks emit assets to the same filename bundle.js (chunks first and second)
Our expectation is that, webpack will create first-bundle.js and second-bundle.js under ./dist folder. For that, we can make use of [name] placeholder to provide dynamic naming to output files based on entry points. Here is how the updated config file looks like.
module.exports = {
  entry: {
    first: "./src/first.js",
    second: "./src/second.js",
  },
  output: {
    filename: "[name]-bundle.js", // highlight-line
  },
};
We can see from the webpack logs that first-bundle.js and second-bundle.js are emitted. See the green colored text below.
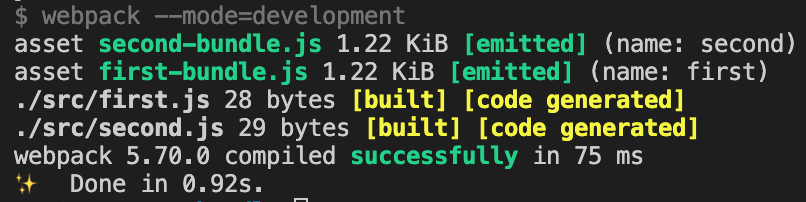
Now, if we check the dist folder, we can see the two bundle files as expected.
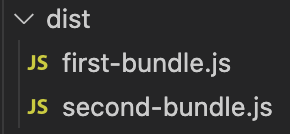
Hope you understood how Webpack output config works.
Webpack is like a secret agent who enters into a building through the main door and then go deep inside through inner doors. Once the agent comes out, he has all the links in his head as a dependency graph. Based on that graph, he creates a bundle file.
We can configure how Webpack works by passing a set of predefined options. One such option is entry. The entry option tells webpack, which module to start with to generate the dependency graph.
The default value of
entryis./src/index.js.
We can pass the entry option to webpack in multiple ways.
If we want webpack to start bundling from ./src/app.js, we can set the webpack.config.js file as:
module.exports = {
  entry: "./src/app.js",
};
The entry option can accept an array of files.
// first.js
console.log("I am first");

// second.js
console.log("I am second");

// webpack.config.js
module.exports = {
  entry: ["./src/first.js", "./src/second.js"],
};
Here the contents from first.js are first added to bundle. Next, contents from second.js are appended to the bundle.
Here is the generated bundle file. If we look closely, we can see the two console log statements from both JavaScript files.
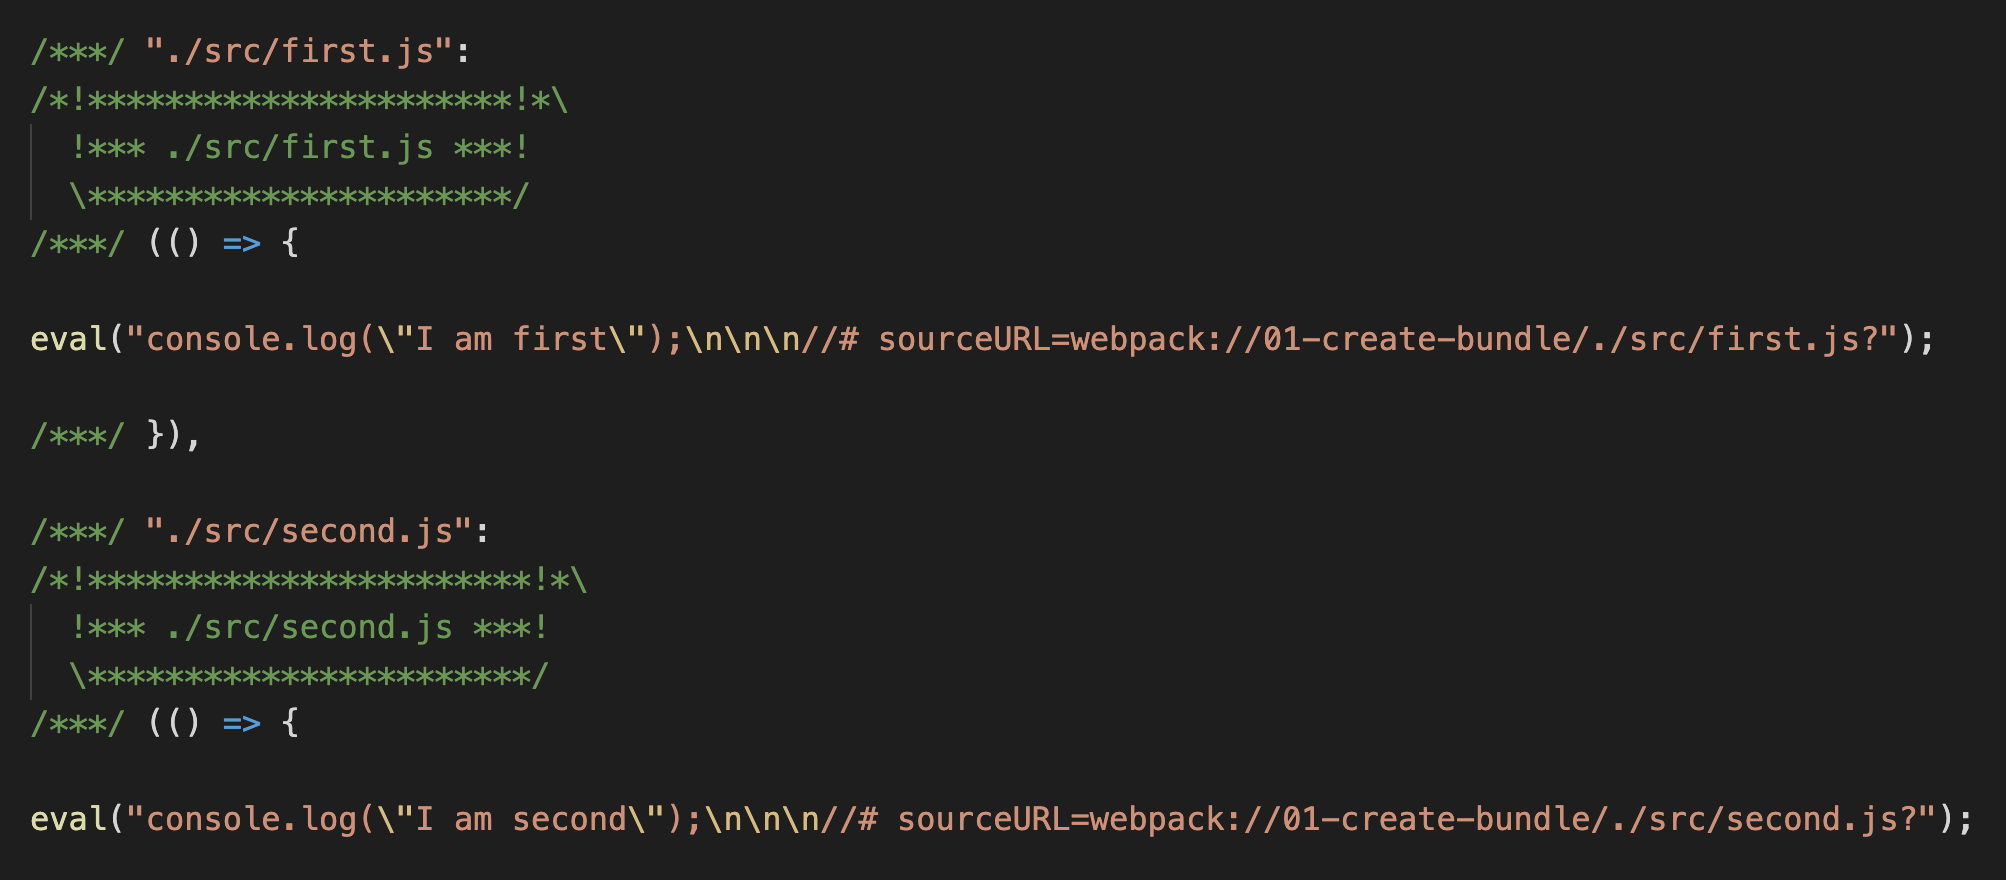
In the previous section, the two input files are combined to a single bundle. Now, there is an object syntax way using which we can mention webpack entry.
module.exports = {
  entry: {
    firstApp: "./src/first.js",
    secondApp: "./src/second.js",
  },
};
In this syntax, for each object keys, a bundle is formed. In our case, there are two keys: firstApp and secondApp. Due to which, after webpack build, dist folder will contain two bundle files, firstApp.js and secondApp.js.
One use case of object syntax is to separate all of the custom logic and all of the vendor JavaScript. Since the vendor JavaScript bundle will not change frequently, that can be effectively cached.
If we are using Webpack to bundle assets in our project, we can supply a set of options to webpack. This can be done either through command line or creating a webpack.config.js file.
From Webpack 4 onwards, it is not mandatory to supply a configuration file. Webpack takes, its own default configuration if none is provided. Default configuration expects the entry point to be src/index.js and bundle destination to be dist/main.js.
If a file with name webpack.config.js is present in the project, when webpack is executed, it respects the options present in that file.
Here is a sample config file:
module.exports = {
  mode: "development",
  entry: "./src/app.js",
};
The config JavaScript file is a CommonJS module. An object is exported from this file which is then considered by Webpack. Above configuration tells following things to webpack while it is running:
development mode. So the output bundle file will contain comments and non-minimized code. Default project mode is production.app.js under src folder. From there, webpack starts creating the dependency graph. Default entry point is src/index.js.By default, Webpack takes configuration details from webpack.config.js. If for some reasons, we need to tell webpack, to take different file as the configuration file, we can use --config flag.
If our new webpack configuration file is named as production.config.js, we can make use of it by running webpack as shown below.
webpack --config production.config.js
Webpack can help us to generate a config file using webpack-cli tool. To generate the file, we can go to the project root in terminal and run:
npx webpack-cli init
Befor running above command, we need
@webpack-cli/generatorsin our project. If it is not present, install it usingnpmoryarn.
When running above command, webpack will ask a set of questions. The process is interactive.
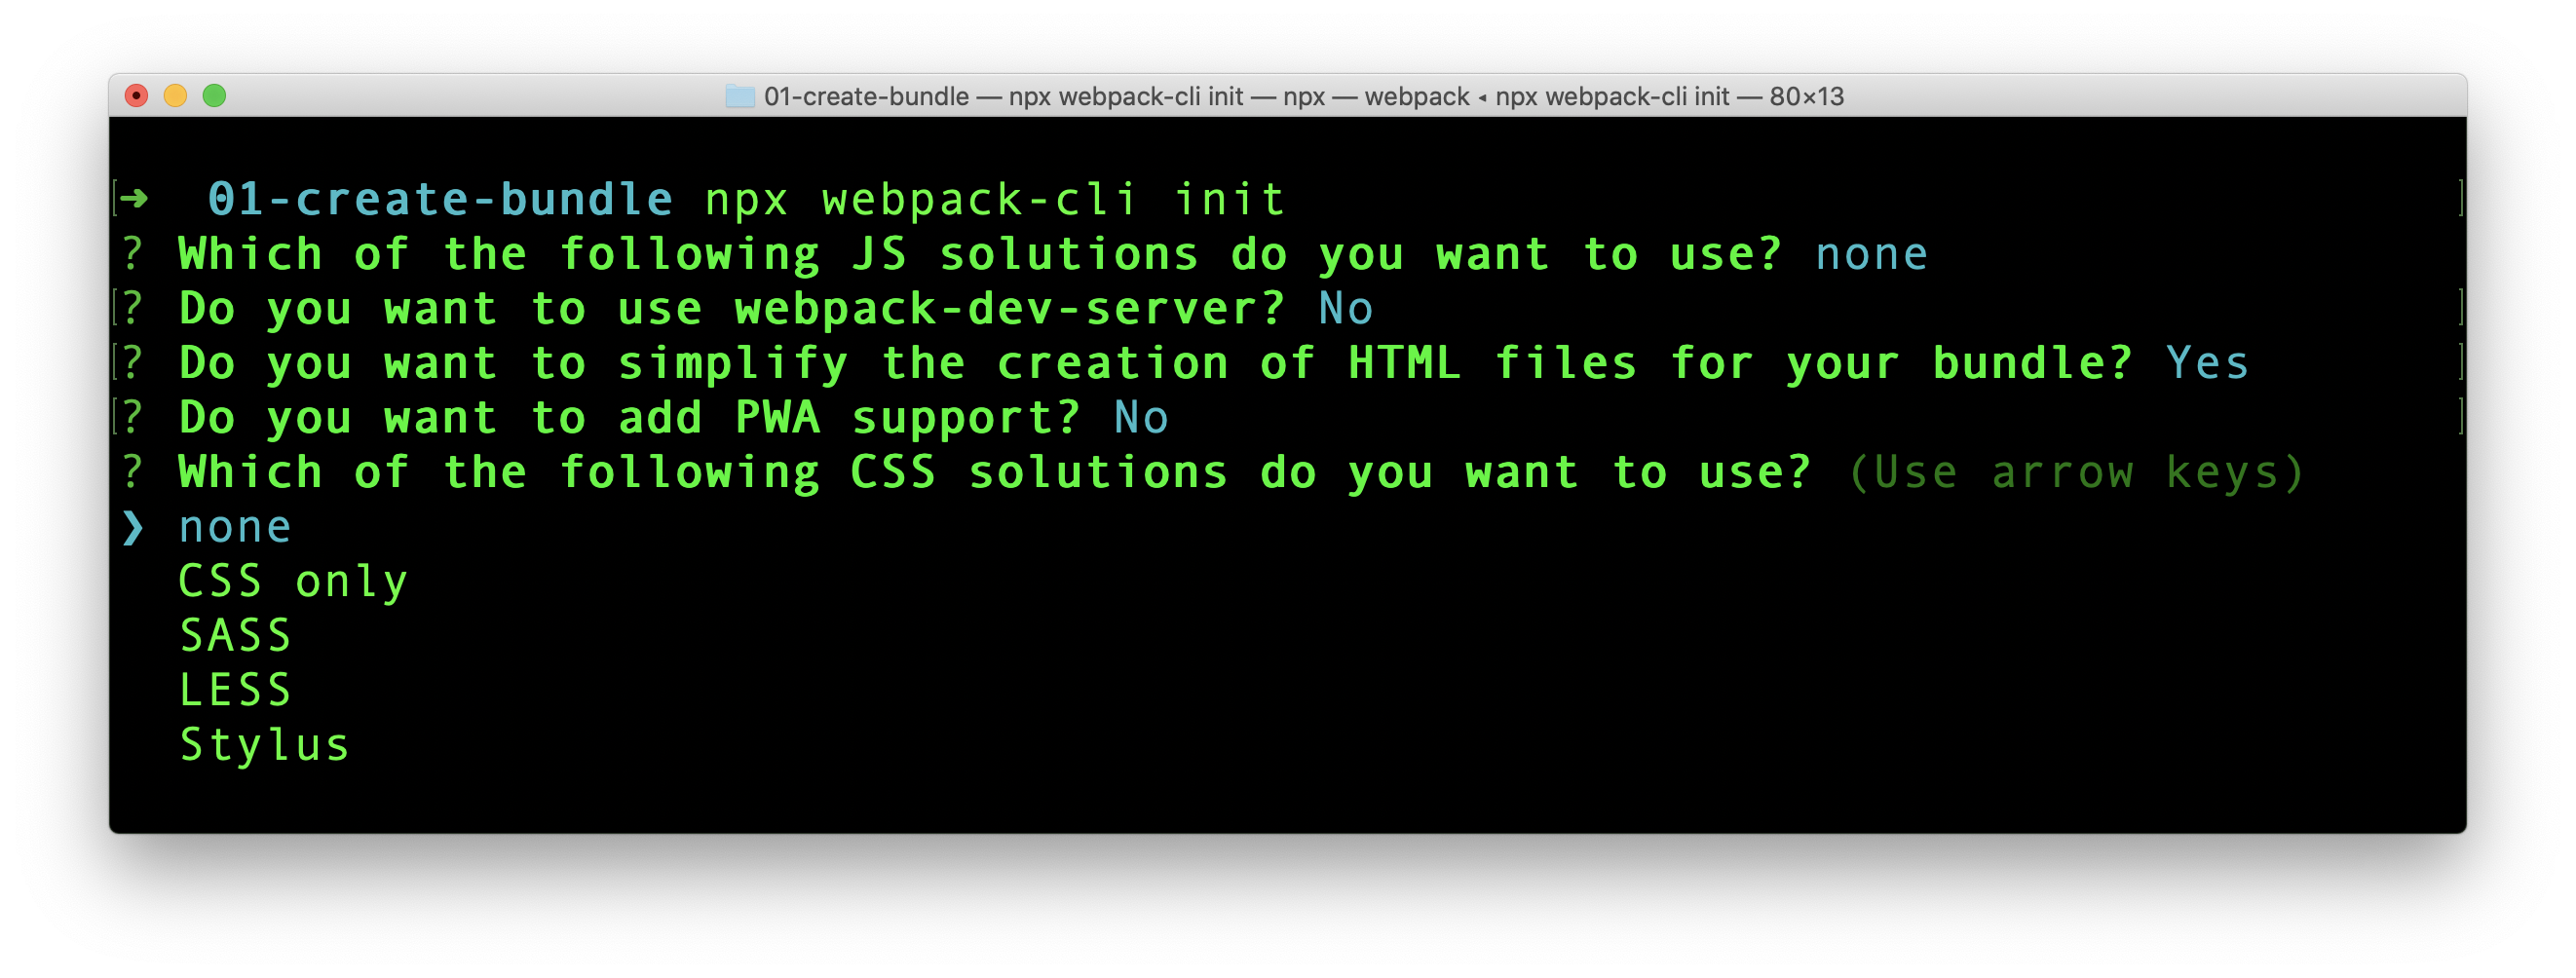
The process will create a boilerplate code with package.json, index.js and webpack.config.js file. If those files are already created in the project, there is option to overwrite or keep them.
Createapp.dev is a very interactive online application that gives us the configuration required for different project types. Give it a try.
Webpack is a static module bundler for JavaScript. Webpack finds out the required JavaScript files and its dependencies. Later, it creates a single or multiple bundle files to be used in production.
Let us directly dive into how a bundle is formed. Create a folder anywhere to try webpack. Then initialize the folder as a NPM package using:
yarn init -y
We need to install webpack and webpack-cli packages.
yarn add webpack webpack-cli
At the time of writing, Webpack version is 5.70.0.
Next, in package.json we add a script command to run webpack.
"scripts": {
    "build": "webpack --mode=development"
}
We are running webpack in development mode. By default, webpack builds the project in production mode. In production mode, the bundle file generated will be minified and uglified. We prefer development mode now to better understand what is happening behind the screens.
We need two JavaScript files to try webpack. First, create a file index.js under <project_folder>/src and add following content.
// /src/index.js

const second = require("./second");

console.log("I am from index.js");
console.log(second.message);
As we can see, index.js is using an object from second.js. So create second.js file in the same level as that of index.js and add the following content.
// /src/second.js

module.exports = {
  message: "I am from second.js",
};
We are done with our coding part.
We already have a script command in package.json to run webpack. So, go to terminal and run:
yarn build
It creates a new folder /dist and the folder contains a main.js file. This main.js is the bundle file generated by webpack.
If we open main.js file, we can see some complex JavaScript. We do not have to worry about that. It is the way how Webpack bundles. Now, if we search for contents from our index.js and second.js, we can find it in main.js.
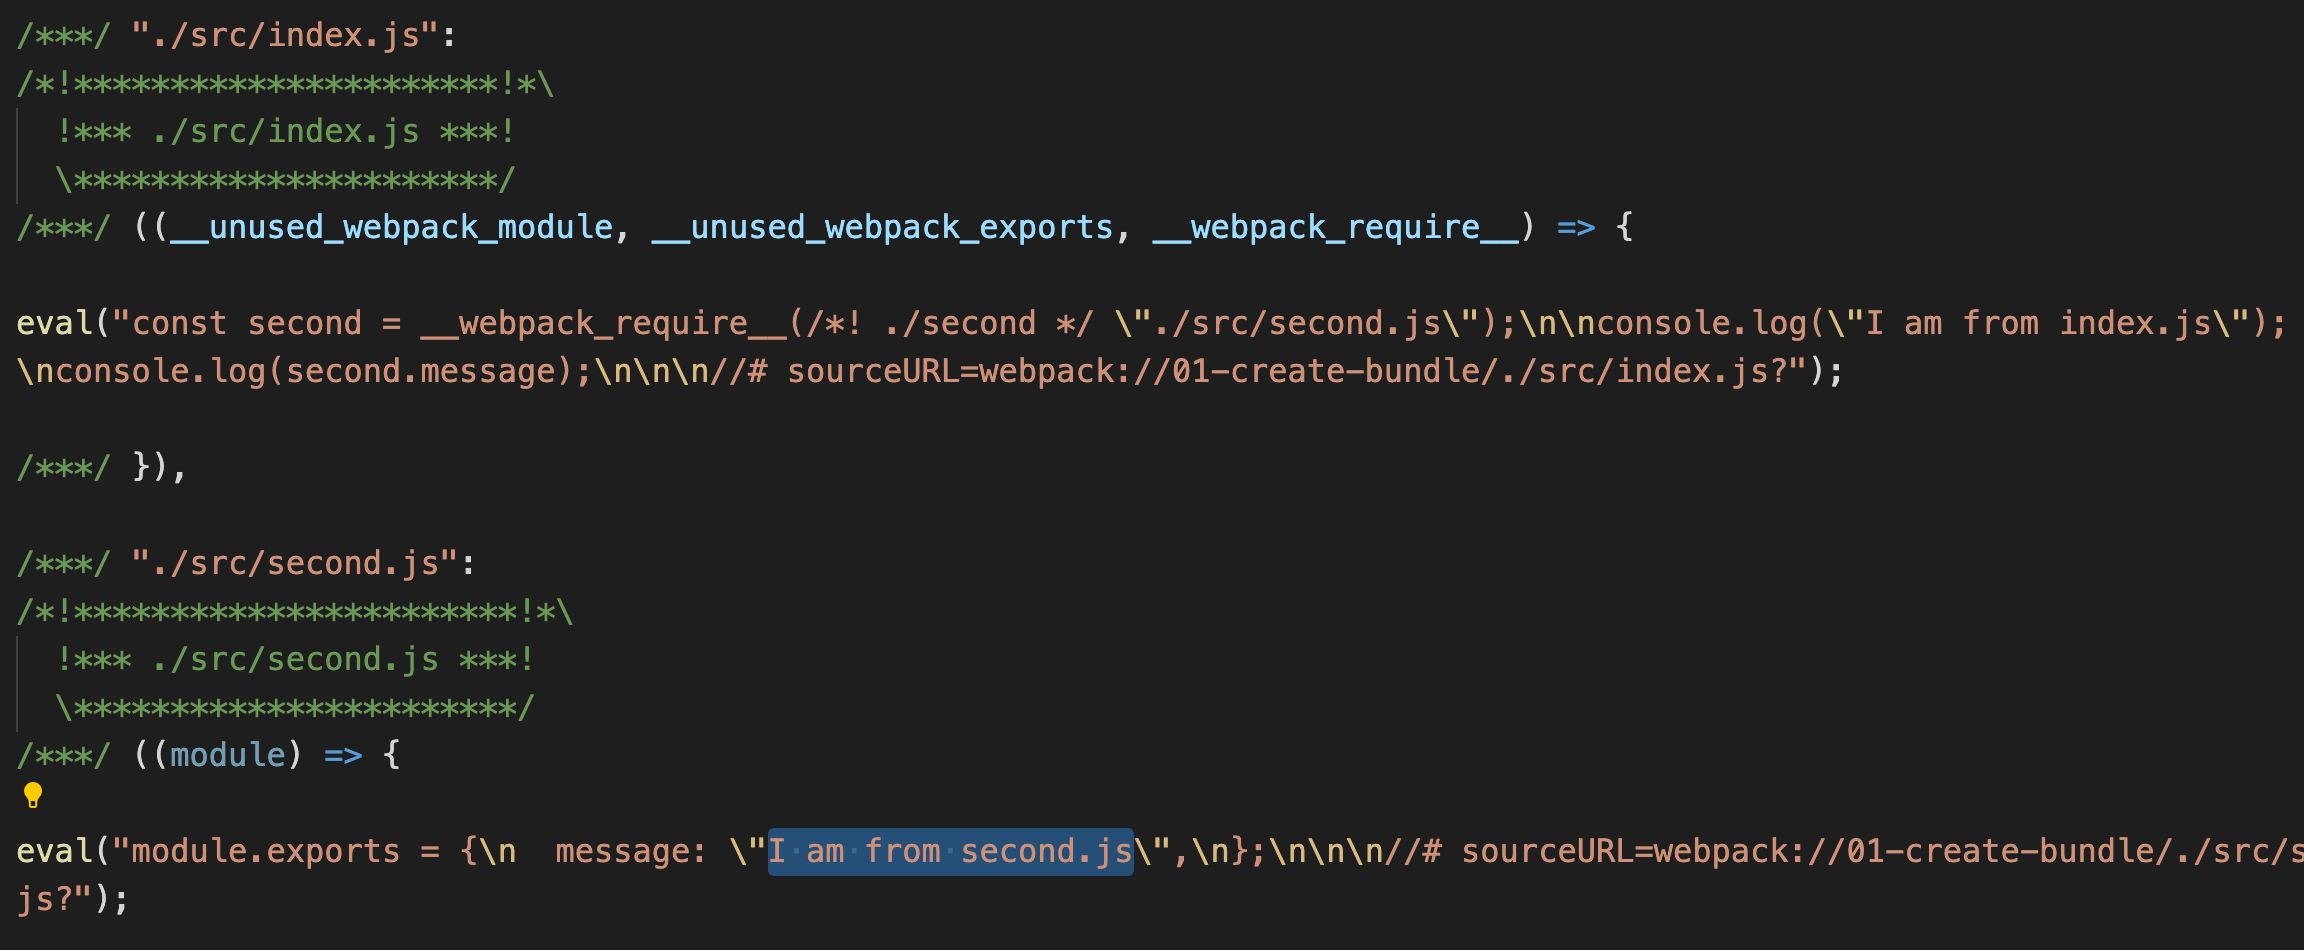
So does main.js contains all the logic to execute independently? Let us test that. Go to terminal and directly run the main.js using node.
node dist/main.js
We can see the console outputs in the terminal.
We did not write any instructions to webpack about our file structure. Still, webpack first took the index.js file under src folder, resolved dependencies of index.js and finally created a bundle file(main.js) in dist folder. This all worked because we wrote everything as per webpack's default configuration.
From webpack 4 onwards, we do not need to supply explicit configuration file. There are some default configuration. Taking the file from /src/index.js as the starting point is part of the default configuration.
Also, writing the output bundle file as main.js inside dist folder is part of default configuration.
So webpack, like a detective entering a house, enters into our project through index.js. It then climbs to second.js after seeing the require() statement. Like that, it crawls through the entire project and creates the bundle. This crawling process is also termed as Tree Shaking, where the unused code is eliminated.
Hope you got a basic idea about Webpack and its working.
In the previous two articles, we learned how to create and test a smart contract. In this article we focus on deploying a smart contract to a real network. Here are the links to previous two articles.
You need to go through above two articles to better understand this article.
When we say real network, there are networks like Darwinia or Mainnet. But these networks are paid and we are not going to use them now. We can spin up real network in our laptop itself as a localhost network. We will see how to do that soon.
Now, under scripts folder, create a new file deploy.ts. The file name can be anything. What we are going to do next is very similar to what we did in contract testing.
First, add package references to the file.
import "@nomiclabs/hardhat-ethers";
import { ethers } from "hardhat";
Next, we add a function that can deploy a contract to a network.
const deploy = async () => {
const HelloWorld = await ethers.getContractFactory("HelloWorld");
const hello = await HelloWorld.deploy();
await hello.deployed();
return hello;
};
deploy() function creates a contract hello and returns the contract once it is deployed in network.
We now create a handler function sayHello() that can take a contract and invoke it.
const sayHello = async (contract) => {
console.log(await contract.hello());
};
Next, we call both deploy() and sayHello() functions.
deploy().then(sayHello);
In order to run the deploy script, we need to first go to the terminal and navigate to our project folder. There, execute following command.
npx hardhat run scripts/deploy.ts --network localhost
Instead of deploy.ts, you need to substitute with the file name you have given. Above command tells to do the deployment in local network. For that there has to be a local network on the first hand.
If you are running above command for the first time, you will receive an error message saying:
(node:30727) UnhandledPromiseRejectionWarning: HardhatError: HH108: Cannot connect to the network localhost.
This is because in order to deploy to a network, first the network nodes should be present in localhost. For that run below code to create nodes in a new tab. We run it in a new tab, because the process will be running without giving back the command prompt.
npx hardhat node
Now the local network is up and running. It creates 20 nodes by default as shown below.
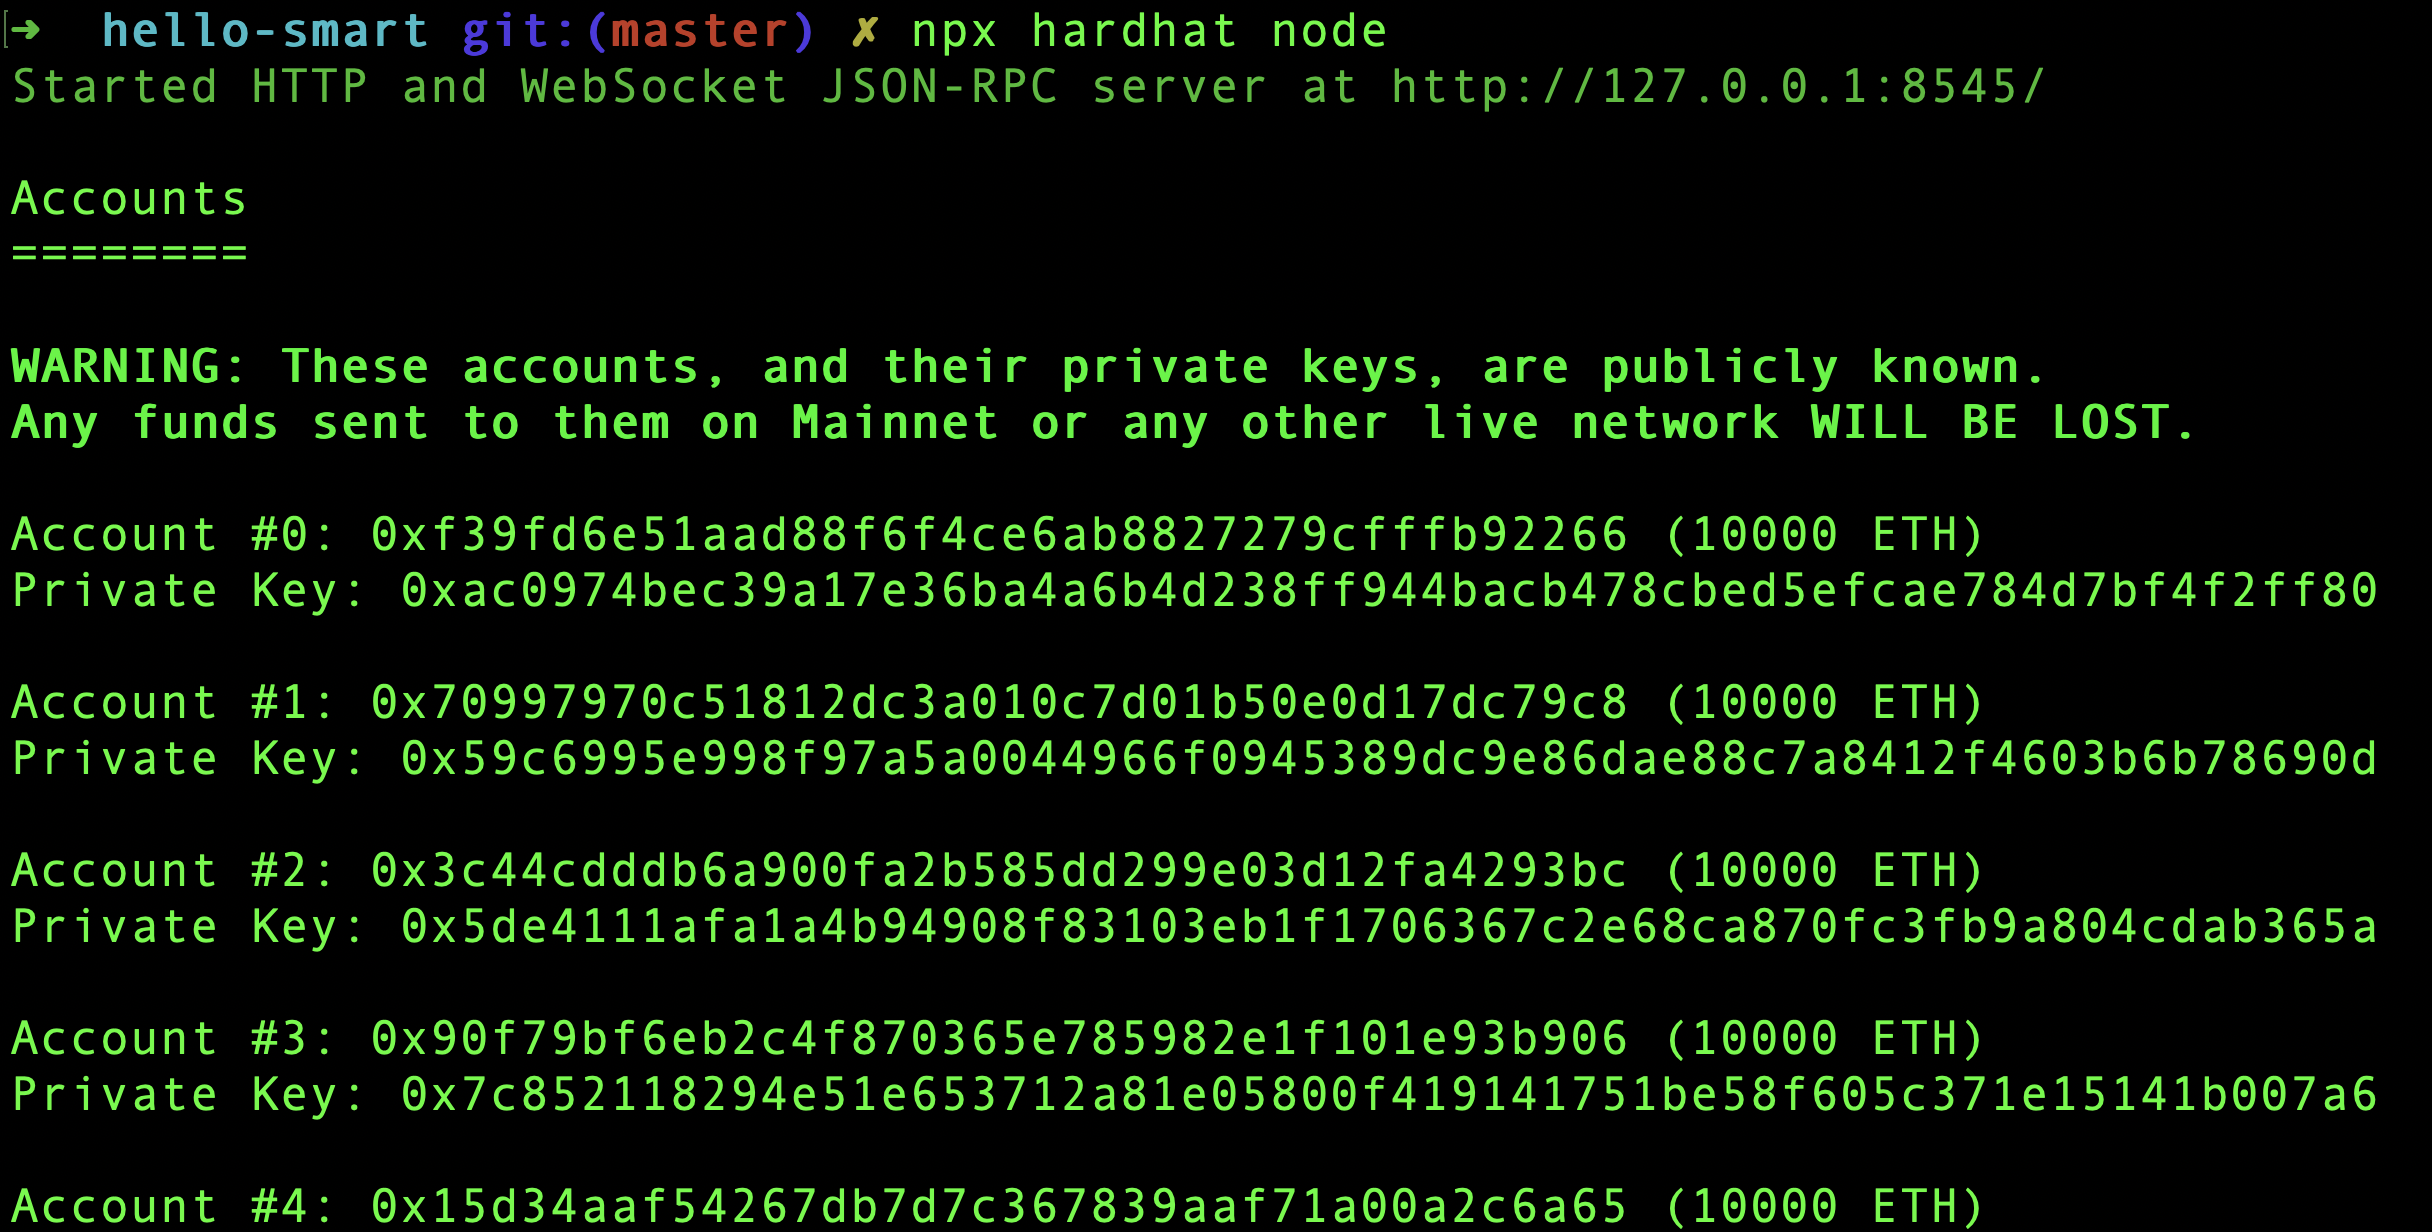
After the nodes are up, rerun deploy script. We should see the Hello World! text printed by sayHello() function.

Now we learned how to deploy a smart contract to a network. When it comes to production environment, the --network will be substituted by real networks.
In the previous article, How To Create Your First Smart Contract, we created our first smart contract. Next step is to test it.
We need to install few dependencies to setup our test environment.
yarn add -D @nomiclabs/hardhat-ethers ethers chai
@nomiclabs creates npm packages that makes working with hardhat much easier. It adds more capabilities and functions to easily work with hardhat.
@nomiclabs/hardhat-ethers is a hardhat plugin for integration with ether.js. Ether.js helps us to interact with Ethereum blockchain in a simple way.
ethers is a node package that contains complete Ethereum wallet implementation and utilities in JavaScript and TypeScript.
Next we need to install TypeScript dependency.
yarn add --save-dev ts-node typescript
Lastly, we need to install the test assertion library chai and related types.
yarn add --save-dev chai @types/node @types/mocha @types/chai
Now that we have installed everything to run TypeScript. So we need to change the file name of hardhat.config.js to hardhat.config.ts.
Next, open hardhat.config.ts file and add following import statements for ether package.
import "@nomiclabs/hardhat-ethers";
Now everything is done to write our tests in TypeScript.
In the previous article, we created 3 folders contracts, scripts and test to store related files. We need to now create a test file HelloWorld.ts inside test folder.
First we need to import required packages to run the test. So add below lines to HelloWorld.ts file.
import "@nomiclabs/hardhat-ethers";
import { ethers } from "hardhat";
import { expect } from "chai";
Next we use describe and it functions from mocha to write our test.
describe("Hello World", () => {
it("should say Hello World", async () => {
// Test code here
});
});
describe is used to structure and group tests in mocha. it creates tests. Now, inside the it callback function, add below 4 lines.
const HelloWorld = await ethers.getContractFactory("HelloWorld");
const hello = await HelloWorld.deploy();
await hello.deployed();
expect(await hello.hello()).to.equal("Hello World!");
First line picks the HelloWorld contract which we created in the previous article.
Second line deploys the contract to a network. In this case, the network is a test network spin up by hardhat and is dissolved immediately after the test. Everything is managed by hardhat.
Third line, await hello.deployed() makes sure that the contract is deployed. When we work with Ethereum, deployment will not happen instantly. This line waits to ensure that deployment is success.
Fourth line invokes the contract function and tests for the value returned.
In order to run our test, go to the project folder in terminal and run:
npx hardhat test
Sometimes, you may get below error:
Error HH13: Your Hardhat project uses typescript, but ts-node is not installed.
In that case, install ts-node again.
yarn add -D ts-node
Then run npx hardhat test again. If everything went well, we should see the test passing successfully.
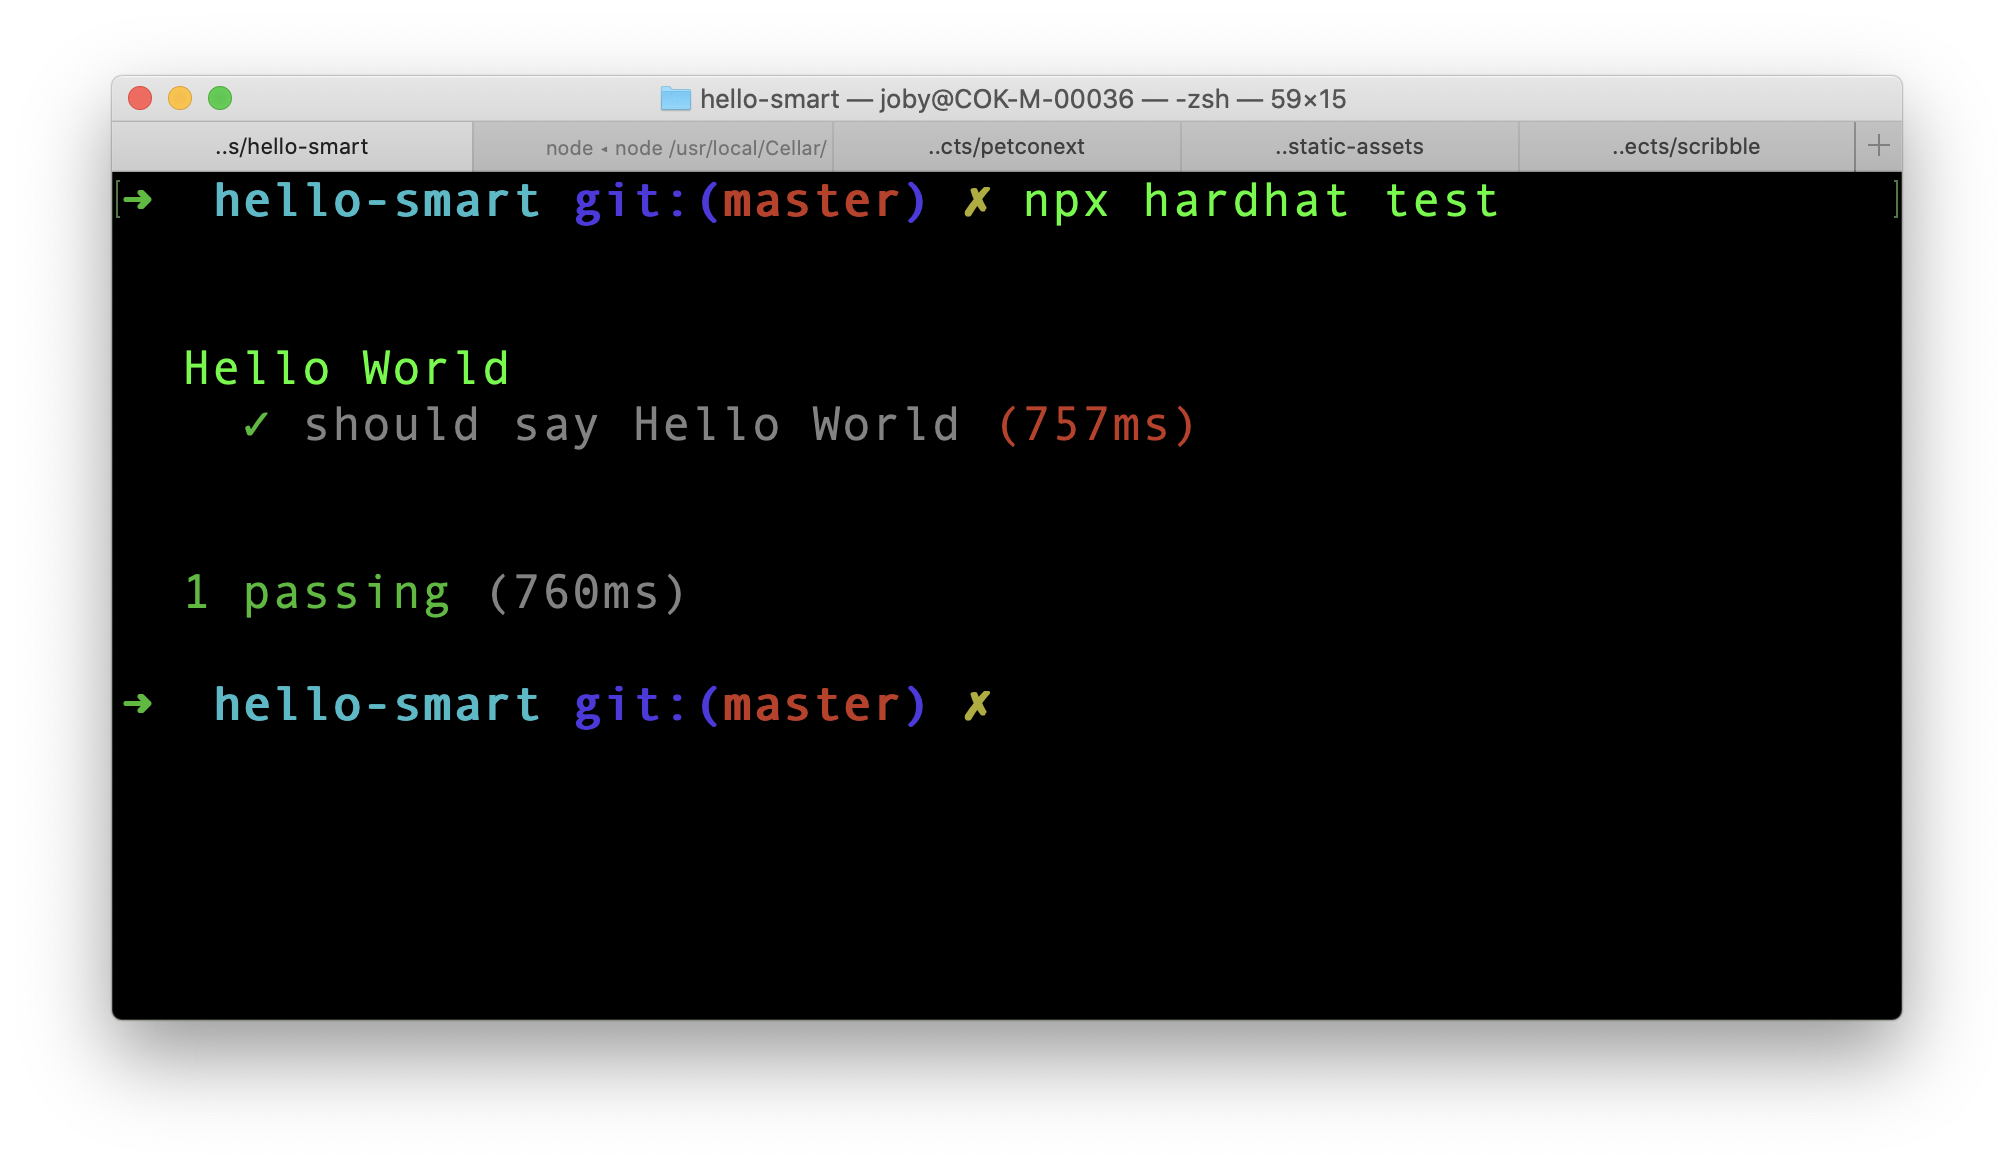
We successfully created a test suite for our smart contract and executed it. In the next part, we will go through the deployment process.
While working with Solidity, during compilation I got this error.
Error HH606: The project cannot be compiled, see reasons below.
The Solidity version pragma statement in these files doesn't match any of the configured compilers in your config. Change the pragma or configure additional compiler versions in your hardhat config.
This is caused due to mismatch in the compiler versions specified in hardhat config and that requested in solidity file pragma statement.
In my case, pragma in solidity file requested minimum version to be 0.8.0. But in hardhat.config.js the compiler version was 0.7.3. Updating version in hardhat config file to 0.8.10 fixed the issue.
Smart Contracts are programs stored on a blockchain that run when predetermined conditions are met. We are going to create our first smart contract.
Create a new folder and navigate to it.
mkdir hello-smart
cd hello-smart
Initialize Git to convert the folder to a git repository. Then initialize Yarn to convert the project to a node package. You can also use npm also, instead of yarn.
git init
yarn init -y
The skeleton is ready. Open the folder in a code editor. I am using Visual Studio Code. In the editor, create .gitignore file and add just one line to it.
node_modules
This will prevent Git from pushing node_modules folder to Git server.
Hardhat is an Ethereum development environment for us. It is a tool for building and deploying contracts to any Ethereum network. It facilitates frequent tasks like running tests, auto check code for any errors.
Add hardhat as a dev dependency to the project.
yarn add -D hardhat
Even though we installed hardhat in our project, we are going to run through hardhat steps using npx command.
npx hardhat
We are presented with the first question to start a hardhat project.
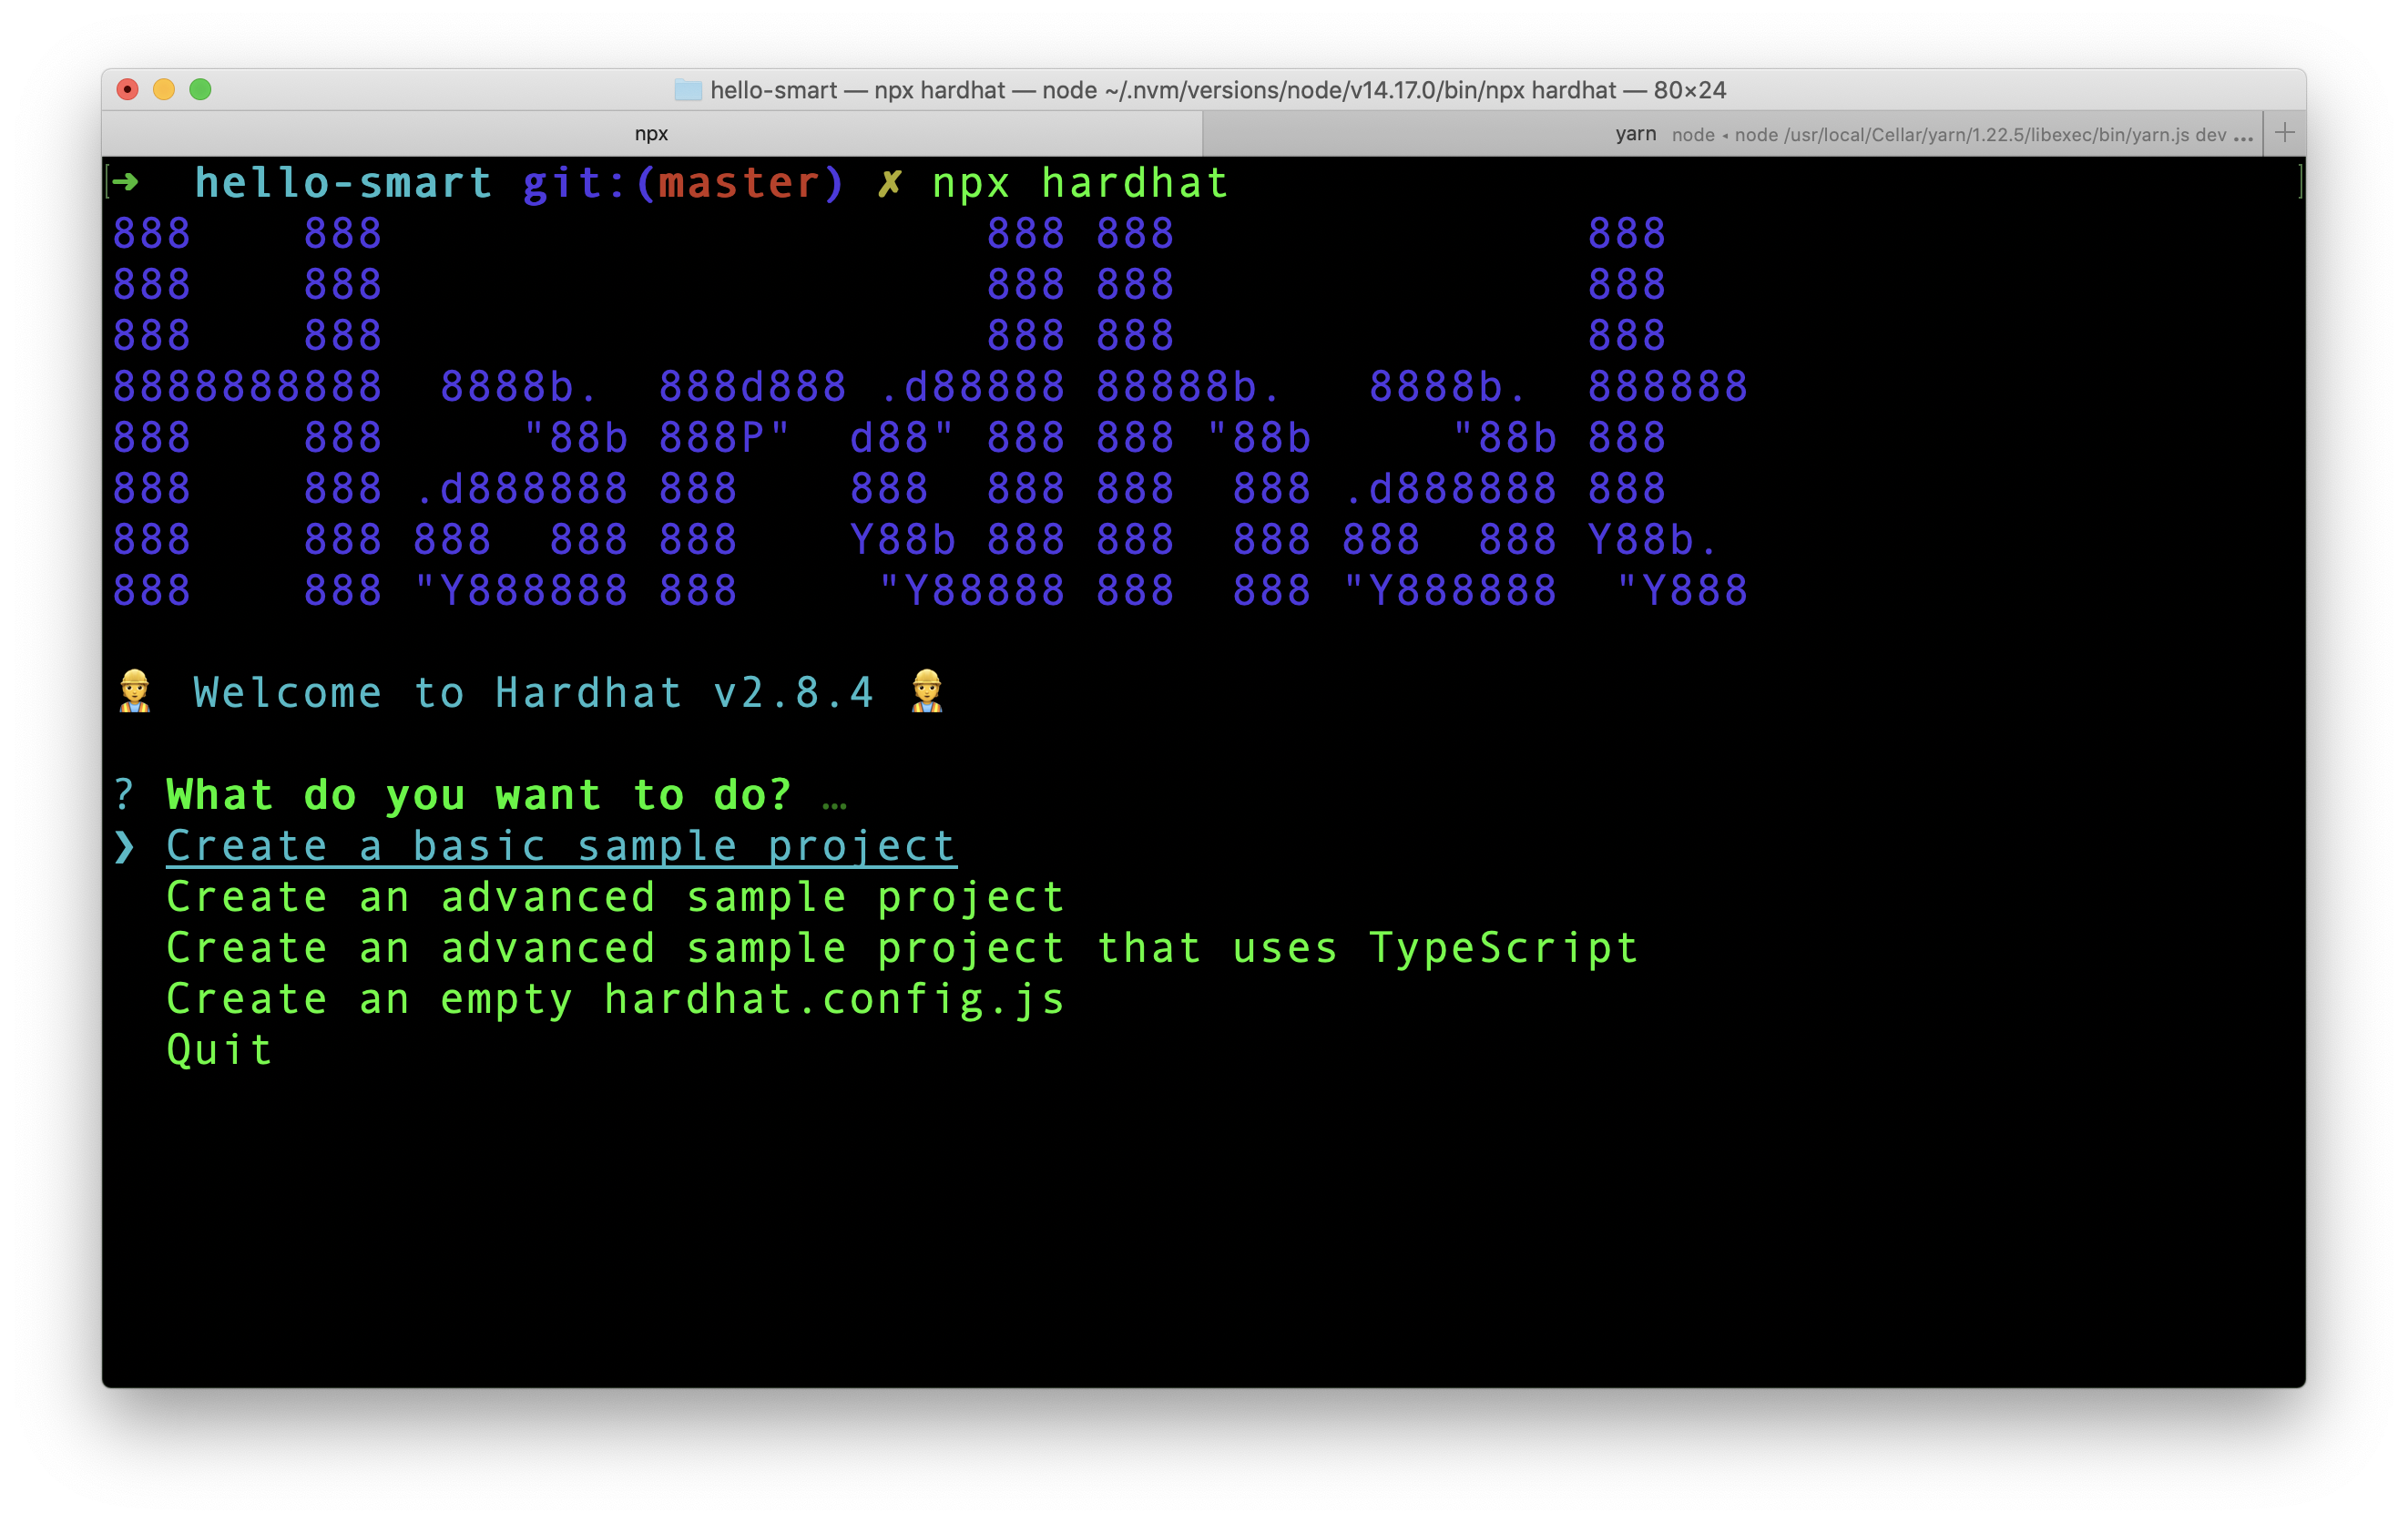
Select the 4th option from the list which is Create an empty hardhat.config.js and press Enter. A new file hardhat.config.js will be created in our project.
The typical folder structure for a smart contract looks like this:
project
- contracts
- mycontract.sol
...
- scripts
- deploy.ts
...
- test
- mytest.js
...
We store all our code for contracts under contracts folder. Files under scripts folder are used for deploying the contract. test folder contains test code.
Hardhat automatically takes code from contracts folder and compile each code. Also, when we run hardhat test command, it goes through test folder and run each tests.
Create a file under contracts folder and name it HelloWorld.sol. .sol file extension is for solidity, which is the programming language of Ethereum. Lets start filling the file.
First step is to tell Solidity, what compiler we expect.
pragma solidity ^0.8.0;
pragma is kind of pre-compilation level. It says that we need atleast 0.8.0 compiler level for compilation. You can imagine above line as package.json in node projects which tells what versions of tools to be used.
Next add following to the file.
contract HelloWorld {
}
The contract syntax looks similar to a class. In lot of ways it has similarities to a class. Contract is a state container with functions that can mutate the state. Contract also has a constructor. This constructor will be executed only once when deployed to a network.
Now add the below function inside HelloWorld contract.
function hello() public pure returns (string memory) {
return "Hello World";
}
As we can guess this is a normal function that is public and returns a string "Hello World". pure represents that this function does not read or update the contract state. As we can see, our hello() simply returns a hard coded string. So it is a pure function.
Here is the complete contents of HelloWorld.sol.
pragma solidity ^0.8.0;
contract HelloWorld {
function hello() public pure returns (string memory) {
return "Hello World";
}
}
Before compilation step, we need to verify that the compiler version in hardhat.config.js and what is requested in our solidity file matches. In our case, the compiler version in hardhat.config.js is 0.7.3. We need to update the version to 0.8.10 in hardhat config file. Then only it matches the version number in HelloWorld.sol file.
After making version changes, go to terminal and run:
npx hardhat compile
The contract should compile successfully.
Hardhat stores the compiled contract under artifacts folder which was dynamically created during compilation. If we open artifacts/contracts/HelloWorld.sol/HelloWorld.json, we can see all the information about our contract and also the bytecode which is required for Ethereum Virtual Machine.
After compilation, the next step is to deploy the contract to a test network. We will cover that part in the next article.
Next.js can create static HTML pages at build time. Static HTML pages can then be deployed in CDNs to improve page performance. Using next export command, we can create a static HTML site from a Next.js site.
Even without using next export, Next.js does automatic static optimization by generating HTML files for pages. If a page contains getServerSideProps or getInitialProps, Next.js will switch to render the page on-demand or per-request (meaning Server-Side Rendering). If both getServerSideProps and getInitialProps are NOT present, Next.js automatically create a static HTML file.
In my Next.js project, I created a new page for about. It contains following code.
export async function getStaticProps(context) {
return {
props: {
name: "Joby",
age: 35,
},
};
}
export default function About({ name, age }) {
return (
<div>
<h1>About Page</h1>
<span>
{name} is {age} years old
</span>
</div>
);
}
As you can see, in the above code getServerSideProps and getInitialProps are not present. Now when I run next build, I could see about.html generated under .next/server/pages/.
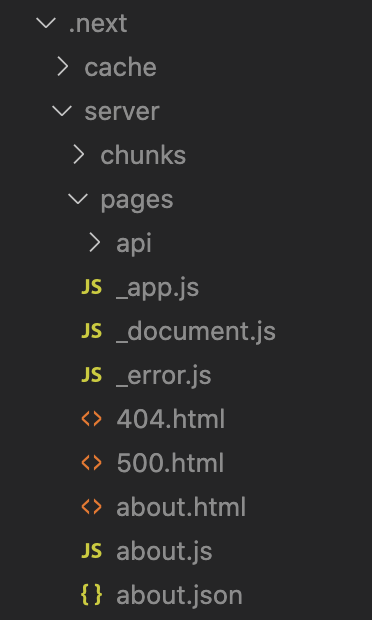
If there is getServerSideProps in the page, then, instead of about.html, Next.js creates about.js. The about.js is then executed in a node server like a normal Node.js application.
In my current project, we are hosting Next.js in AWS using Next.js Serverless Component. It is an eCommerce website. After integrating few APIs in product listing page, some browse pages started throwing below error when directly accessing the CloudFront url.
502 ERROR
The request could not be satisfied.
The Lambda function returned invalid JSON: The JSON output is not parsable. We can't connect to the server for this app or website at this time. There might be too much traffic or a configuration error. Try again later, or contact the app or website owner.
If you provide content to customers through CloudFront, you can find steps to troubleshoot and help prevent this error by reviewing the CloudFront documentation.
Initially we thought something was breaking from the backend and the API response was corrupted. But after reading through AWS documentation and understanding the working of Next.js Serverless component to an extend, this is what we found.
Next.js Serverless component is creating AWS Lambda function to run server side code. For improved performance, the Lambda functions are copied to Lambda@Edge and executed from there.
If a Next.js page contains getServerSideProps(), there is a server side execution. This server side execution happens at Lambda@Edge. Lambda@Edge then returns the response from getServerSideProps() to CloudFront . This response has a size limit of 1MB set by AWS. So if our response is greater than 1MB, Lamba@Edge truncates it and pass to CloudFront. Truncation makes the response invalid. When CloudFront tries to parse the invalid response JSON, this error is thrown.
We reduced the size of JSON object by optimizing the returned data from getServerSideProps() function and solved the issue.
Class Field Declarations feature is in Stage 4 of TC39 process. It is expected to be launched in the year 2022. This proposal was authored by Daniel Ehrenberg. Kevin Gibbons is the champion for this proposal.
In ES2015 we can declare classes using class keyword. Here is a simple class for counter.
class Counter {
constructor() {
this.count = 0;
}
incrementCount() {
this.count++;
console.log(this.count);
}
}
count is used to keep track of the count. Each time, incrementCount() is called, the value of count is incremented by 1.
const counter1 = new Counter();
counter1.incrementCount();
counter1.incrementCount();
Above code prints 1 and 2 in the console.
1
2
Field Declarations helps to declare the fields(count) immediately under Counter and improve code readability. Above class can be modified using field declarations as shown below.
class Counter {
count = 0; // highlight-line
incrementCount() {
this.count++;
console.log(this.count);
}
}
The output will be same, but the code is now more readable. In the above example, we have initialized the value of count. We can also just declare a variable without initialization.
class Counter {
count; // highlight-line
print() {
console.log(this.count);
}
}
const counter = new Counter();
counter.print(); // undefined
By default, any fields in a class are public. For example, consider below code.
class Counter {
count = 0;
increment() {
this.count++;
console.log(this.count);
}
}
Here count is a field declared to keep track of the count. Each invocation of increment() updates the count value and prints it. What if someone updates the count value outside of increment() method?
const counter = new Counter();
counter.increment(); // 1
counter.count = 5;
counter.increment(); // 6
counter.increment(); // 7
Since the count field is updated to 5, last 2 increment() methods print 6 and 7. How can we keep the count field private?. Only increment() method should update the value of count. We can set count as private by adding # before the field.
class Counter {
#count = 0;
increment() {
this.#count++;
console.log(this.#count);
}
}
Now let us see how previous invocation works. The output of each line is shown as comment.
const counter = new Counter();
counter.increment(); // 1
counter.count = 5;
counter.increment(); // 2
counter.increment(); // 3
We can see that counter.count = 5 does not throw any error. But there is no effect. The count field is udpated only through increment() method.
By making private fields, ECMAScript classes provides better encapsulation. There is no chance of accidental updation of internal fields.
Dynamic creation of private fields are not allowed. If we want to use any private fields, we need to declare it first on top of the class.
Here is a class that has one field(count1) declared on top. If we call setCount() method, two more fields, count2 and count3 are added to the instance object.
class Counter {
count1 = 0;
setCount() {
this.count2 = 0;
this.count3 = 0;
}
}
const counter = new Counter();
console.log(Object.keys(counter).length); // 1
counter.setCount();
console.log(Object.keys(counter).length); // 3
As we can see, before setCount() invocation, there was only one field. After the invocation, the field count is 3.
Now, let us convert all the fields as private.
class Counter {
#count1 = 0;
setCount() {
this.#count2 = 0;
this.#count3 = 0;
}
}
When setCount() is invoked, this.#count2 throws following error.
Uncaught SyntaxError: Private field '#count2' must be declared in an enclosing class
This says that, we can create public fields dynamically, but not private fields.
If you want to try this feature, it is available in following software versions at the time of writing.
TC39 is the 39th technical committee of an organization called ECMA International. ECMA(European Computer Manufacturers Association) is a standardizing body like ISO. TC39 is the committee that designs ECMAScript.
The TC39 committee is made up of people who are sent by member organizations that are companies and non-profits who are part of ECMA. The companies include browser manufacturers also. So the TC39 committee members either work for or are associated with these companies that are part of ECMA International.
A new feature or a proposal to ECMAScript can be suggested by anyone. The proposal then goes through 5 stages before standardization, starting with stage 0. To move the proposal from one stage to next stage, approval from TC39 is required.
Stage 0 is also know as strawperson stage. This is the start for submitting a proposal. A proposal is submitted in a free-form way. The submission can be done either by a TC39 member or a non-member through this discourse group or connecting through Matrix chat room.
TC39 Committee owns proposals at stage 1 and beyond. At stage 1, a champion is identified for a proposal who takes care of the advancement of the proposal. During this stage following things happen:
We can view the proposals that are in stage 1 here. In the list of proposals, you can also see the name of author and champion.
By the time a proposal reaches Stage 2, the initial specification for the proposal should be ready. During this stage, the TC39 precisely describe the syntax and semantics using the formal specification.
So, if a proposal reaches Stage 2, it means that the committee is expecting this proposal to be included in the standard eventually.
You can view the list of proposals that are in Stage 2 in TC39 Proposals repository.
If a proposal enters Stage 3 means,
We start seeing this specification implemented in some browsers. The feedback from implementation is then used to further refine the proposal.
Whenever a new feature is added to the standard, corresponding test scripts are added to Test262. For a stage 4 proposal, the test scripts should be complete. If you are interested, you can see the report of running the test suites online.
There should be atleast two compatible implementations which pass the acceptance test. Also, a pull request is sent to ecma262 repo with updated spec text. All ECMAScript editors needs to approve this pull request.
After all the approvals, the proposal is shipped as part of the standard. Now, the JavaScript engines like SpiderMonkey or V8 will start implementing these features.
Once a proposal reaches Stage 4, it will be included in the specification. ECMAScript General Assembly approves the new standard in July every year.
Objects in JavaScript consist of key value pairs. An object consist of different properties. Each property can contain a data value of certain type. Setting types of an object properties and recursively applying this process to nested objects defines the type of an object.
Here is a simple JavaScript object.
{
name: "Joby",
age: 35
}
As we can see, name property contains string value and age contains a number. Therefore, we can define the type of above object as:
{
name: string,
age: number
}
We saw the object and associated type. In actual code, this is how we can declare a variable and attach an object type.
let student: {
name: string;
age: number;
};
student = {
name: "Joby",
age: 35,
};
The object value we passed to student matches the defined type. What if we assign a different object to student as shown below?
student = {
name: "Joby",
age: 35,
year: 2022,
};
TypeScript in this case clearly points out the extra year property. See how detail TypeScript is in the error message.
error TS2322: Type '{ name: string; age: number; year: number; }' is not assignable to type '{ name: string; age: number; }'.
Object literal may only specify known properties, and 'year' does not exist in type '{ name: string; age: number; }'.
When a function accepts an object as argument, we can again define the type of object accepted by the function. If there is a function foo() that accepts above student object, this is how the function declaration looks like.
function foo(student: { name: string; age: number }) {
return;
}
We can then call the function foo() by passing an object with only name and age property.
foo({
name: "Joby",
age: 35,
});
Adding an extra parameter to the argument object throws an error. Let us pass an object to foo() that contains 3 properties.
foo({
name: "Joby",
age: 35,
year: 2022,
});
TypeScript clearly points out the error. Let me paste the exact error message below. See for yourself how descriptive it is.
error TS2345: Argument of type '{ name: string; age: number; year: number; }' is not assignable to parameter of type '{ name: string; age: number; }'. Object literal may only specify known properties, and 'year' does not exist in type '{ name: string; age: number; }'.
In an object, few properties can be optional. Consider the following object:
{
name: "Joby",
status: "married",
spouse: "Ninu"
}
In the above object, spouse key is not required if status is single. While defining type for such fields, we can mark a property as optional by ? operator. Here is the type definition for our object.
{
name: string
status: string
spouse?: string
}
Types of TypeScript variables can be explicitly set using annotations. Here is a TypeScript variable that is of string type.
let name: string;
Using the same annotation syntax, we can define the types of function arguments and return value. Here is a function that adds two numbers.
function add(a, b) {
return a + b;
}
Above function can also be used to concatenate 2 strings. To avoid that, we can specify number type for the function's arguments and return value. This is how we do that in TypeScript.
function add(a: number, b: number): number {
return a + b;
}
Above code says that function add() accepts only 2 numbers as arguments and return a number value. If we do not specify any types, by default the argument and return type will be any.
In the above typed function, we try to invoke the function with invalid arguments, eg: add(3, "a"), TypeScript will throw below error.
error TS2345: Argument of type 'string' is not assignable to parameter of type 'number'.
We can catch errors early and at the place of function definition, if we properly set the argument and return types.
When we define a return type for a function, TypeScript makes sure that a value of proper type is always returned.
function foo(): number {}
Above function foo() should return a number value. But it is clear that foo() is not returning any value. Therefore, TypeScript will throw below error.
error TS2355: A function whose declared type is neither 'void' nor 'any' must return a value.
TypeScript can define types for variables. It can be through type inference or through explicit type declaration.
In JavaScript, we can declare a variable using var, let or const. Here is a variable that is declared and initialized with a value 10.
let a = 10;
If above line is present in a TypeScript file, a is inferred as a number type variable by TypeScript. We do not have to explicitly set the type as number. If we try to assign a non-number value to a, TypeScript throws an error.
let a = 10;
a = "hello";
Above 2 lines are perfectly ok in JavaScript. But TypeScript is not happy with it. Here is the error message thrown by TypeScript:
error TS2322: Type 'string' is not assignable to type 'number'.
a = "hello";
Generally, TypeScript defines the type of a variable at the time of declaration itself. So, it is always good to plan the type of a variable in advance and assign it at the time of declaration itself.
Literals in JavaScript stands for specific data values like 6 or "hello". For a variable declared using const keyword, we cannot change the value later.
const a = 10;
As we learned in the previous section, TypeScript can infer the type of variable a. TypeScript is clever. It understands that a is a const variable. Therefore it can be assigned only with value 10. TypeScript defines the type of a as 10. Even though 10 is a value, for TypeScript it is called a literal type.
When a is assigned with a literal type of 10, assigning a different number results in a TypeScript error. For example, consider the following code.
const a = 10;
a = 20;
TypeScript will throw below error in the second line.
error TS2588: Cannot assign to 'a' because it is a constant.
What if we re-assign with value 10 itself? Can we expect TypeScript accepting that?
const a = 10;
a = 10;
Here also, TypeScript throws the same error:
error TS2588: Cannot assign to 'a' because it is a constant.
TypeScript respects the rules of JavaScript first. Then only it will check for its own rules. Re-assigning to a const variable is not allowed in JavaScript itself. So, TypeScript helps us by finding such errors at compile time itself.
Sometimes we declare a variable without initialization. There can be different reasons for that. One being passing the value from one scope to another like below.
let apiResponse;
function callAPI() {
apiResponse = "data";
}
function printResponse() {
console.log(apiResponse);
}
In this case, we do not know what data will be set to apiResponse from the API. Therefore, what TypeScript will do is, it sets the type of apiResponse as any. As the name suggests, a variable with type any can accept any data values.
Below TypeScript code will not throw an error.
let a;
a = 10;
a = "hello";
That is because, the first line inferred any type for a. Now a can accept any data values.
We can explicitly set the type of a variable using type annotations. It is better to use type annotations only if required. If TypeScript can infer the type automatically from the initialized value, we do not have to use type annotations. This keeps the code cleaner.
If we want to restrict a variable only to accept Date objects, we can do below annotation.
let dob: Date;
Now if we try to assign a number to dob, it will throw below error.
error TS2322: Type 'number' is not assignable to type 'Date'.
We now know how TypeScript treats variables and how types of variables are determined.
Happy learning!
In TypeScript project, if you find a .d.ts file, it is a TypeScript Declaration file. While compiling a TypeScript file, the compiler can strip all the type information and store it in this declaration file. The generated JavaScript file will not contain any TypeScript specific information.
In order to generate a separate .d.ts declaration file, we need to set declaration property value to be true in tsconfig.json.
{
"compilerOptions": {
"outDir": "dist",
"declaration": true, // highlight-line
"target": "ES6"
},
"include": ["src"]
}
My index.ts file contains following code.
function add(a: number, b: number): number {
return a + b;
}
As per the TypeScript config file, the compiled output needs to be stored in /dist folder.
When we compile the TypeScript code, a TypeScript declaration file with name index.d.ts is also created and stored along with the output index.js file. Here is how the declaration file looks like.
declare function add(a: number, b: number): number;
As we can see, the declaration file contains the function add() with only the type information. Where as the generated output JavaScript file contains pure JavaScript code without any hint of TypeScript.
// index.js
function add(a, b) {
return a + b;
}
Then what is the use of declaration file? For people who just requires JavaScript can take only the JavaScript file and use it. Whereas people who work with typescript can make use of the type declaration file to validate the code during development or while building the project.
The goal of this article is to learn how to setup and compile a TypeScript program. We use tsc compiler command to perform the compilation. We also learn how to set the level of JavaScript that comes out of TypeScript compiler.
Create a folder anywhere to store the project files. I have created a folder named ts-intro. Inside the folder, create 3 files.
package.jsontsconfig.jsonsrc/index.tsWe need only one dependency for this project. That is typescript. So, here is how our package.json looks like.
{
"name": "ts-intro",
"devDependencies": {
"typescript": "^4.5.5"
},
"scripts": {
"dev": "tsc --watch --preserveWatchOutput"
}
}
The dev command will run the TypeScript compiler(tsc) along with some options. --watch flag watches for any file change and does compilation again if there is any source file change. --preserveWatchOutput is to retain the console outputs even after re-compilation.
Now, that is it about package.json file. Let us understand the second file, tsconfig.json.
When we run tsc command, if a tsconfig.json file is there, TypeScript will parse that file for options. The settings in the file is applied during TypeScript compilation. Here is our tsconfig.json file.
{
"compilerOptions": {
"outDir": "dist",
"target": "ES3"
},
"include": ["src"]
}
We are passing 2 compiler options. outDir is for output directory. Here, we are telling TypeScript to store the output in dist directory. If we does not specify this option, TypeScript by default puts the output JavaScript file alongside the TypeScript files. Keeping a separate output directory makes development easier.
If we want the output JavaScript to support ES3 browsers(Eg: IE6), then we need to set the value of target to ES3. Note that, more backward compatibility means the generated JavaScript files will contain more code. So, we do not have to set this option to older versions unnecessarily.
By mentioning "src" in include array, we specify that all our TypeScript files will be in src folder. --watch flag will be watching for any file changes under the src folder.
We can pass all compiler options as command line flags. But as the project gets bigger, having a separate config file is easier to manage and version.
We are going to write our TypeScript code in this index.ts file. First, paste below code to index.ts file.
let a = 10;
What we are going to test is:
let keyword to an ES3 code?/dist folder?Before starting the execution, we need to install the packages. For that navigate to project folder in terminal and run:
npm install
Above command will install typescript dependency. Once installation is complete, run the dev script using:
npm run dev
I could see /dist folder getting created. Inside the dist folder, an index.js file is present with following code:
var a = 10;
As we can see, TypeScript converted the let keyword to var for ES3 compatibility. What if we update the target value in tsconfig.json to ES6? Then let keyword is kept as such in the output JavaScript file.
So far we tried only JavaScript code in index.ts file. Let us try a simple TypeScript code.
function add(a: number, b: number): number {
return a + b;
}
Our aim is to restrict add() function to accept only numbers. After compilation the output JavaScript file contains following code:
function add(a, b) {
return a + b;
}
Wait! Where is the type check? I was expecting TypeScript to add type checking code like:
function add(a, b) {
if (typeof a === "number" && typeof b === "number") return a + b;
else return "error";
}
That will not happen. TypeScript is a static type checker. It does not do any code logic modification. Example, how can TypeScript decide what to do if an error occurs? Does it need to return a string with "error" or throw some exception. All these confusions will occur. So TypeScript will do only build time type check with the annotations given to it.
For example, in the above TypeScript code if we call the function with a string value like below, TypeScript can identify the error at build time itself.
function add(a: number, b: number): number {
return a + b;
}
add("a", "b");
Now TypeScript will throw below error in terminal:
src/index.ts:5:5 - error TS2345: Argument of type 'string' is not assignable to parameter of type 'number'.
5 add("a", "b");
We learned how to setup a simple project that can compile TypeScript files. We learned how to provide compiler options using tsconfig.json file. We understood how Static Type checking works in case of TypeScript. This article can be a starting point for further TypeScript experiments.
TypeScript is a syntactic superset of JavaScript. It means, it starts with basic JavaScript syntax, and then start building more type specific syntax on top of it. TypeScript is an open-source project maintained by Microsoft. The main goal is to add types to JavaScript.
Here is an example TypeScript code to declare a string type variable.
let name: string;
A TypeScript code is compiled by a TypeScript compiler and outputs JavaScript code.
One reason is developers can be bring their intent to the code. For example, below function is to add 2 numbers, NOT to concatenate 2 strings.
function add(a, b) {
return a + b;
}
But how to express our intent? We can do using TypeScript.
function add(a: number, b: number): number {
return a + b;
}
Now if somebody use the function like add("b", 3), TypeScript compiler will throw an error.
Second reason is TypeScript can detect some errors at compile time rather than at run time. Examples are:
null or undefined values in variablesThird reason is the code development experience with TypeScript. TypeScript gels well with Visual Studio Code. Both are from Microsoft. When working with TypeScript, the intellisense support and documentation support is great.
If you want to try TypeScript syntax quickly, TypeScript language provides an online editor at https://www.typescriptlang.org/play. Also https://www.typescriptlang.org/ is the official website of TypeScript.
Another question that comes to developers is about future JavaScript. Will JavaScript in near future bring type support? I don't think so.
Assume, JavaScript bring following syntax tomorrow:
string name = "Jack";
It is going to break a lot of JavaScript code floating on web starting from 90s. So it is good and advisable to learn TypeScript.
When using Next.js Serverless Component to deploy a Next.js application to AWS Lambda, a Cloudfront distribution is automatically created. If by any chance, we delete the Cloudfront distribution directly from AWS console, the next time when we try to deploy to AWS, an error is thrown as below.
NoSuchDistribution: The specified distribution does not exist.
This is happening because, when we deploy our application, the Serverless framework creates two new folders in our project folder. They are .serverless and .serverless_next.
Inside .serverless folder, Serverless is storing the name of earlier created cloudfront distribution id. What we need to do is to delete both these folders and try again. It should work.
Next.js is a React framework that helps us to build isomorphic web applications easily. Isomorphic applications are those web applications which can be rendered either in the client side or in the server side. In a real world project, building an application and deploying it to server should be automized using any CI/CD tool. In this article, we will perform following steps.
Here, Gitlab is the Git server. It can be different for you like Bitbucket, Github and so on. Also, the CI/CD used is also from Gitlab. For other CI/CD tools, the syntax will be different but the base algorithm will be same.
First step in our process is to setup a Next.js application. For that you need to have Node.js installed in your machine. After that run following command in terminal.
npx create-next-app@latest
Above command asks for a project name. It then creates a folder with that name and then setup your Next.js application in that folder. If you have difficulty in setting up a Next.js application, you can also refer to this article. Refer to Create Next.js Application section.
Next, create a repository in Gitlab and push the current code to the repo. My repository name is Next.js Intro.
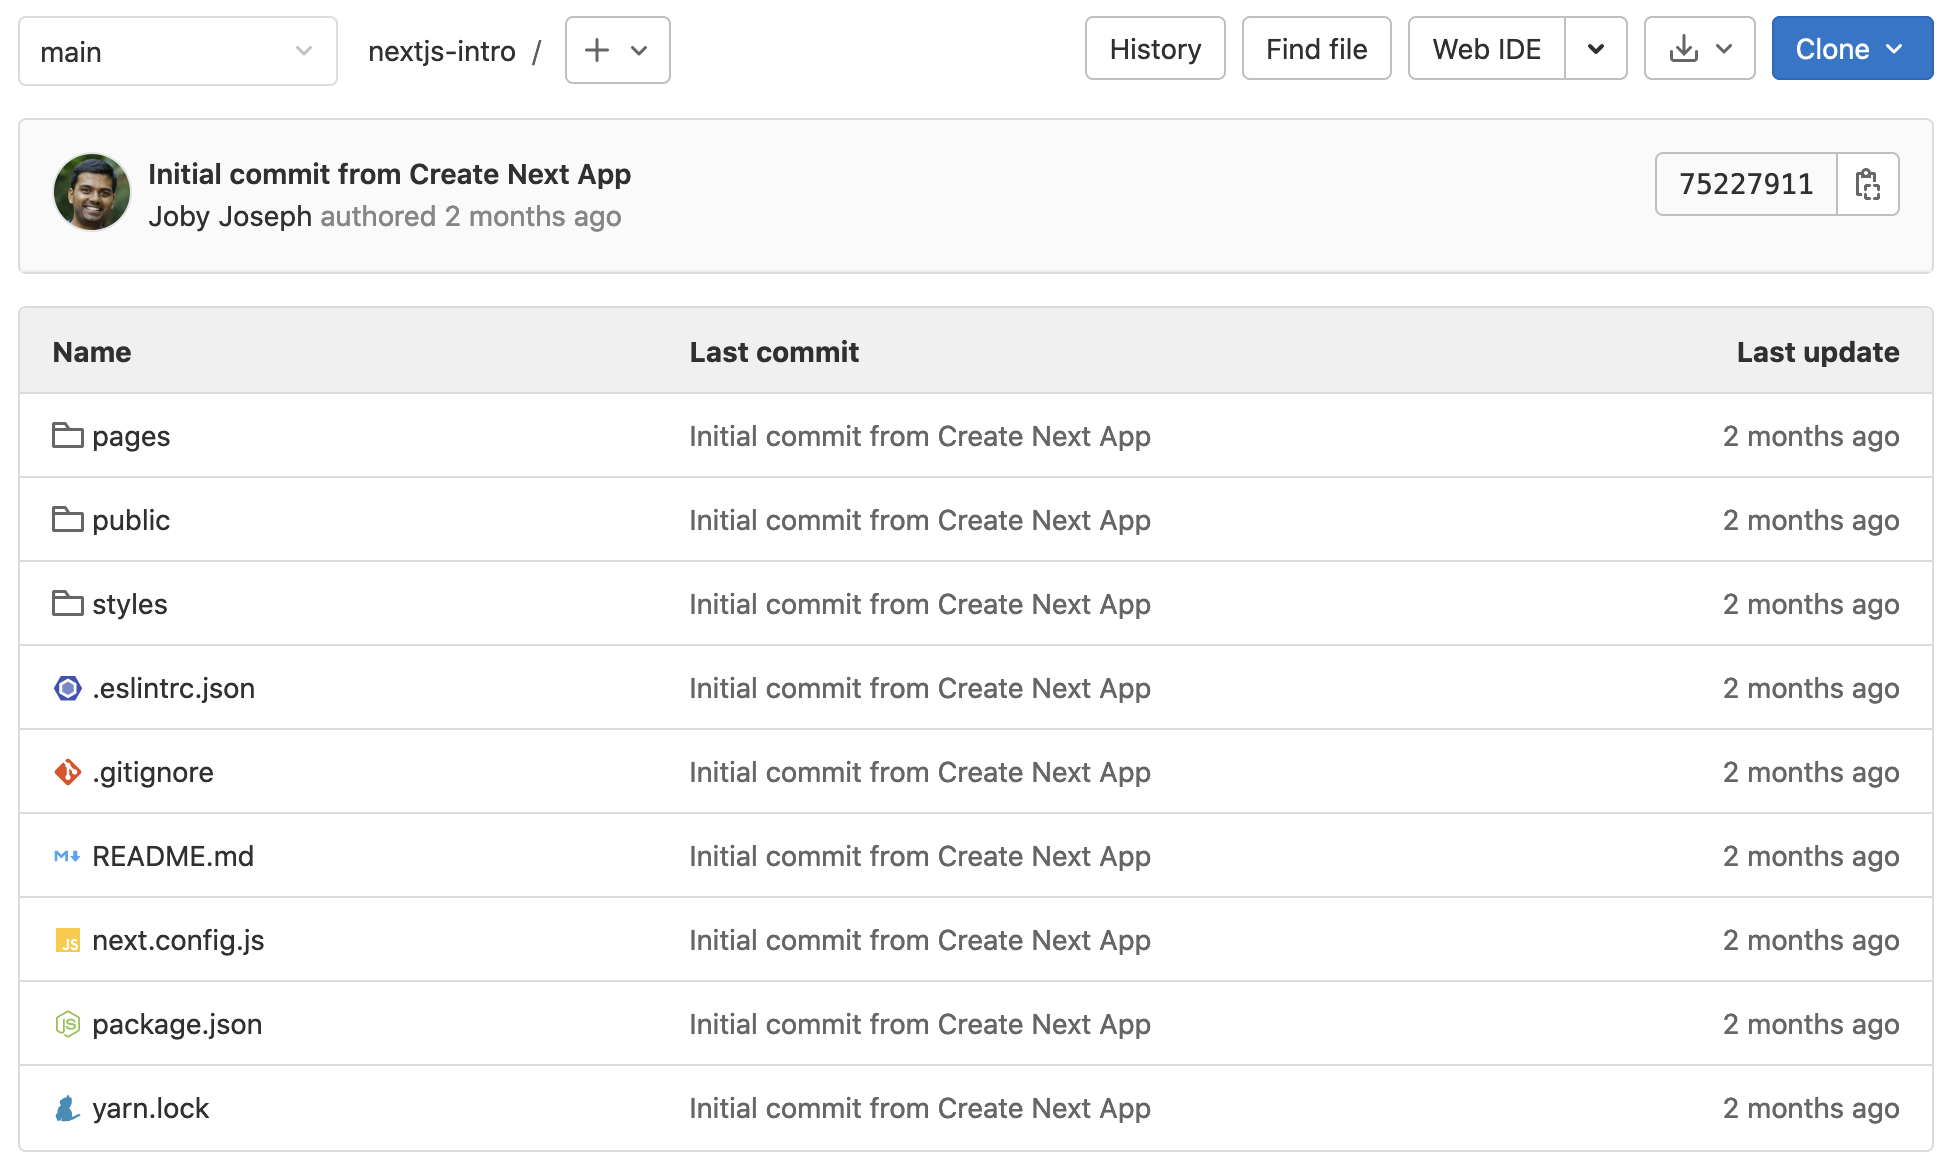
The Gitlab repo looks like above.
Serverless is a NPM package using which we can upload our Next.js application to AWS Lambda. To install that, go to our Next.js app root folder and run below command.
npm install --save serverless
Now serverless package is added to our Next.js project. The package name is also appended to dependencies section in package.json file. Next, we need to create a new command in package.json to invoke our serverless package. For that, open package.json file of our Next.js application. Under "scripts" section, add below key-value pair.
"deploy": "serverless"
By adding above command, we can run npm run deploy in terminal to invoke serverless. When serverless command runs, it executes the set of tasks written in serverless.yml file. Right now, we do not have that file in our project. So, create a serverless.yml in the project root folder.
In the yml file, add the following content:
myNextCICDApplication:
component: "@sls-next/serverless-component@latest"
The @sls-next/serverless-component is written exclusively for Next.js. By adding the reference to it in serverless.yml file, serverless now know the steps to deploy our Next.js application to AWS Lambda@edge.
Ok, now serverless is ready to upload our Next.js application to AWS. But which AWS account? For that, we need to set two environment variables, AWS_ACCESS_KEY_ID and AWS_SECRET_ACCESS_KEY.
First take terminal. Navigate to the folder of our application. If you are using a Mac machine, run following commands to set environment variables.
export AWS_ACCESS_KEY_ID=<your access key id here>
export AWS_SECRET_ACCESS_KEY=<your secret access key here>
You can confirm if the environment variable is properly set by running printenv in Mac. For other OS, the command might be different.
After setting environment variables, run npm run deploy in terminal. That will execute our serverless command. We can see the deploying process.
Once the deployment is complete, the serverless component, gives the AWS cloudfront url to access our site.
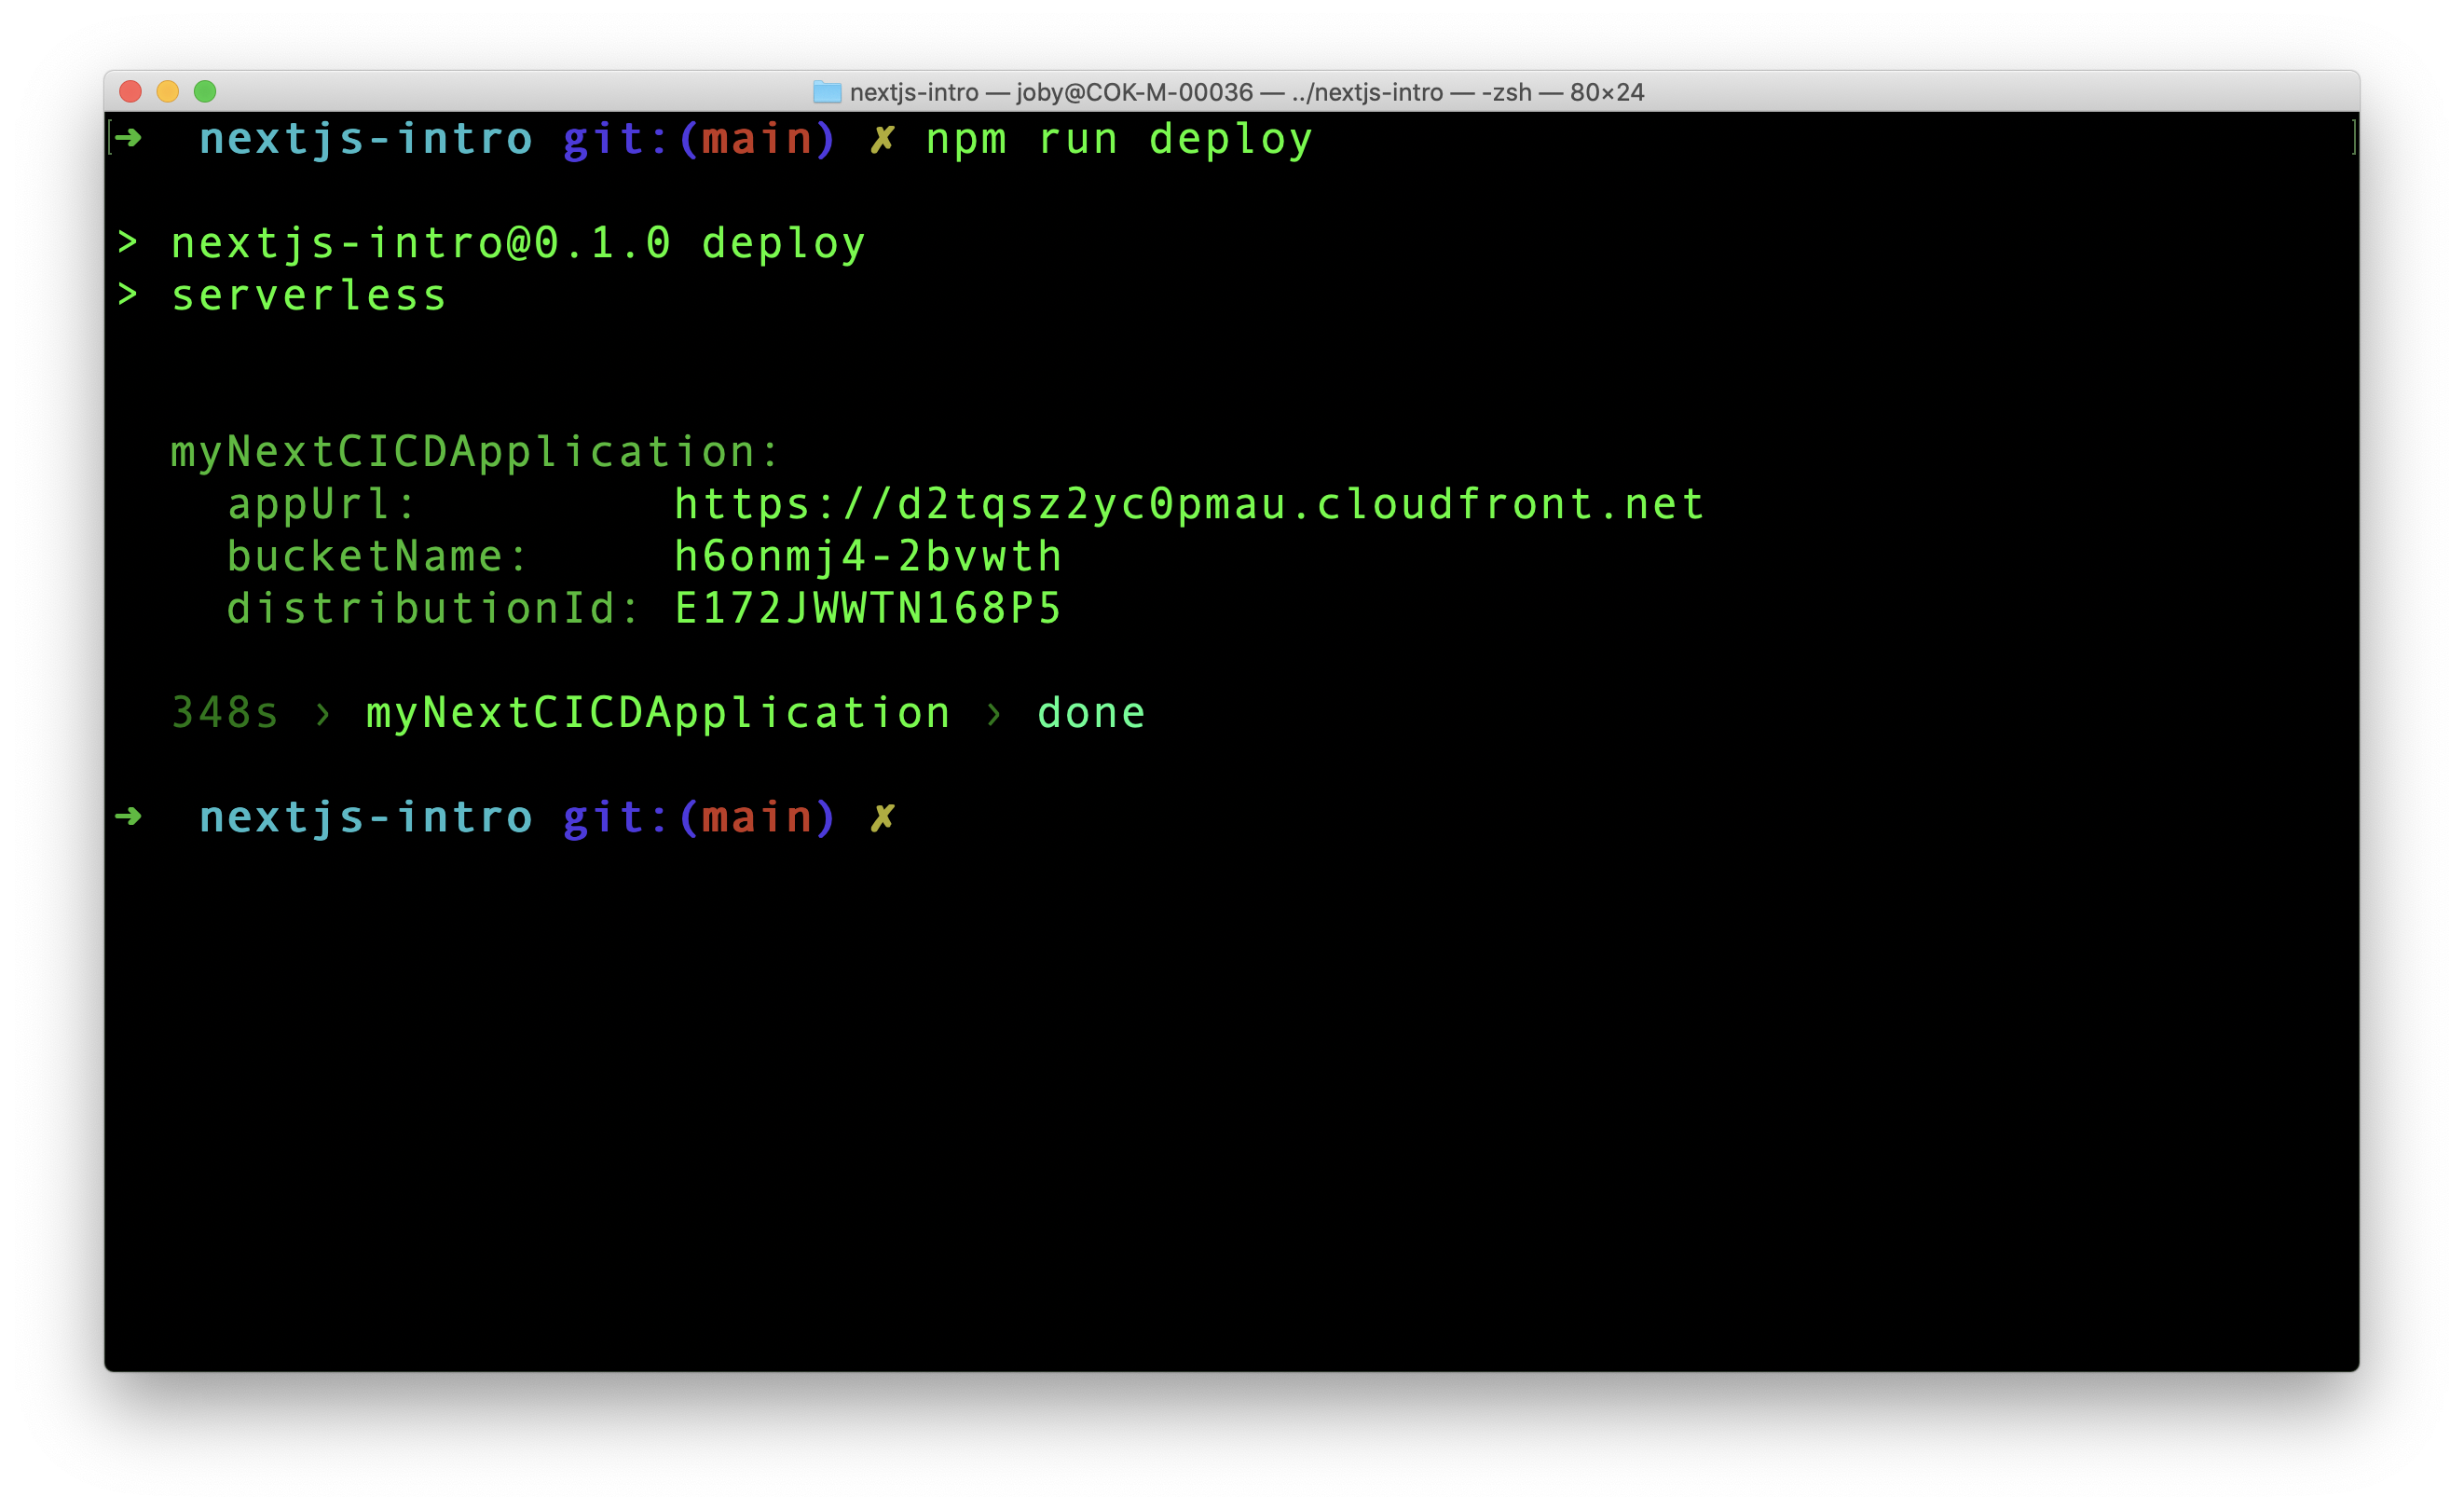
Push the new changes to the project repo in Gitlab. The main changes are related to serverless package. Just to ensure that we are in sync, our project structure now looks like this.
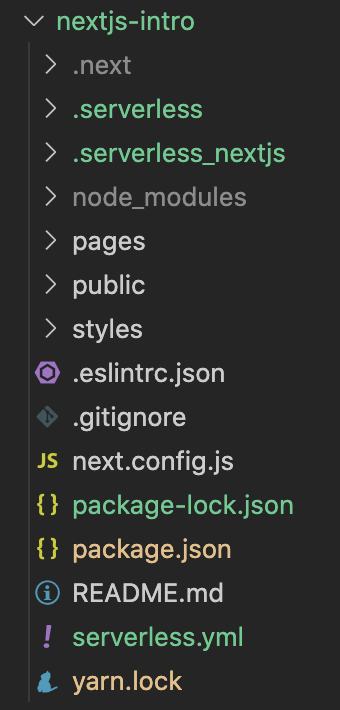
Now, its time to tell Gitlab CI/CD to handle the build and deployment. Gitlab has all necessary files to do that in the repository.
First we need to be clear about the expectation from Gitlab CI/CD. Here is the flow of process:
main branchJust like serverless is expecting a serverless.yml file, Gitlab CI/CD expects a .gitlab-ci.yml file in our project. A software called Gitlab Runner is the one who listens for change and execute the jobs defined in the yml file. We are going to implement the steps mentioned above in this yml file.
To start with, create .gitlab-ci.yml file in the project root.
In order to run our project, we need a Node.js environment. We can use a Docker image here using image property.
default:
image: node:16.13.1
In Gitlab CI/CD yml file, we can define different jobs. A job contains a set of scripts to be executed. There are ways to run multiple jobs serially or parallely. Let us create a job in our yml file.
stages:
- deploy
aws-deploy-job:
stage: deploy
script:
- npm install
- npm run deploy
Before all jobs, we define stages. In our code, there is only one stage, deploy. There can be multiple stages. aws-deploy-job is a job name. That job is connected to deploy stage. All the commands under scripts are executed when this job is running.
When Gitlab runs our script, the serverless framework in our project will search for AWS credentials. It is there in our local machine, but not in Gitlab. We cannot directly and openly paste AWS credentials in .gitlab-ci.yml file. That causes security breach. Instead, there is an option to define variables and their values in Gitlab console. This console can only be accessed by authorized users.
Let us set two variables in the console for AWS access key ID and AWS secret access key. For that, Go to Repo Settings > CI/CD > Variables section. Expand the section and add a new variable like below.

In similar manner, add another variable for Access Secret. Here is how the Variables sections looks finally.
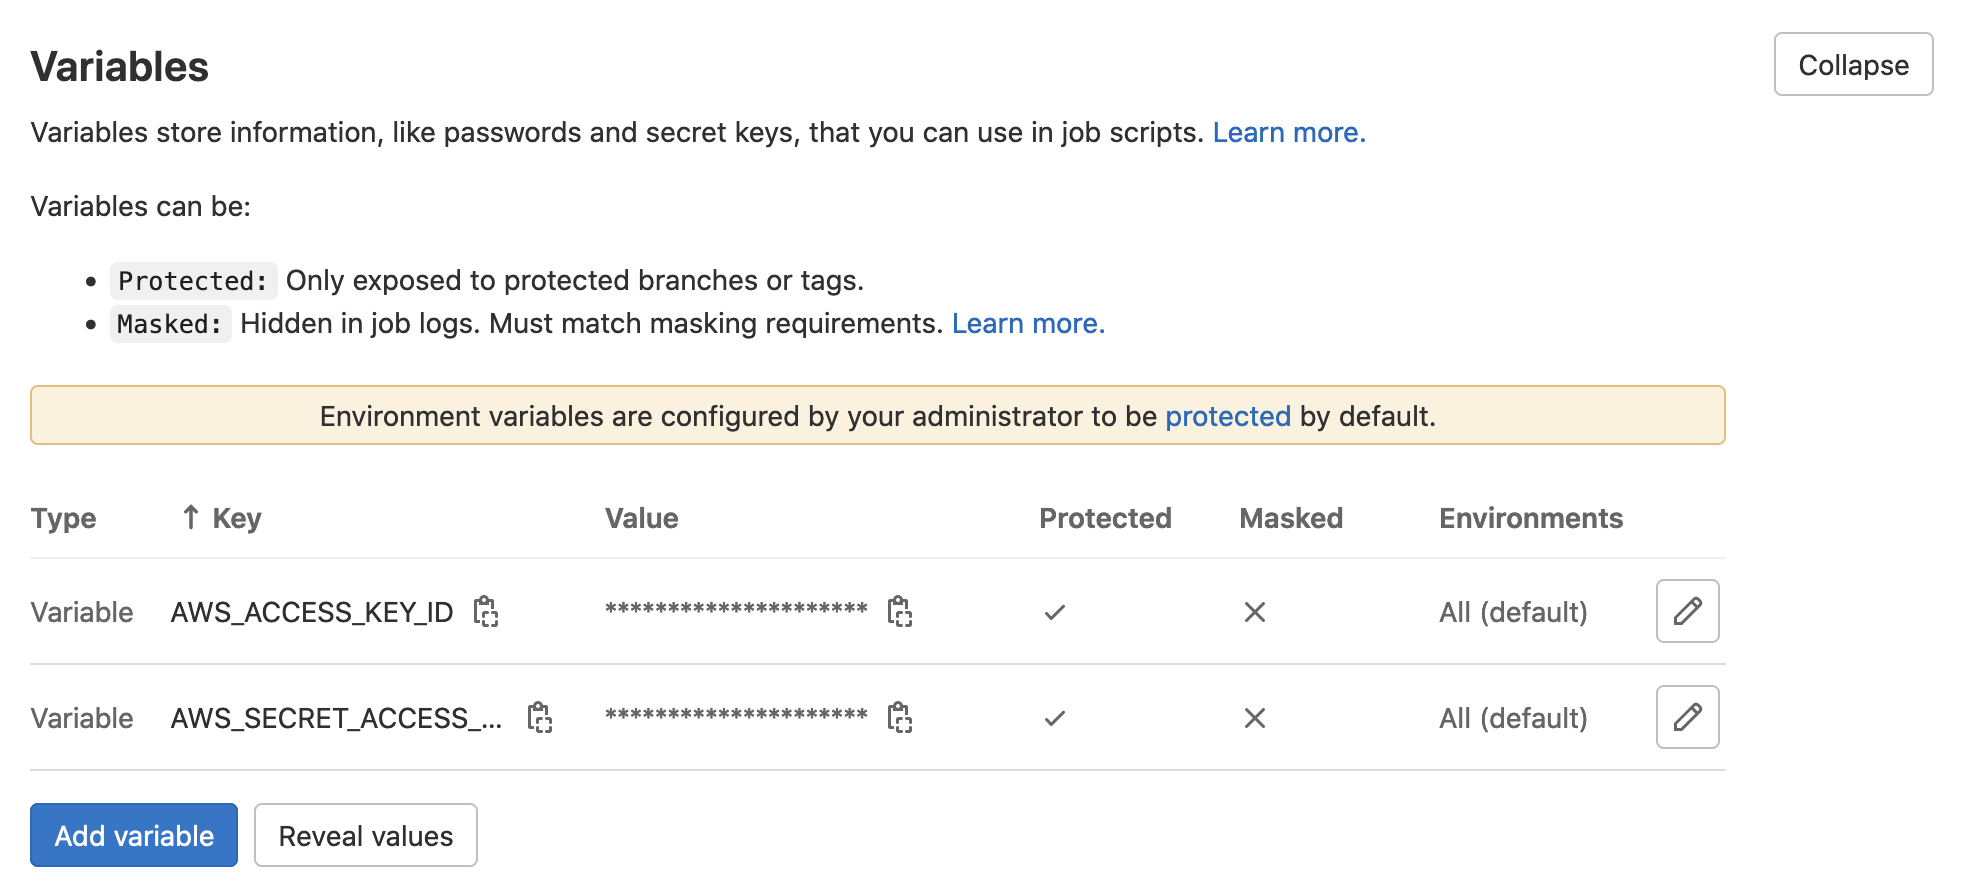
We created two variables required for serverless Component. Since we did not change anything in the code, there is nothing to push to Gitlab. Instead, Go to Gitlab CI/CD pipeline and rerun the last failed pipeline. That will install all dependencies for the project using npm install and after that, run serverless.
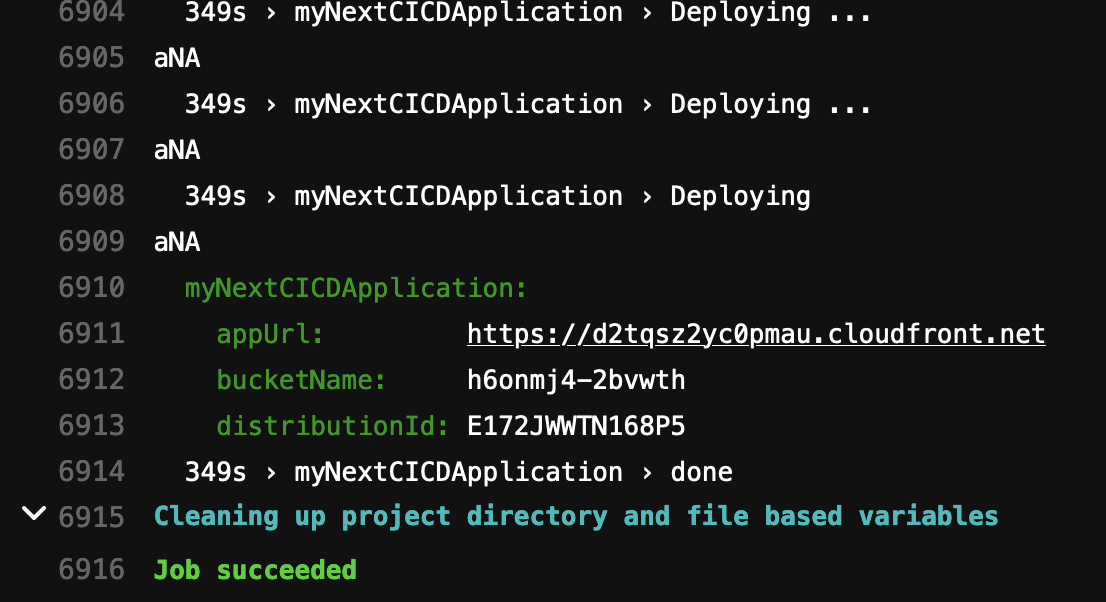
Now, when serverless is run by Gitlab CI/CD it has the needed AWS credentials from the environment variables. From now on, if we push any changes to our Gitlab repo, automatically the pipeline will run and deploy the updated site to AWS Lambda@edge.
We learned how to setup CI/CD pipeline for deploying our Next.js site to AWS Lambda. Now the pipeline is not production ready. Ideally, we setup different branches that maps to different environments(dev, qa, stage, prod). After that, when we push code to dev branch, deployment to dev environment happens, qa to qa environment and so on. We need to do update Gitlab yml file to manage our project like that.
Next.js is a React framework to create isomorphic applications. In this article we learn how to
In order to spin up a Next.js application in our machine, we first need to install Node.js. You can test if Node.js is installed in your machine by typing following command:
node -v
It should return the version number of installed Node like v14.15.0. If it is not installed, go and install Node.js first. Once Node.js is ready, navigate to a folder where you want Next.js app to be setup. Then run following command:
npx create-next-app@latest
When running above command, it will ask for the project name. A folder will be then created with this name and all the files are put inside that folder. My app's name is my-nextjs-app.

Now Next.js app is ready. We can go into the app folder and run yarn dev to see the running site.
We need to create an AWS user that has necessary privileges to host the application in AWS Lambda. For that, we need to create an IAM user. This step is like any other IAM user creation. Nothing special. So if you dont know how to create an IAM user, check this link.
I am listing out some details which I gave while creating my IAM user. My user id is serverless. I gave AdministratorAccess policy to this user. Now this user has all the power to do whatever it wants in AWS.
In the last step of user creation, we get an access ID and secret key for serverless user. Save it safely somewhere.
Now we have a user who is ready to take our Next.js code and host it in Lambda. Next, we need to install AWS-CLI(Command Line Interface) in our laptop and configure it. Then only any tool in the future, if it wants to do something in AWS using serverless user, it can make use of aws-cli commands to perform the same.
Best way to install AWS CLI is to follow the official documentation. It lists out OS specific documentation to setup AWS-CLI. Please complete it.
Once AWS CLI is installed, you can check if it is installed correctly by running following command:
aws --version
It should return something like this:
aws-cli/2.2.31 Python/3.8.8 Darwin/19.6.0 exe/x86_64 prompt/off
After AWS-CLI installation, you need to configure it by following this link. During the configuration step, you provide the user credentials like access ID and secret. The AWS-CLI then remembers it and uses it for future transactions.
The AWS configure command looks like this:
$ aws configure
AWS Access Key ID [None]: AKIAIOSFODNN7EXAMPLE
AWS Secret Access Key [None]: wJalrXUtnFEMI/K7MDENG/bPxRfiCYEXAMPLEKEY
Default region name [None]: us-west-2
Default output format [None]: json
During configuration process, AWS is storing the credentials in ~/.aws/credentials file in plain text. We can view the output and see our credentials.
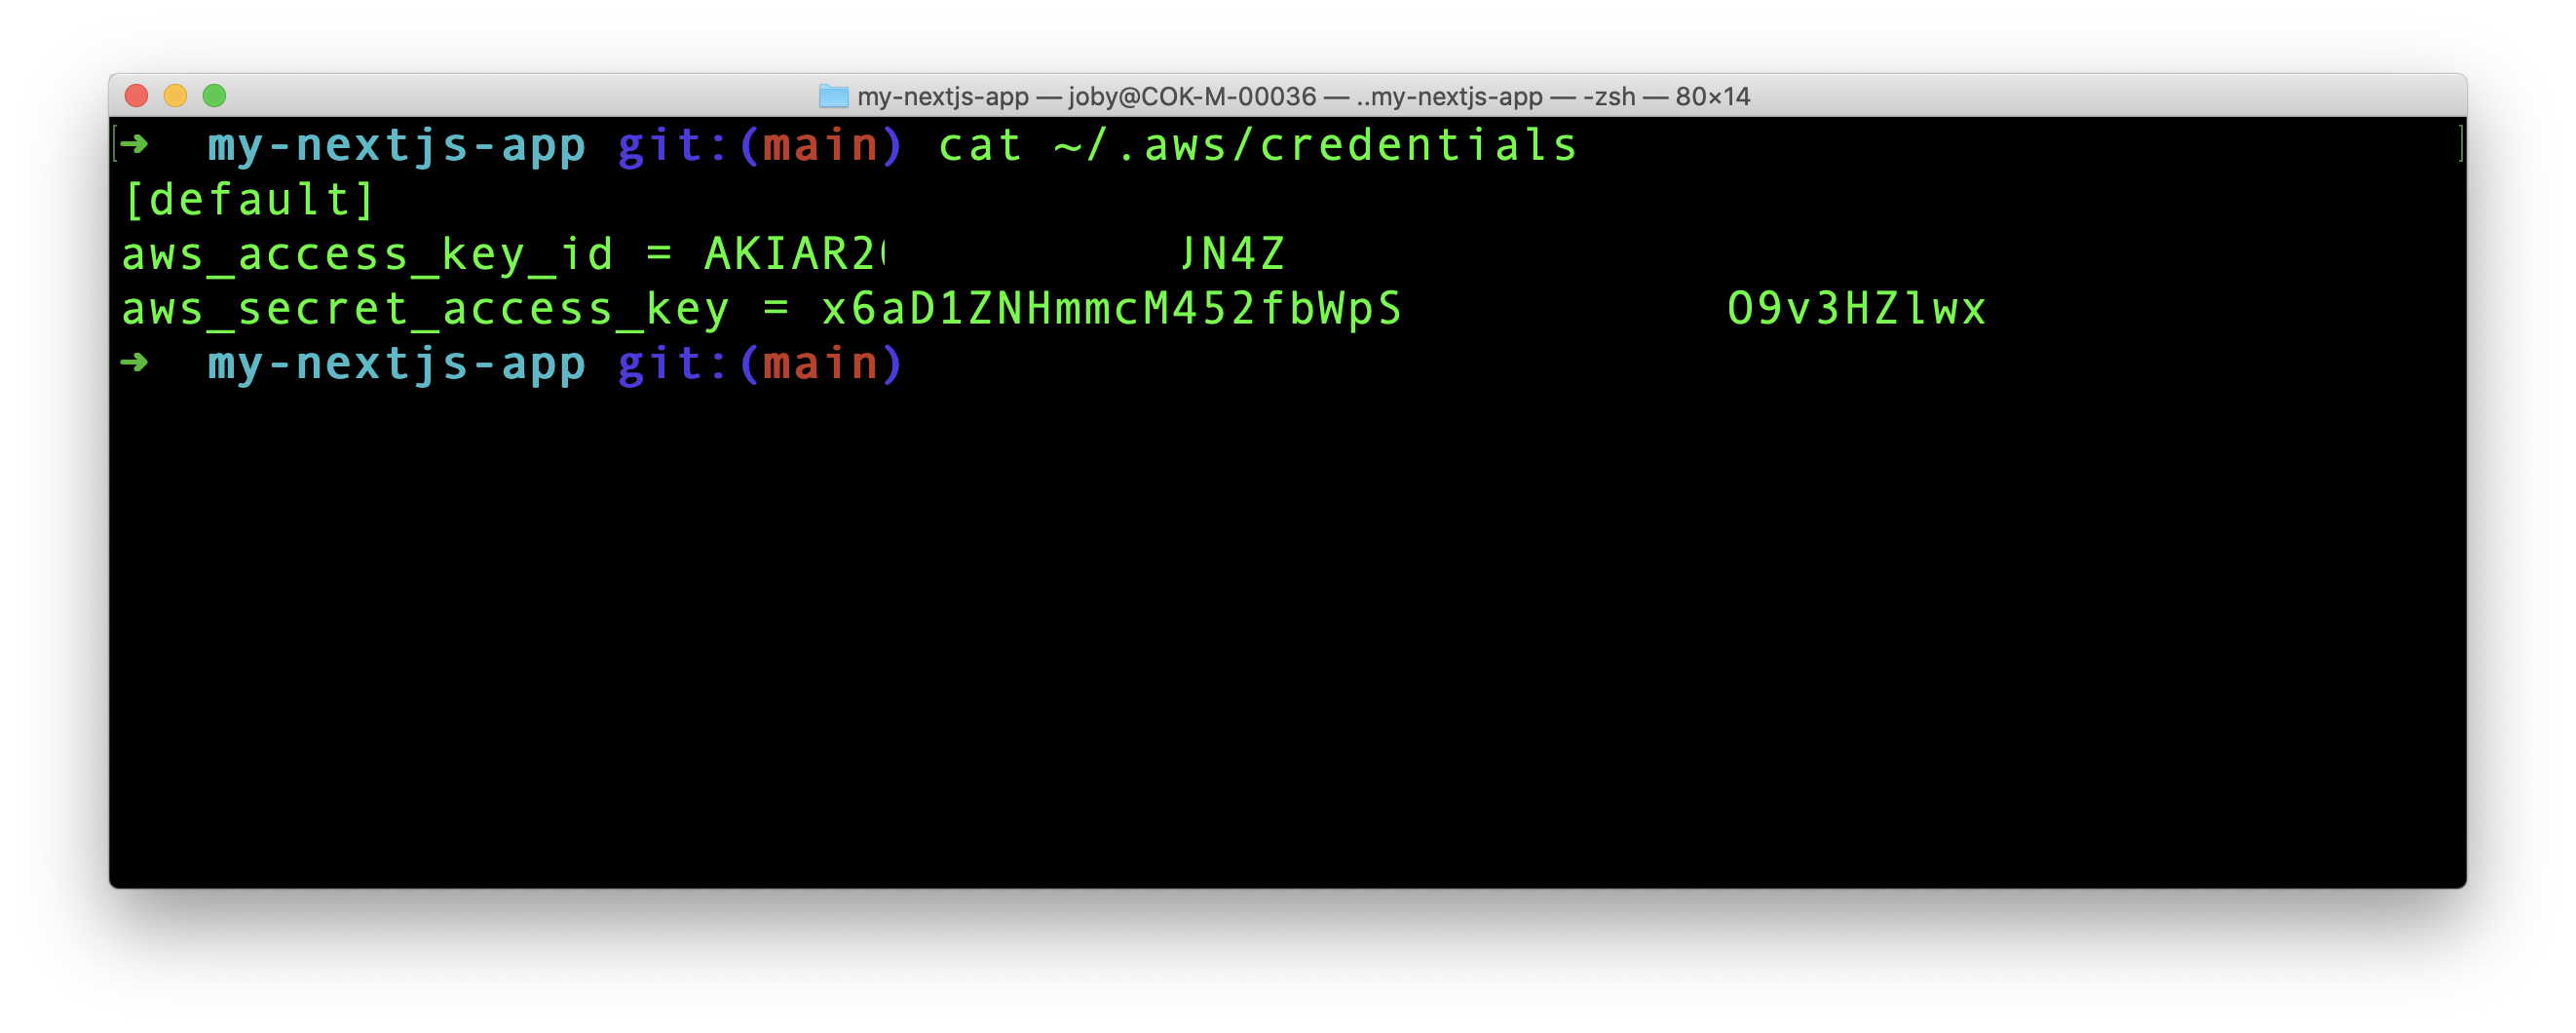
In the credentials file, we can see [default]. That is the profile name. We can add more profiles like that. Later, when we execute Serverless framework, we can tell which profile to use.
In the next section, we are going to use a package called serverless that makes use of the aws credentials and host our Next.js app in AWS Lambda.
Serverless framework make development, deployment and running serverless application very easy. The framework contains code that can push our application to most of the serverless solutions out there like AWS, Google cloud and Azure. In this demo, we are going to use AWS.
Serverless is a general framework that helps to host any applications to any serverless solutions. In order to host a Next.js application, there is a serverless component particularly created for Next.js. It is open source and known as Serverless Next.js Component.
We are going to use Serverless Next.js Component.
In order to use Serverless framework, we need to have a serverless.yml in the root folder of the project. It is going to have all the configurations. Create this file in our Next.js root folder, ie in the same level as of parent package.json file.
In the yml file, add the following content:
myNextApplication:
component: "@sls-next/serverless-component@latest"
In package.json file, add one more command for deploy:
"deploy": "serverless --aws-profile default"
Now when we run npm run deploy, serverless framework starts running. The framework uses the credentials of AWS default profile.
We now have all the main ingredients ready. Let us go to terminal and run below command from our app root folder.
npm run deploy
This command now runs Serverless and do all steps and configure our application in AWS. The Serverless Next.js Component finally shows the cloudfront URL in the console along with other details.
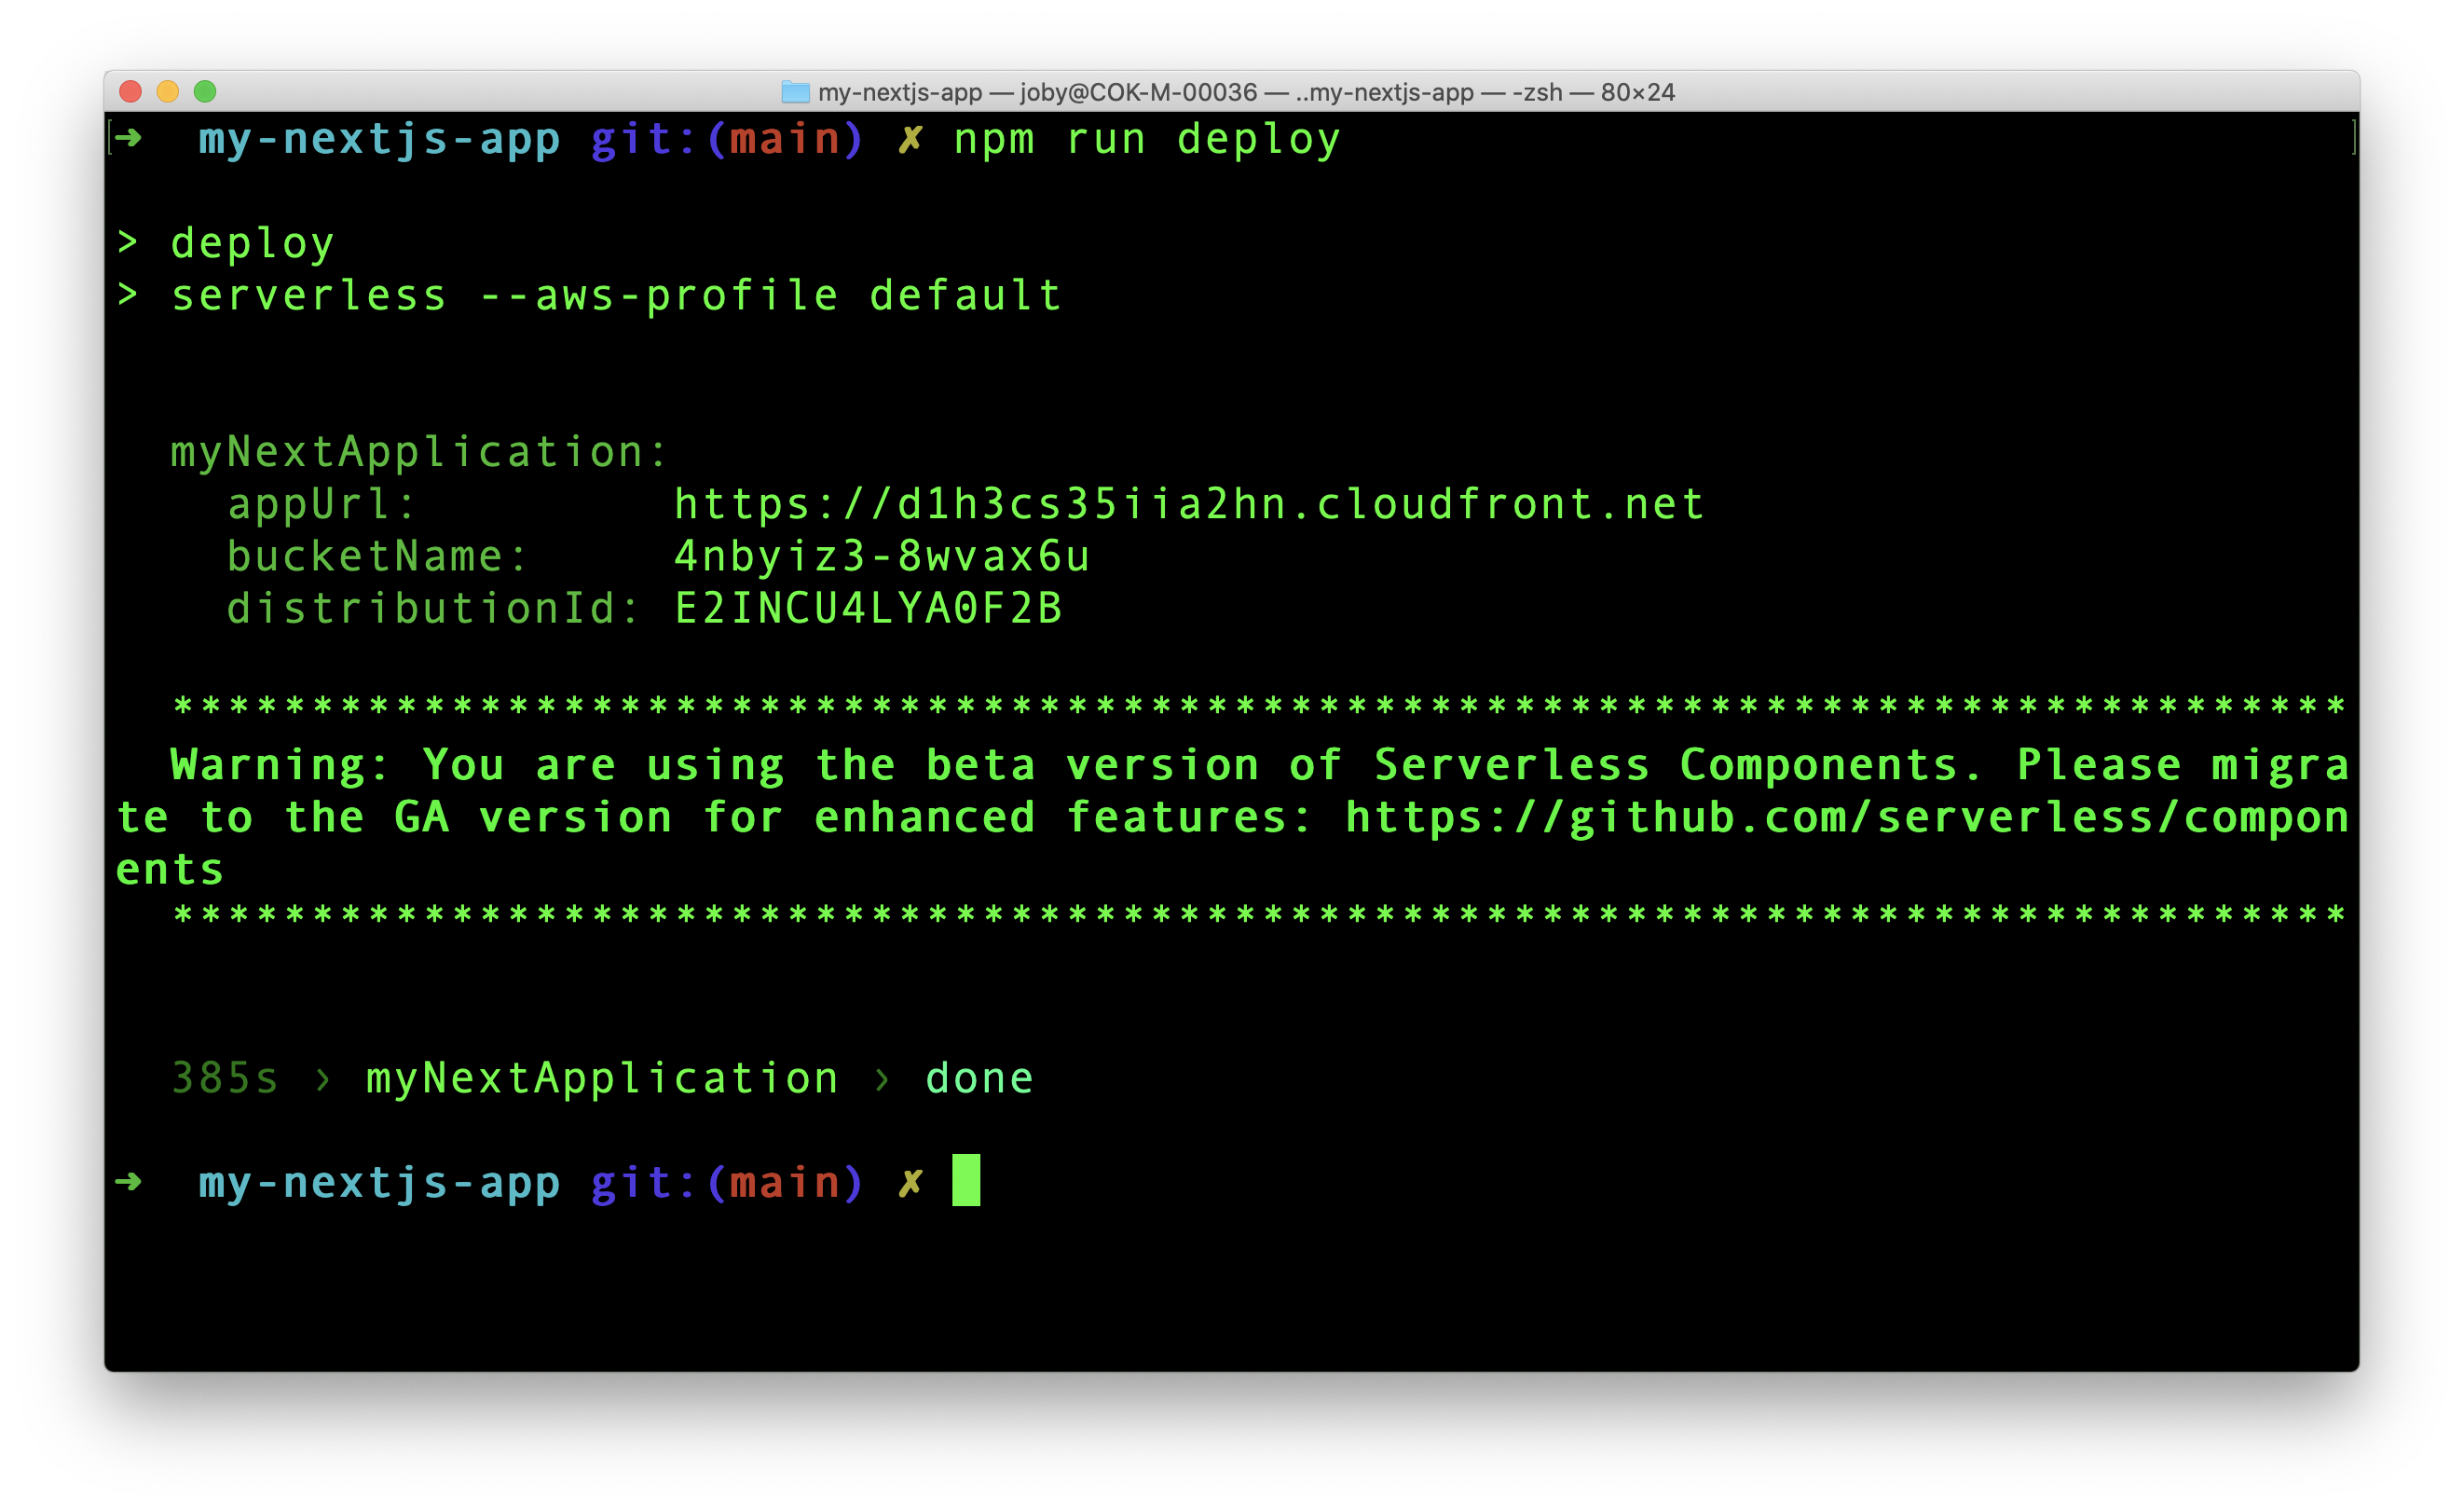
If we take the cloudfront url, https://d1h3cs35iia2hn.cloudfront.net in browser, we can see the deployed Next.js application.
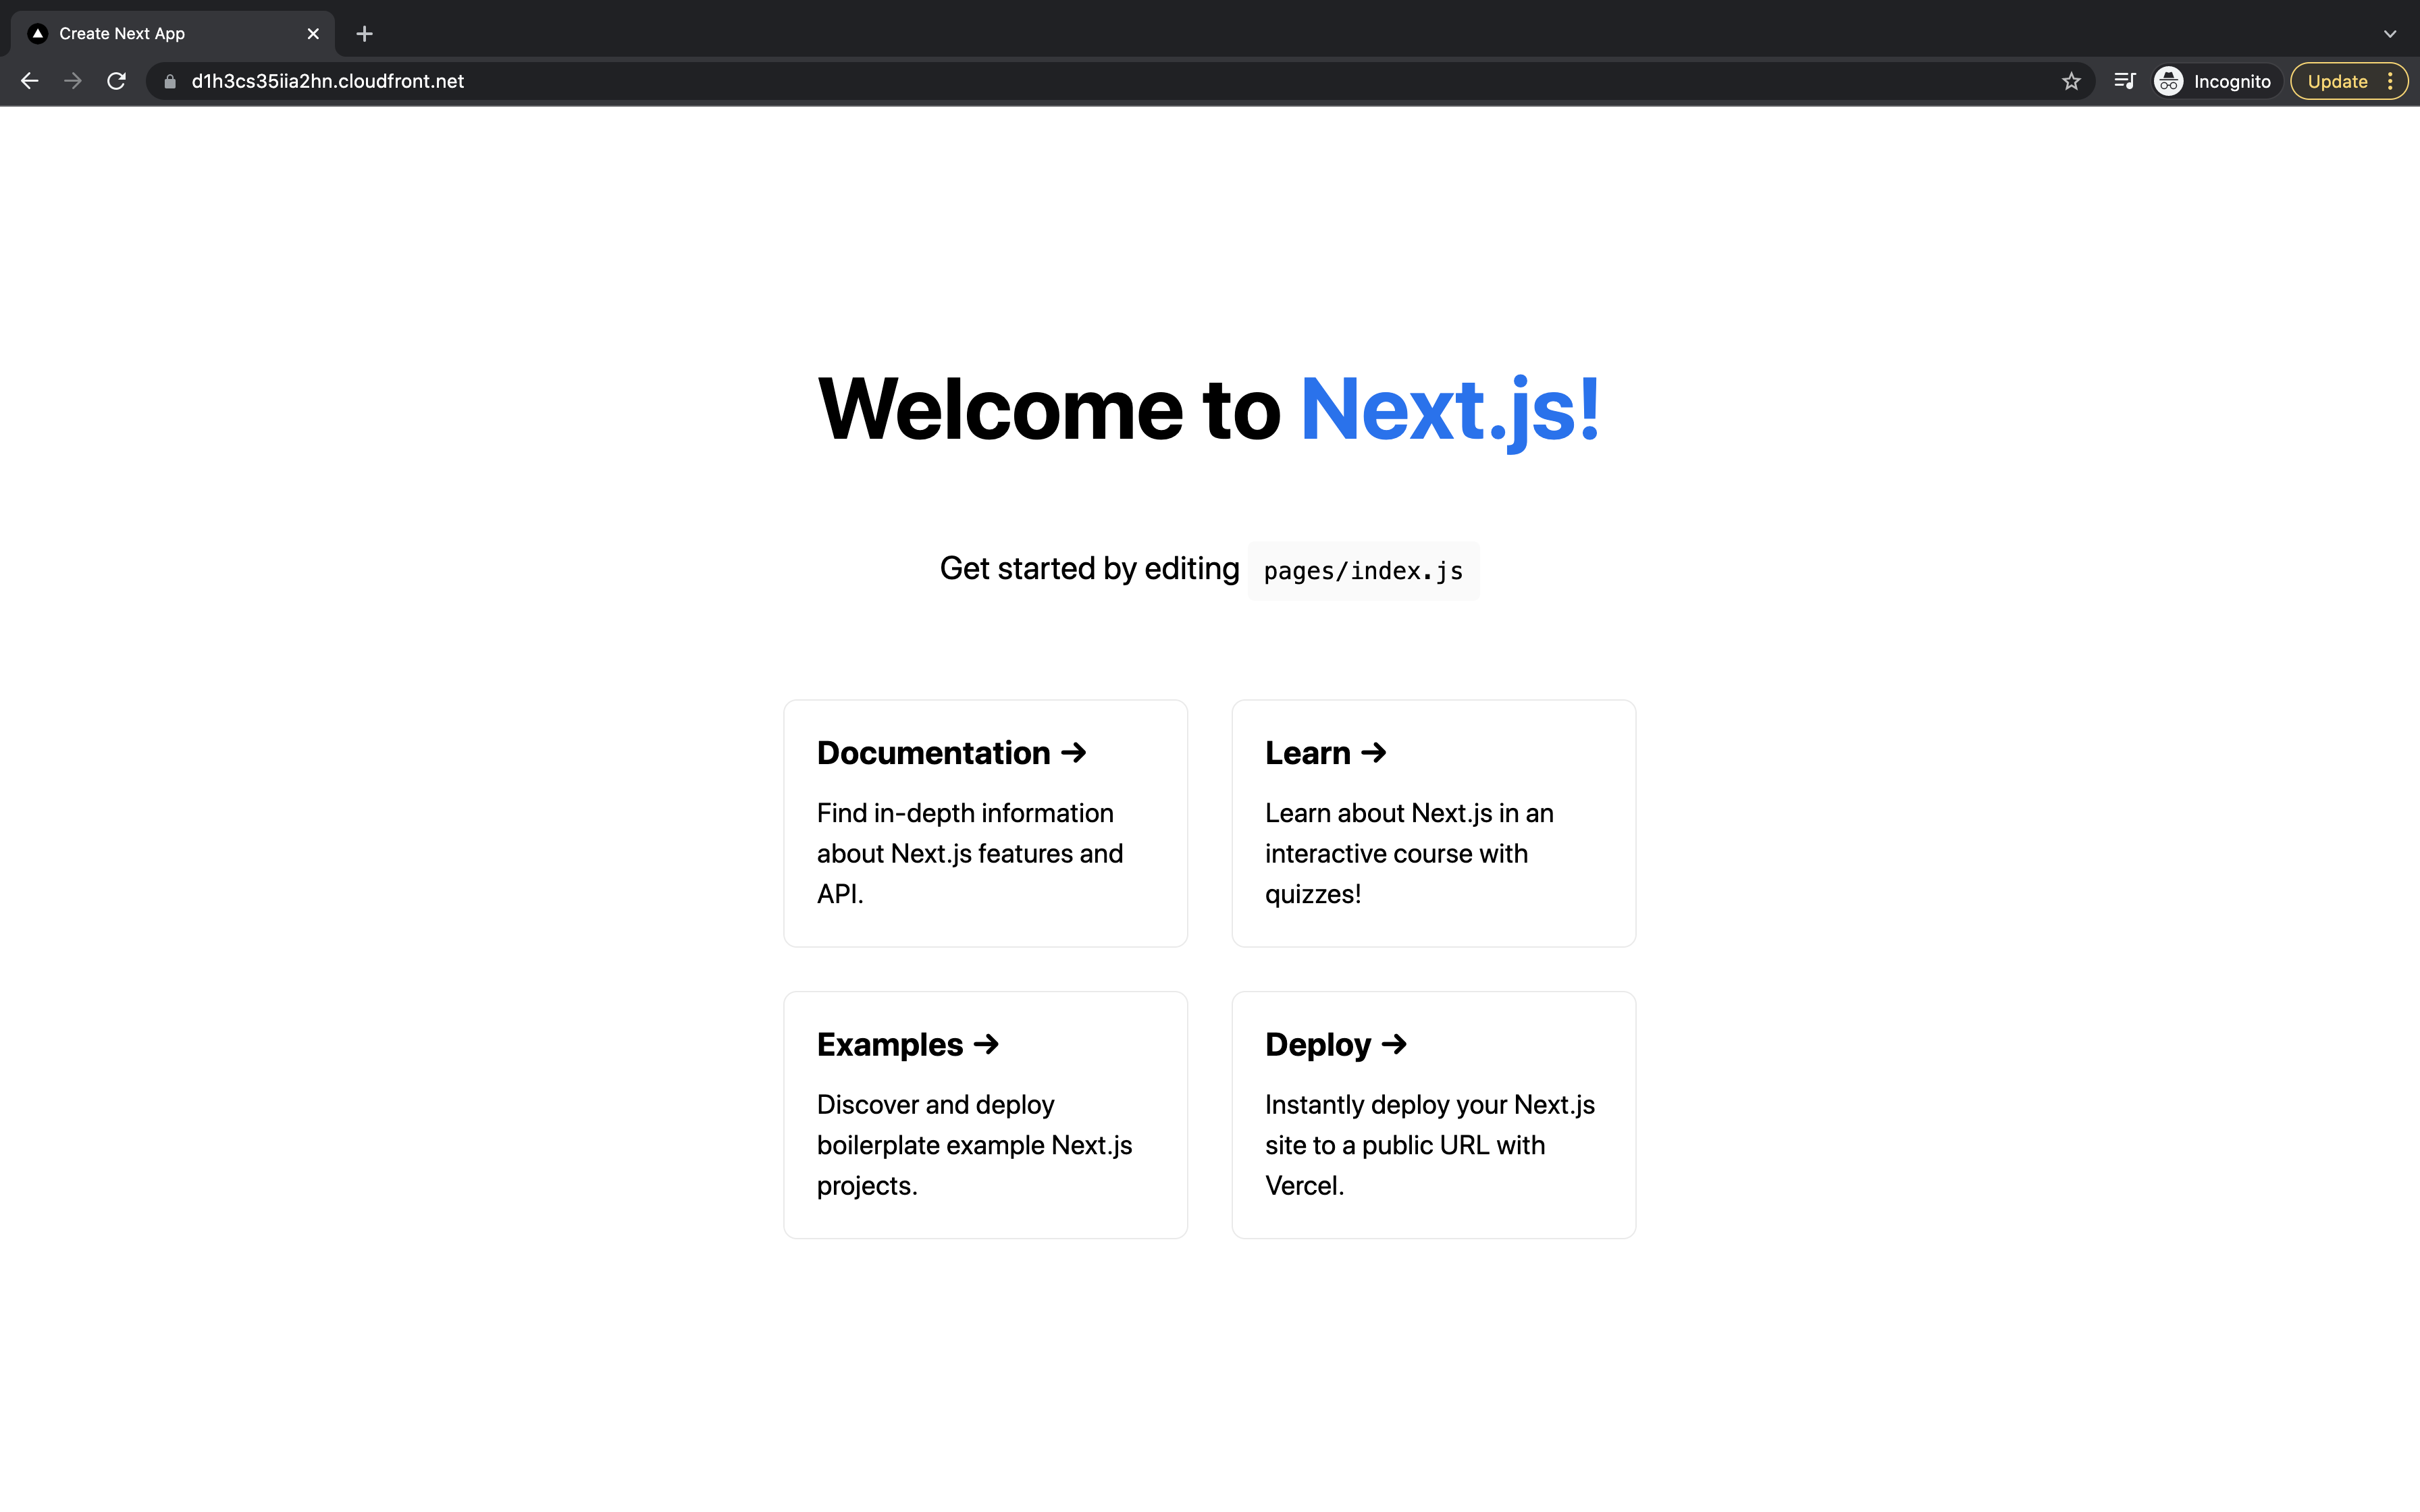
Next.js application requires server side rendering of React. Here, Serverless Next.js Component is deploying our app to Lambda@Edge which has the capability to execute Lambda code at CDN edges.
Serverless.yml is converted to a valid Cloud Formation file by Serverless. The entire deployment process is then conducted based on the steps provided by this Cloud Formation file.
Once Next.js app is built, we get some chunk of Javascript files and other files. These files are stored in a S3 bucket by the Serverless and the bucket id is displayed in the console(in the screenshot above) after deployment.
While running tools like yarn, we have seen emojis in Node.js console. If we want to print emojis in our project, node-emoji package can help. First, install it.
yarn add node-emoji
Then, we can use it like below:
var emoji = require("node-emoji");
console.log(emoji.get("coffee")); // ☕
A complete list of emojis present in the package can be viewed in this link https://raw.githubusercontent.com/omnidan/node-emoji/master/lib/emoji.json.
Now its time to play. Let me try a Merry Christmas!.
var emoji = require("node-emoji");
const christmas_tree = emoji.get("christmas_tree");
const santa = emoji.get("santa");
const tada = emoji.get("tada");
const sled = emoji.get("sled");
const bell = emoji.get("bell");
const confetti_ball = emoji.get("confetti_ball");
console.log(
`\n${christmas_tree}${bell} Merry Christmas! ${sled} ${tada} ${santa}\n`,
);
Here is the output:

When we write console.log statement in our Node.js code, it is written in terminal. What if we need to change the color of printed text? To do that, we need to use ANSI escape codes.
console.log("\x1b[33m%s\x1b[0m", "I am in yellow color");
Above line prints the text in yellow color. We can even try the same line in browser console. The %s is replaced by the actual content. The \x1b[33m in the pattern gives yellow color to string. The pattern is an example of ANSI escape code which is a standardized code. Therefore, it works in any terminal.
Here is a set of codes to adjust text color, background color or text effects:
Reset = "\x1b[0m";
Bright = "\x1b[1m";
Dim = "\x1b[2m";
Underscore = "\x1b[4m";
Blink = "\x1b[5m";
Reverse = "\x1b[7m";
Hidden = "\x1b[8m";
FgBlack = "\x1b[30m";
FgRed = "\x1b[31m";
FgGreen = "\x1b[32m";
FgYellow = "\x1b[33m";
FgBlue = "\x1b[34m";
FgMagenta = "\x1b[35m";
FgCyan = "\x1b[36m";
FgWhite = "\x1b[37m";
BgBlack = "\x1b[40m";
BgRed = "\x1b[41m";
BgGreen = "\x1b[42m";
BgYellow = "\x1b[43m";
BgBlue = "\x1b[44m";
BgMagenta = "\x1b[45m";
BgCyan = "\x1b[46m";
BgWhite = "\x1b[47m";
If you are finding it difficult to use in the above format, there is a npm package colors for easy usage. Using that, we can print yellow colored text like below:
console.log("I am in yellow color".yellow);
When using colors package, we can chain effects. For example, to print yellow bold text in red background, we can use following code:
console.log("I am in yellow color".yellow.bgRed.bold);

This article is updated on Mar 13, 2021 based on ES2021 Release Candidate. The features listed in the release needs to be approved by ECMA General Assembly on June 2021. That is when the features actually be a part of the standard.
All the features listed below, at the time of writing is supported in Google Chrome Canary build. You can test it out there.
String.prototype.replaceAll() replaces all occurrence of a string with another string value.
Currently JavaScript string has a replace() method. It can be used to replace a string with another string.
const str = "Backbencher sits at the Back";
const newStr = str.replace("Back", "Front");
console.log(newStr); // "Frontbencher sits at the Back"
If the input pattern is a string, replace() method only replaces the first occurrence. That is why in the code, the second occurrence of "Back" is not replaced.
We can do a full replacement only if we supply the pattern as a regular expression.
const str = "Backbencher sits at the Back";
const newStr = str.replace(/Back/g, "Front"); // highlight-line
console.log(newStr); // "Frontbencher sits at the Front"
String.prototype.replaceAll() is trying to bring the full replacement option even when the input pattern is a string.
const str = "Backbencher sits at the Back";
const newStr = str.replaceAll("Back", "Front");
console.log(newStr); // "Frontbencher sits at the Front"
WeakRef stands for Weak References. Main use of weak references is to implement caches or mappings to large objects. In such scenarios, we do not want to keep a lot of memory for a long time saving this rarely used cache or mappings. We can allow the memory to be garbage collected soon and later if we need it again, we can generate a fresh cache.
JavaScript is a garbage collected language. If a variable is no longer reachable, JavaScript garbage collector automatically removes it. You can read more on JavaScript garbage collection here in MDN site.
Consider the following code:
const callback = () => {
const aBigObj = {
name: "Backbencher",
};
console.log(aBigObj);
};
(async function () {
await new Promise((resolve) => {
setTimeout(() => {
callback();
resolve();
}, 2000);
});
})();
The code might look complicated. But basically, what we do is create a function named callback() and execute it using setTimeout(). The async wrapping is just to use await functionality. await is a feature in ES6, that helps to execute asynchronous code in synchronous way.
When executing above code, it prints "Backbencher" after 2 seconds. Based on how we use the callback() function, aBigObj is stored in memory forever, may be.
Let us make aBigObj a weak reference.
const callback = () => {
const aBigObj = new WeakRef({
name: "Backbencher",
});
console.log(aBigObj.deref().name);
};
(async function () {
await new Promise((resolve) => {
setTimeout(() => {
callback(); // Guaranteed to print "Backbencher"
resolve();
}, 2000);
});
await new Promise((resolve) => {
setTimeout(() => {
callback(); // No Gaurantee that "Backbencher" is printed
resolve();
}, 5000);
});
})();
A WeakRef is created using new WeakRef(). Later the reference is read using .deref() method. Inside the async function, The first setTimeout() will surely print the value of name. That is guaranteed in the first turn of event loop after creating the weak reference.
But there is no guarantee that the second setTimeout() prints "Backbencher". It might have been sweeped by the gargage collector. Since the garbage collection works differently in different browsers, we cannot guarantee the output. That is also why, we use WeakRef in situations like managing cache.
FinalizationRegistry is a companion feature of WeakRef. It lets programmers register callbacks to be invoked after an object is garbage collected.
const registry = new FinalizationRegistry((value) => {
console.log(value);
});
Here registry is an instance of FinalizationRegistry. The callback function passed to FinalizationRegistry gets triggered when an object is garbage collected.
(function () {
const obj = {};
registry.register(obj, "Backbencher");
})();
Line 3 attaches obj to registry. When obj is garbage collected, the second argument of .register() method is passed to the callback function. So, according to our code logic, when obj is garbage collected, "Backbencher" is passed to the callback function and is printed in the console.
Promise.any() resolves if any of the supplied promises is resolved. Below we have 3 promises, which resolves at random times.
const p1 = new Promise((resolve, reject) => {
setTimeout(() => resolve("A"), Math.floor(Math.random() * 1000));
});
const p2 = new Promise((resolve, reject) => {
setTimeout(() => resolve("B"), Math.floor(Math.random() * 1000));
});
const p3 = new Promise((resolve, reject) => {
setTimeout(() => resolve("C"), Math.floor(Math.random() * 1000));
});
Out of p1, p2 and p3, whichever resolves first is taken by Promise.any().
(async function () {
const result = await Promise.any([p1, p2, p3]);
console.log(result); // Prints "A", "B" or "C"
})();
What if none of the promises resolve? In that case Promise.any() throws an AggregateError exception. We need to catch it and handle it.
const p = new Promise((resolve, reject) => reject());
try {
(async function () {
const result = await Promise.any([p]);
console.log(result);
})();
} catch (error) {
console.log(error.errors);
}
For demo purpose, only one promise is passed to Promise.any(). And that promise is rejected.
Logical assignment operator combines the logical operations(&&, || or ??) with assignment.
var x = 1;
var y = 2;
x &&= y; // highlight-line
console.log(x); // 2
Line 3 operation can be expanded to:
x && (x = y);
Or in other way, it is like:
if (x) {
x = y;
}
Since x is a truthy value, it is assigned with the value of y, ie 2.
Just like the way we did with &&, we can do with || and ??.
x &&= y;
x ||= y;
x ??= y;
||Here is the code.
var x = 1;
var y = 2;
x ||= y; // highlight-line
console.log(x); // 1
Here line 3 can be expanded like:
x || (x = y);
That means, the assignment operation happens only if x is a falsy value. In our code, x contains 1 which is a truthy value and hence, assignment does not happen. That is why our code prints 1 in the console.
???? is Nullish Coalescing operator in JavaScript. It specifically checks if a value is null or undefined.
var a;
var b = a ?? 5;
console.log(b); // 5
In line 2, if the value of a is null or undefined, the right hand side of ?? is evaluated and assigned to b.
Let us now consider ?? along with =.
var x;
var y = 2;
x ??= y; // highlight-line
console.log(x); // 2
Line 2 in the above code is equivalent to:
x = x ?? (x = y);
Here the value of x is undefined. So the right hand side expression is evaluated and sets x to 2.
Is 1000000000, one billion? Are you finding difficult to count the number of zeros? If it is difficult to work with, ES2021 supports _ which can be placed as numeric separator. When one billion can be written as 1000_000_000 in code, it is way easier to read.
const billion = 1000_000_000;
console.log(billion); // 1000000000
The underscore(_) separator also works with BigInt numbers.
const trillion = 1000_000_000_000n;
console.log(trillion.toString()); // "1000000000000"
The separator is just for readability purpose. So, it can be placed anywhere within the number.
const amount = 178_00; // 00 after _ for cents.
If you are facing this issue with name variable or some other variable, this article can help. In order to recreate this issue, just create a new TypeScript file and add the following line to it.
let name = "hi";
If we are using VSCode, we can see the error immediately as shown below.
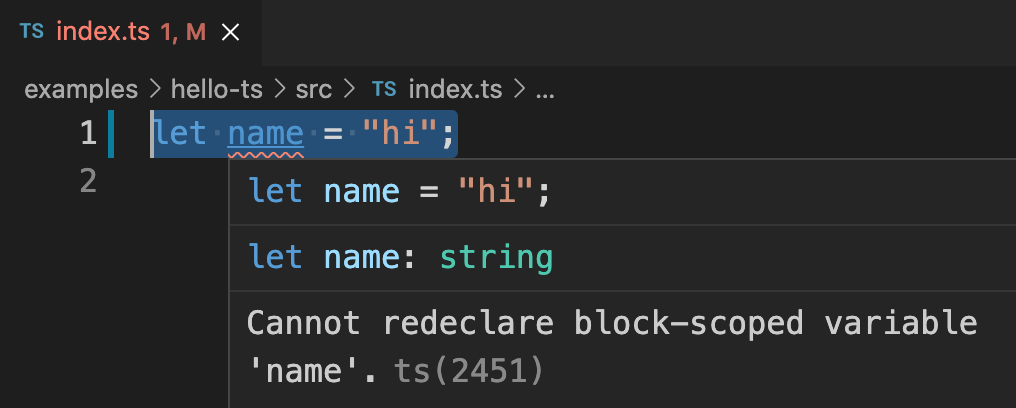
The error is coming due to a TypeScript feature. When we write a code in TypeScript in a new file, it needs to follow either of below conditions.
Our file followed the second condition. In that case, variable name is already in global scope because the global object has a property named name. Along with that, let does not allow redeclaration. Both these combined, threw the error.
We need to tell TypeScript that our file is a module with its own scope. TypeScript considers any file with import or export statements as a module. Just to notify TypeScript that our file is a module, add the following line as the first line of TypeScript file.
export {};
Yes, adding that one line will solve the problem. So our final TypeScript file looks like below.
export {};
let name = "hi";
Question:
What is TypeScript? How it is used in a project?
Answer:
TypeScript is a static type checker. JavaScript is an untyped language. We can declare a variable and later assign any type to it. TypeScript ensures that a variable declared to hold a certain type, does not hold any other data type. TypeScript does the type check without running the code. That is called static type checking.
In a project, we write TypeScript code in files ending with .ts extension. We install TypeScript package and later compile our TypeScript files using tsc command. The output of compilation will be a pure JavaScript file.
Question:
Are all JavaScript files, valid TypeScript files?
Answer:
Yes. A valid JavaScript code is also a valid TypeScript code.
Question:
We have an object obj that contains two properties, name and age.
const obj = {
name: "John",
age: 24,
};
name can contain only string value and age can contain only number value. How can we define a type for obj?
Answer:
TypeScript type for the object can be defined using interface.
interface User {
name: string;
age: number;
}
Then it can be applied to the object like:
const obj: User = {
name: "John",
age: 24,
};
Question:
Here we have a function sum() that takes two arguments.
function sum(a, b) {
return a + b;
}
sum(2, 3, 4);
But, at the time of invocation, we are passing 3 arguments. TypeScript does not like that and it throws error. Still, it updates the output JavaScript file. How can we tell TypeScript, not to update output JavaScript file if there is any error in TypeScript code?
Answer:
We can make use of --noEmitOnError flag. Add this flag along with tsc command.
tsc --noEmitOnError test.ts
Now, if there is any error in test.ts, the output file test.js is not created or updated.
Question:
Here is a simple TypeScript code that uses ES6 syntax.
const myName: string = "John";
After TypeScript compilation the output JavaScript code is in ES5 syntax.
var myName = "John";
How can we create output in ES6 syntax?
Answer:
By default, TypeScript tries to convert the code to ES3. But, we can control the target version of JavaScript using --target flag. We can produce ES6 output by following command.
tsc --target es2015 test.ts
Above command produces following JavaScript code where we can see ES6 const keyword.
const myName = "John";
Question:
Here is the code written in a TypeScript file:
let a = "Hello";
a = 10;
When TypeScript compiler runs this code, will it throw any error?
Answer:
Yes. It will throw following error:
Type 'number' is not assignable to type 'string'.
Even though we have not explicitly set the type of variable a, TypeScript infers the type as string by observing the first initialization. That is why an error is thrown when a number is assigned to a in the second line.
Question:
Does the following TypeScript code throw any error?
let a: string = "Hello";
let b: any = 10;
a = b;
Answer:
No. Above code does not throw any error. Here, variable b is of any type. So, it can be assigned to or from any variables.
Question:
How can we declare a variable that stores a number array in TypeScript?
Answer:
An array type is specified by adding square brackets([]) to the type. In this case we need to declare a number array. So we can use number[] type.
var numArr: number[] = [2, 4, 6];
Question:
Here we have a function that accepts 2 numbers and return its sum.
function sum(a, b) {
return a + b;
}
Write the above function with defined types.
Answer:
The input and output of a function can be typed. In our case, both the inputs need to be of number type and the output needs to be also of number type. It can be done as below in TypeScript.
function sum(a: number, b: number): number {
return a + b;
}
Question:
What is contextual typing in TypeScript?
Answer:
TypeScript has the ability to understand the type of a variable based on context. Here is an example.
We have an array of strings.
const arr = ["Apple", "Banana", "Grapes"];
Later, we loop through each item using map() method.
arr.map((fruit) => {
console.log(fruit.toUppercase());
});
As we can see, we have written toUppercase() instead of toUpperCase(). TypeScript can understand that each item in the array is of type string. So, it sets the type of fruit as string. That is called Contextual Typing.
In the above example, TypeScript clearly mentions the error like below:
Property 'toUppercase' does not exist on type 'string'. Did you mean 'toUpperCase'?
Question:
What is the purpose of writing below configuration in the tsconfig.json file?
{
"declaration": true
}
Answer:
That is to create a type definition file. During build process using tsc command, along with generating a JavaScript file, TypeScript also creates a type definition file. So, if we use the output JavaScript file in a non-typescript project, only the JavaScript file is used. But if we are using the output JavaScript file in a TypeScript project, this type definition file is considered to define the types in JavaScript file.
Consider the following TypeScript file index.ts:
interface Color {
red: number;
green: number;
blue: number;
}
const color: Color = {
red: 10,
green: 20,
blue: 30,
};
console.log(color);
If "declaration" is true, two files are created as output, index.js and index.d.ts. The JavaScript file will contain only the JavaScript code. *.d.ts is the type definition file. It contains code for TypeScript to set types in index.js.
// index.js
"use strict";
var color = {
red: 10,
green: 20,
blue: 30,
};
console.log(color);
// index.d.ts
interface Color {
red: number;
green: number;
blue: number;
}
declare const color: Color;
Question:
What is the purpose of --target, --module and --watch flags when used along with tsc command?
Answer:
When we use tsc command, TypeScript code is converted to JavaScript. The version of the generated JavaScript file can be set using --target flag. By default, TypeScript compiles to ES3. That might result in huge size for JavaScript file due to extra code added for backward compatibility.
--module allows to set the module system. If our code is going to be run by Node.js, we have to explicitly set the module flag to commonjs.
--watch flag enables watch mode. If watch mode is enabled, any change in TypeScript file gets compiled and reflects in JavaScript file.
Question:
We have a JavaScript code that declares 3 variables and later assigns value to those variables.
let car;
let model;
let isSedan;
car = "BMW";
model = 2018;
isSedan = true;
How can we add types to the declared variables using TypeScript syntax?
Answer:
We can add type information along with each variable declaration as shown below.
let car: string;
let model: number;
let isSedan: boolean;
car = "BMW";
model = 2018;
isSedan = true;
string, number and boolean written above are called Type Annotations.
Question:
Here we have a variable declaration with no explicit type definition.
let planet = "Earth";
planet = 3434;
Does the above code throws an error in TypeScript?
Answer:
Yes, above code throws error in TypeScript. When we do initialization along with declaration, TypeScript sets the type of variable as the assigned type. So, in our case, the type of planet is string. Therefore, it is not allowed to assign a number type to planet. Above code shows following error by TypeScript.
Type 'number' is not assignable to type 'string'.
Question:
When I tried running below code, I am getting an error.
const PI = 3.14;
PI = 2.14;
The error thrown is:
Cannot assign to 'PI' because it is a constant.
What rule of TypeScript did we break?
Answer:
Actually TypeScript is a super set of JavaScript. This error is part of native JavaScript. In JavaScript, if we try to reassign to a const variable, it throws above error.
Question:
Here is an array in JavaScript that contains mixed data types. In the second line, we are pushing a boolean value to the array.
const arr = [23, "Apple", 35];
arr.push(true);
Does that work?
Answer:
No, it does not work. Even though arr contains mixed types, TypeScript is not treating it as an array that can accept any data types. TypeScript is seeing it as an array that can accept only either string or number. The equivalent syntax in TypeScript is:
const arr: (string | number)[] = [23, "Apple", 35];
That is the reason why arr is not accepting boolean value. If we want the array to accept any values, we need to explicitly mention that while declaring.
const arr: any[] = [23, "Apple", 35];
Question:
Here we have an empty array.
const arr = [];
Can we push values of any types to this array?
Answer:
Yes. Here, TypeScript implicitly provides the type as any to the array elements.
Question:
What is the meaning of following TypeScript code?
const arr: [number, string, number] = [23, "Brooklyn", 57123];
Answer:
This is an example of Tuple. Tuple is an array of fixed length. Here we are defining a tuple and the type of each element in the tuple.
Question:
Here is a valid assignment to a variable in JavaScript.
obj = {
car: "BMW",
model: 2021,
};
Please write down the type definition while declaring obj variable.
Answer:
If both properties car and model are mandatory in obj, the TypeScript type definition looks like below.
let obj: { car: string; model: number };
If any of the properties in the object is optional, it can be represented using question mark ?.
let obj: { car: string; model?: number };
Question:
Here is a typescript code. Will it throw an error?
let obj: { car: string; model?: number };
obj = {
car: "BMW",
type: "Sedan"
};
Answer:
Yes, it will throw an error. type is not part of defined type. Therefore, line 4 throws an error.
Question:
Here we have a TypeScript code.
let obj1: { car: string; model?: number };
let obj2: { car: string; model?: number };
obj1 = {
car: "BMW",
};
obj2 = {
car: "Mercedes",
};
How can we improve above code?
Answer:
The type of obj1 and obj2 are same. We can define an interface and reuse it.
interface Car {
car: string;
model?: number;
}
let obj1: Car;
let obj2: Car;
obj1 = {
car: "BMW",
};
obj2 = {
car: "Mercedes",
};
Question:
Give one example where we can use TypeScript Intersection?
Answer:
We have a variable person that can accept either a student object or a teacher object. The Student type and Teacher type is defined separately.
interface Student {
name: string;
marks: number;
}
interface Teacher {
name: string;
salary: number;
}
Now based on some condition either a student object or teacher object is assigned to person. In that case person should be ready to accept either one of these objects. For that we use TypeScript Intersection.
let person: Student | Teacher;
if (Math.random() > 0.5) {
person = {
name: "Hanna",
marks: 23,
};
} else {
person = {
name: "Jenny",
salary: 8900,
};
}
In the first line, we can see the Intersection(|) operator. That will make person to accept either one of the types.
Once we use intersection operator, only the keys that are common to both types could be used there after. For eg, in the above code, name is the common property. So we can access name.
console.log(person.name);
console.log(person.marks); // Error
It is not sure if person will have marks property. So, TypeScript throws an error if we try to access it.
Question:
We have a TypeScript code here:
interface Student {
marks: number;
}
interface Teacher {
salary: number;
}
let person: Student | Teacher;
if (true) {
person = {
marks: 23,
};
} else {
person = {
salary: 8900,
};
}
console.log(person.marks);
marks is present only in Student, not in Teacher. Therefore, does the last line throw an error?
Answer:
No. The if condition is checking for true. So TypeScript knows that the else block will never get executed. For that reason person.marks does not throw an error. If there was any chance to go to else block, then it will be an error.
Question:
What are union types in TypeScript? When do we use it?
Answer:
Union operator(&) is used in TypeScript to join the types from multiple types. Say we already have a type Person.
interface Person {
name: string;
age: number;
}
We now need to define a teacher object, who is a person and also has some more teacher specific attribute.
interface Teacher {
school: string;
}
let teacher: Person & Teacher;
Now teacher variable should be an object that is a union of Person and Teacher type. That means, it is mandatory for teacher variable to have name, age, school properties. Absence of any property will result in error.
teacher = {
name: "John",
age: 23,
school: "Winterville",
};
Question:
What will happen if we use TypeScript union operator like this:
let street: string & number;
street = 23;
Answer:
In line 1, we are declaring the type of street as both a string and number at the same time. Even though, such a condition cannot be met, TypeScript will not throw any error in line 1. TypeScript simply sets the type of street as never. never is a type that says, no value can be accepted.
Since the type of street is never, line 2 throws an error when we try to assign a number type to never type.
Question:
Here is a JavaScript variable color.
let color;
color = "Red";
The variable can only contain either of 3 values: "Red", "Yellow", "Green". How can we bring this restriction using TypeScript?
Answer:
This can be done using intersection operator in TypeScript.
let color: "Red" | "Yellow" | "Green";
color = "Red";
Question:
Here we have a function that accepts an object and returns an object.
function setState(state) {
const newState = { ...state, name: "John" };
return newState;
}
The input and return object can have only 2 properties, name and age. How can we make sure the type safety using TypeScript?
Answer:
Since the argument type and return type of the function are same, it is good to create an interface first.
interface IPerson {
name: string;
age?: number;
}
Then set the type for function parameter and return type.
function setState(state: IPerson): IPerson {
const newState = { ...state, name: "John" };
return newState;
}
Question:
We have a ES5 typed function.
function sum(a: number, b: number): number {
return a + b;
}
We need to convert above function to arrow function syntax. How can we do that?
Answer:
Here is the typed arrow function.
const sum = (a: number, b: number): number => {
return a + b;
};
Question:
Here, we have a TypeScript function.
function subscribe(accepted: "yes" | "no", email?: string): void {
console.log(email);
}
My intention was, if the value passed to accepted is "no", the second argument should not be passed. And if the value of accepted is "yes", then the second argument email is mandatory. But the code snippet above is failing. It accepts email, even if the value of accepted is "no". How can we fix it?
Answer:
Here we are talking about using the function with 2 different sets of inputs. One with only "no" and other with "yes" and email. So, what we need to do is function overloading. We need to define 2 separate signatures for TypeScript to understand. Here is how we need to do it:
function subscribe(accepted: "no"): void;
function subscribe(accepted: "yes", email: string): void;
function subscribe(accepted: "yes" | "no", email?: string): void {
console.log(email);
}
Question:
Here is a simple TypeScript code.
function hello(this: string) {
console.log(this);
}
hello();
Will it throw any error? If yes, please explain and how can we solve it.
Answer:
Yes. Above code throws an error.
When we define the type of this, TypeScript checks the value of invocation context when the function is invoked. When hello() is invoked, the value of this will be either undefined or window object. Both are not strings. That is the reason of the error.
In order to solve the error, we need to set the value of this explicitly using call(), apply() or bind(). Here is an example using call() that clears the error.
function hello(this: string) {
console.log(this);
}
hello.call("my string");
call() is a static method of Function object. The first parameter passed to it is set as the value of this.
Question:
What are Type Aliases?
Answer:
Type Aliases allow us to give a type a name. Here is an example of how a type alias is created.
type stringOrNumber = string | number;
let pincode: stringOrNumber;
stringOrNumber is a type alias. It can be used with any variables that can contain either a string value or number value.
Question:
Here we have an interface Person.
interface Person {
name: string;
age: number;
}
We need to create a new interface Teacher that has 3 properties, name, age and subject. How to approach this issue?
Answer:
Teacher is a more specific version of Person. So, we can do this by extending Person interface.
interface Teacher extends Person {
subject: string;
}
And later, we can use Teacher type while creating an object.
const obj: Teacher = {
name: "John",
age: 23,
subject: "Science",
};
Question:
Here is a TypeScript code that creates a custom type.
type stringOrNumber = string | number;
Can we rewrite above line using interface?
Answer:
Interfaces can deal with JavaScript objects and its sub types. They cannot work with primitive data types. Therefore, we cannot convert this code using interface.
Question:
Here is a function written in TypeScript.
function sum(a: number, b: number): number {
return a + b;
}
Please write down the interface for the above function.
Answer:
Here is the interface for the sum() function:
interface sum {
(a: number, b: number): number;
}
Question:
We have a TypeScript file with only type definitions like below.
interface sum {
(a: number, b: number): number;
}
interface show {
(message: string): void;
}
Please write down the JavaScript code that is produced after TypeScript compilation.
Answer:
TypeScript performs static type checking. The interfaces and types in the TypeScript code is used by tsc compiler for static type checking. The output JavaScript file does not contain any type information. Therefore, in this case, the output JavaScript file will not contain any code.
Question:
We have a function type definition here created using interface.
interface show {
(message: string): void;
}
Write the same definition using type keyword.
Answer:
Here is the type definition created using type keyword.
type show = (message: string) => void;
You have heard about React and you are here to write your first React application. This is going to be just a hello world application using React. We will learn a lot of related concepts through out.
Have you seen websites with header, footer, sidebar? Have you seen Facebook with repeating blocks of statuses? All these building blocks can be considered as different components collectively shape up a full website. React is a library to build such UI components.
Have you worked with jQuery? If yes, you know that it is as easy as adding a link to jQuery file and start using it. In similar lines, let us try to create a Hello World component in React.
Create a HTML file, index.html. Place a <div> tag in the HTML file as a placeholder. Later, our Hello World React component will be rendered inside this <div>.
<div id="root"></div>
The id value can be anything. Later we will use this id value to tell ReactDOM where to render our React component.
Next, add following CDN links to your HTML file.
<head>
<!-- .... -->
<script
crossorigin
src="https://unpkg.com/react@16/umd/react.development.js"
></script>
<script
crossorigin
src="https://unpkg.com/react-dom@16/umd/react-dom.development.js"
></script>
<!-- .... -->
</head>
CDN stands for Content Delivery Network. CDN providers have servers distributed across the globe. They cache our files(here react.development.js and react-dom.development.js) in all there servers. It helps any user from any geographical location to retrieve the file quickly.
First file we added is react.development.js. It is for react development. It contains more debugging information and comments. Therefore, the file size will be larger compared to its production version. Now in the React world, this react.js or react.development.js contains all the code to create components.
We now need someone to render the created components to web browser. For that we import react-dom.development.js. This file contains code to efficiently render React components on screen.
Now our HTML setup is done. Let us write our Hello World component in a separate JavaScript file(component.js). Add the reference of the new file inside our HTML. Our final HTML file looks like this:
<!DOCTYPE html>
<html lang="en">
<head>
<meta charset="UTF-8" />
<meta name="viewport" content="width=device-width, initial-scale=1.0" />
<meta http-equiv="X-UA-Compatible" content="ie=edge" />
<title>First React App</title>
<script
crossorigin
src="https://unpkg.com/react@16/umd/react.development.js"
></script>
<script
crossorigin
src="https://unpkg.com/react-dom@16/umd/react-dom.development.js"
></script>
</head>
<body>
<div id="root"></div>
<script src="component.js"></script>
</body>
</html>
When we add reference to react.development.js, it adds an object React to global scope. The React object contains a method called createElement(). This method is used to create a component in React.
In component.js, first we will create a component and assign it to a variable myComponent.
const MyComponent = React.createElement("h1", null, "Hello World!");
createElement() method accepts 3 arguments. First argument is the HTML tag name. Second attribute is the properties or attributes for the HTML tag. Third argument is the children. The child of an element can be a string or another React component.
Now our component is ready. But we need to render it inside the div#root element. For that, react-dom.development.js file loaded by CDN adds a ReactDOM object to global scope. We can use render() method inside ReactDOM object to render MyComponent to browser.
ReactDOM.render(MyComponent, document.getElementById("root"));
Here is the full code for component.js.
const MyComponent = React.createElement("h1", null, "Hello World!");
ReactDOM.render(MyComponent, document.getElementById("root"));
Our component.js file is done. Now, let us open index.html in browser. It will render our React component inside the div.
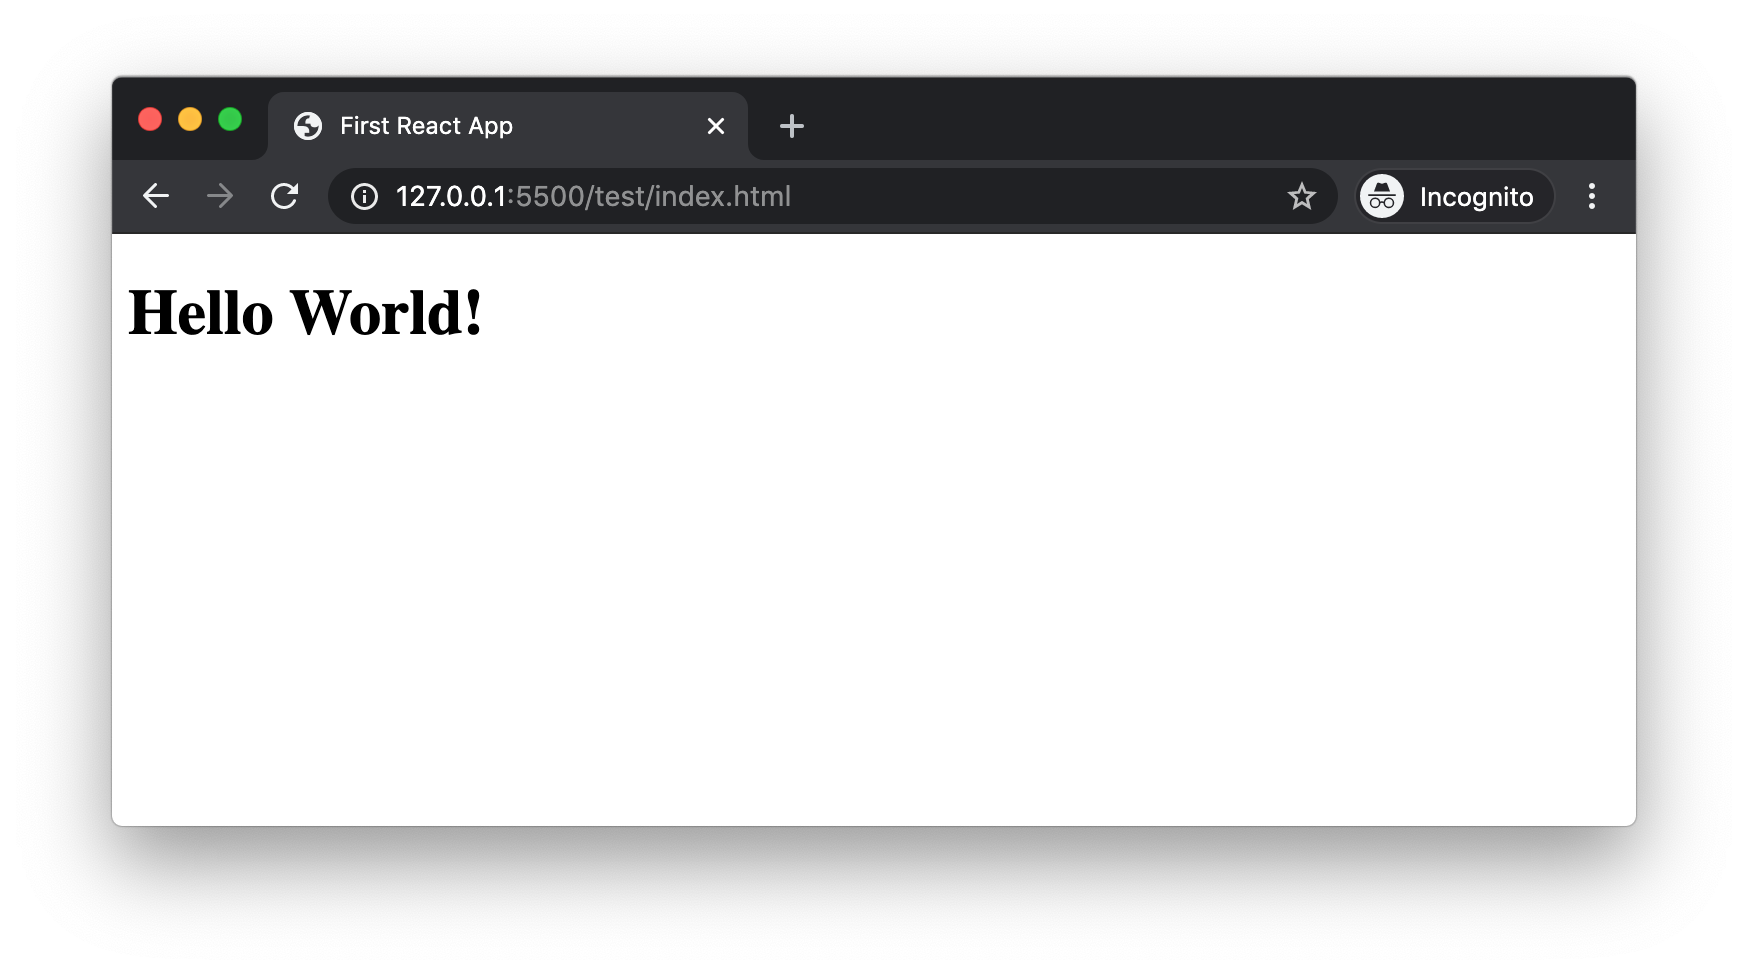
Here the HTML code that is rendered as part React component is written using React. That says that, HTML is being rendered by JavaScript. So, when using React, we do not have to render all HTML code to browser and programatically hide whichever not needed. Instead, we can do the condition check in JavaScript and render only the needed HTML code to browser DOM.
In the parameter list of React.createElement(), second argument passed was null. Let us add an object instead of null.
const MyComponent = React.createElement(
"h1",
{ style: { color: "red" } },
"Hello World!",
);
Now a style attribute is added to the h1 tag.
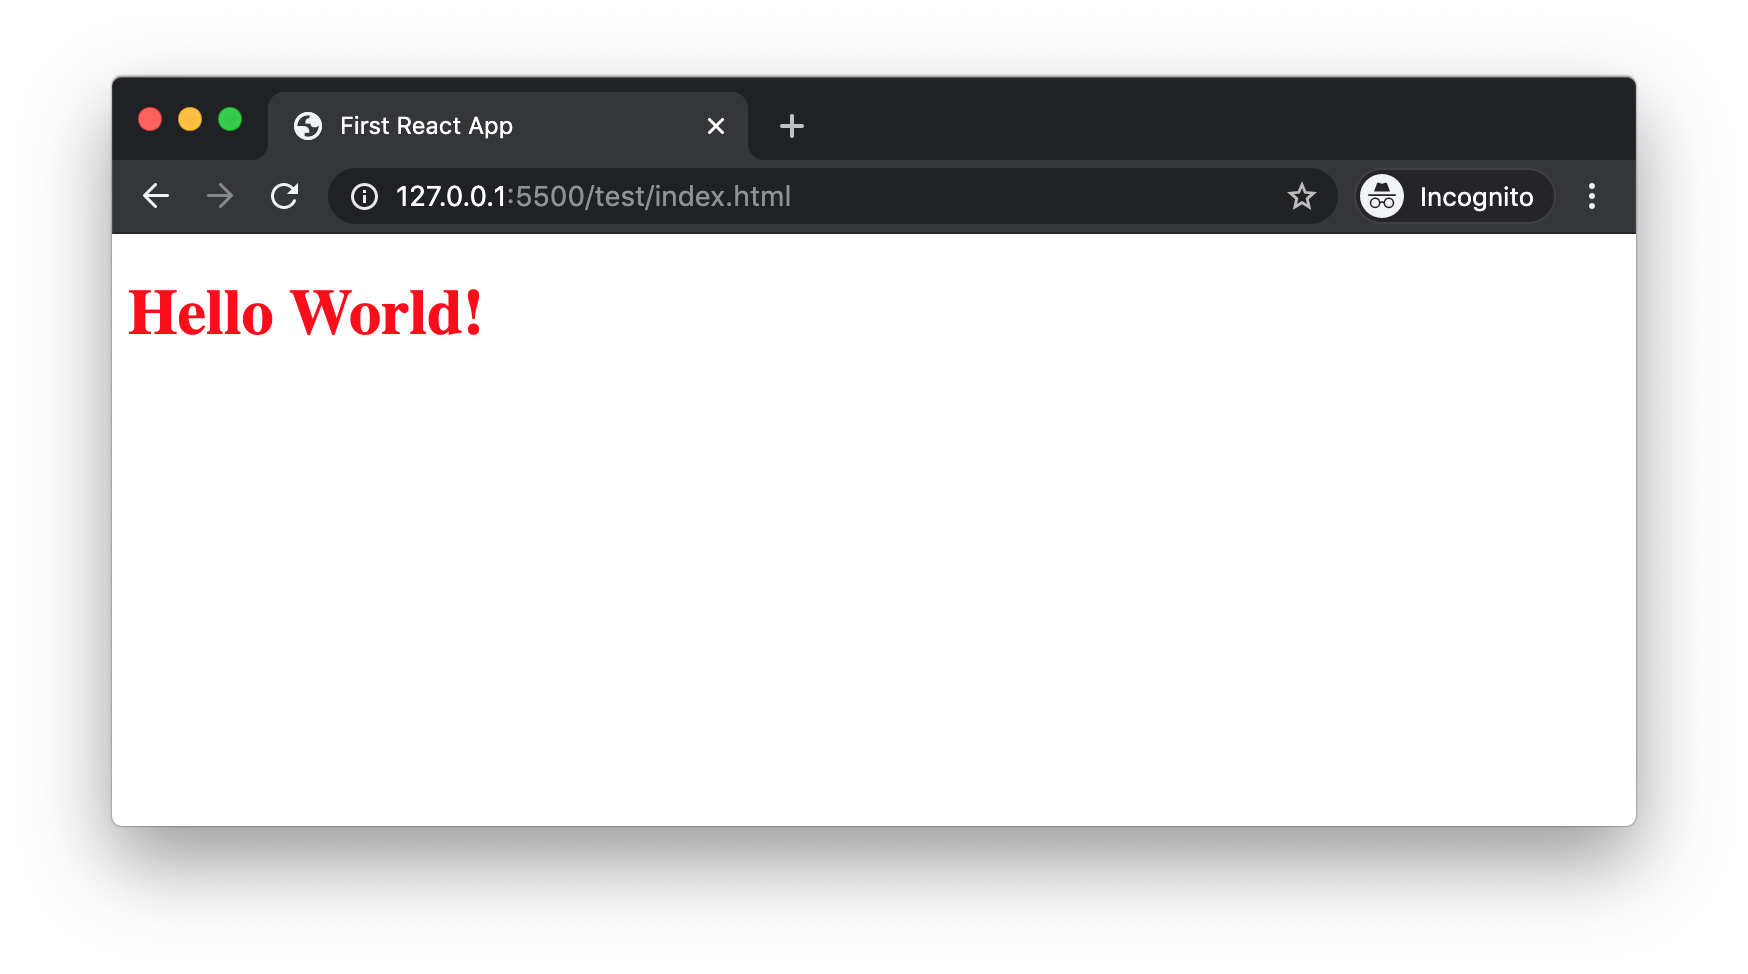
So now we successfully created a React component and used it in our web page. But as we can see in React.createElement(), the syntax used to show a simple h1 tag is quite twisted. When the amount of HTML is more, things can get worse. For example, consider the HTML below.
<div>
<h1>Blog Title</h1>
<p>Here is the blog description.</p>
</div>
When we convert the code to equivalent React code, it looks like below.
const MyComponent = React.createElement("div", null, [
React.createElement("h1", null, "Blog Title"),
React.createElement("p", null, "Here is the blog description."),
]);
To make the life of developers easy, Facebook came up with a special syntax called JSX(JavaScript Syntax eXtension). Instead of writing difficult React.createElement() code, it helps to work with HTML kind of syntax. For example, the above component can be written like below in JSX.
const MyComponent = (
<div>
<h1>Blog Title</h1>
<p>Here is the blog description.</p>
</div>
);
More on JSX in the next section.
As we saw earlier, if we are using JSX syntax, it is very easy to work with. But, there is a problem. Browsers can download JavaScript files and execute it using their JavaScript engine. JavaScript engines cannot understand JSX.
So, let the developers like us work with JSX. We can use a tool to convert our JSX work to pure JavaScript. That tool is Babel.
Let us rename our component.js file to component.jsx. That is just for code readability. Now any other developer can know that this file contains JSX code. Here is the full code in component.jsx.
const MyComponent = (
<div>
<h1>Blog Title</h1>
<p>Here is the blog description.</p>
</div>
);
ReactDOM.render(MyComponent, document.getElementById("root"));
Node.js is a server-side runtime environment for JavaScript. That means Node.js has got an engine which can read and execute JavaScript. You can install it from Node.js official site.
You can verify Node.js installation by typing following command in terminal.
node --version
It will display the version number. Mine is v12.14.1. We need Node.js to run some build tools like Babel.
When installing Node.js, it also installs NPM(Node Package Manager). It is a rich repository of many packages. You can check for npm installation by typing following command in terminal.
npm --version
My NPM version number is v6.13.4. We download and install required tools from NPM repository.
Babel is a transpiler. It means it can convert one type of code to another type. Eg: Babel can convert ES6 code to ES5. Babel can also convert JSX code to React.js code.
We now need Babel to convert component.jsx to component.js file. To use babel command in terminal, we need to install Babel globally. Run this command in terminal.
sudo npm install -g babel-cli
-g command is used to install any package globally. Only if a command is installed globally, we can use babel as a command in terminal. We can test if Babel is installed successfully by typing following command in terminal.
babel --version
In my machine, I have already installed v7.4.3 sometime back.
Now babel-cli is like a robot. But it does not have knowledge to convert JSX to JavaScript. We need to teach Babel how to do that. This is by installing @babel/preset-react package. If babel-cli was installed globally, @babel/preset-react is installed within the project boundary.
Before installing @babel/preset-react, we need to create a file in our project with name package.json. This file maintains the package dependencies of our project. npm has an init command to create package.json file. In the terminal, from the root of our project, run below command.
npm init -y
-y is to accept all the default values while creating the package.json file. Now the file is created with default content that looks like this.
{
"name": "test",
"version": "1.0.0",
"description": "",
"main": "index.js",
"scripts": {
"test": "echo \"Error: no test specified\" && exit 1"
},
"keywords": [],
"author": "",
"license": "ISC"
}
Now we can start with @babel/preset-react package installation. In the command prompt, type:
npm install --save-dev @babel/preset-react
From the root project folder in terminal, run this command.
babel --presets @babel/preset-react component.jsx -o component.js
Here we are telling babel to use @babel/preset-react to convert component.jsx to component.js. If we open the component.js file, we can see the transpiled pure JavaScript code.
If we open the index.html in a browser, we can see the output.
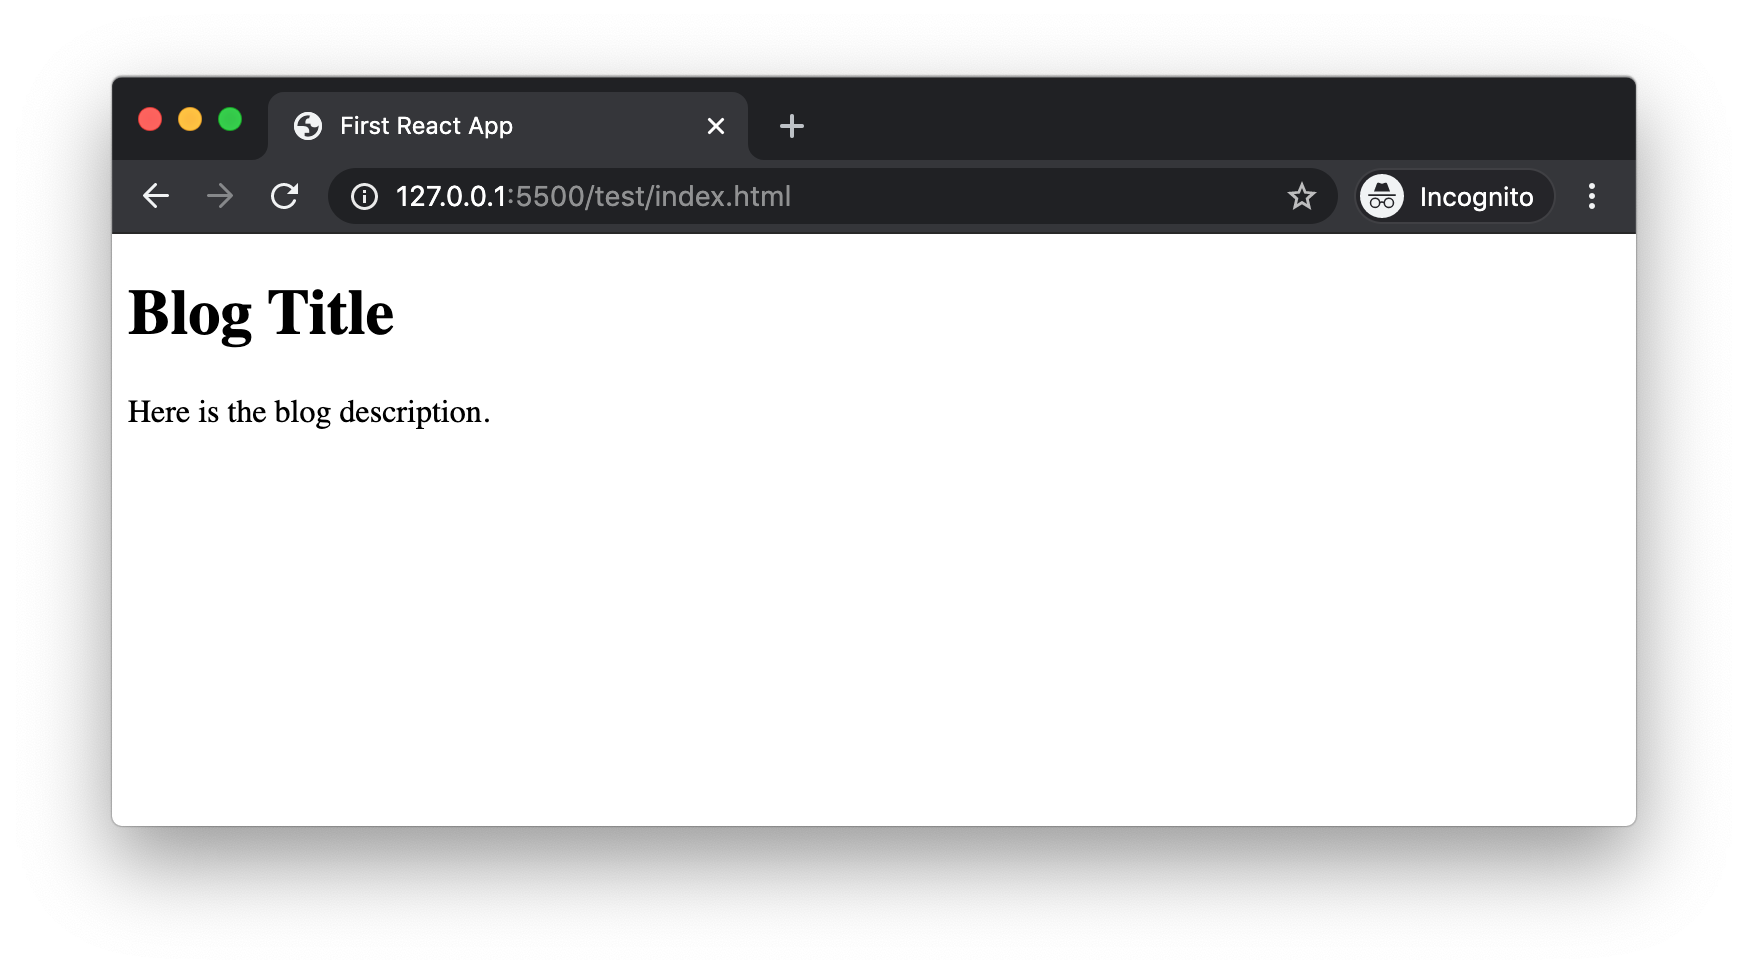
Now we saw how to create a React component using JSX. Our project is a very simple one as of now with only one component file. That is why it is ok to go to terminal and run babel command everytime. But as the project grows bigger, we need to automize some tasks. That part we will discuss in a separate article.
React.js is a UI component library. We can write React components using pure JavaScript. But, that can be of huge effort. JSX syntax helps to write React components in HTML kind of syntax. Browsers cannot understand JSX. So we use a transpiler like Babel to convert JSX to pure JavaScript code.
React Native is a framework designed for cross-platform mobile app development without compromising UX and UI experience.
React Native helps to maintain a single codebase, at the same time give us both Android and iOS apps. Native apps on the other hand can provide latest OS features and is more flexible. When to use what is based on project in hand.
React Native is in version 0.62 now and is very stable. There were lot of issues and memory leaks in the past. The React Native team is very active and the product is now well suited for production use. So if the situation asks for it, we can use it with confidence.
Since new versions are coming fast, always keep track of new versions and features in that release. A problem you face might be solved by just upgrading React Native to latest version.
If our client wants their app only for a certain OS like iOS or Android, then we do not have to go with React Native. We can directly jump into native app development.
Sometimes, the project asks for platform specific features like iOS ARKit. React Native might not be supporting this feature. Likewise, if the app has too complex features, React Native might be a difficult choice. It is good to go with native approach. Even though the man effort might be more, but in the long term it will pay off.
Most of the high traffic apps are not so complex. They might be having lot of CRUD operations and need access to basic phone features like camera, mic, push notifications and access permissions. React Native can easily handle these features.
Maintaining a single code base in React Native comes with lot of advantage. A new feature can be release to both iOS and Android at the same time. In the same line, if there is any bug, it can be fixed in one place for both iOS and Android.
While developing the application one can maintain a single tool for code quality check and unit testing. Also, the QA team has to do only one regression testing.
Some projects depends on a lot of third party libraries. Adding reference to lot of such libraries can slow down a React Native app. In this situation, go for native app development.
A React Native app can be easily done by a web developer with JavaScript and React knowledge. The framework abstracts the complexity and make it easy for the developer.
Having said that, a native app developer, after learning React Native can take the app to next level. That is because if the app requires complex features, or latest features like ARKit, or implement animations using OpenGL, a native app developer is required to extend the React Native application.
There is a steep learning curve for any developer. But overcoming that is worth the effort. Also, it will be good if you hire a very experienced React Native developer for your team's first RN project. There are areas like app structure, navigation, deployment which can cost lot of hours especially for a newbie. If the project has got tight deadline, have an experienced developer on team.
When going through case studies of many React Native app development, most of the teams are not aiming both iOS and Android when they start. They first start with iOS app development using React Native. Once it is done, they could come up with the Android version in a range of two weeks.
About 95% of iOS code can be reused for Android development. 5% effort is required extra to handle Android specific navigation and UI patterns.
Also, like Bootstrap for web, there are libraries to quick start React Native development. NativeBase and Pepperoni are two examples.
From the experience of Airbnb team, we also need to know that even though React Native is a framework and vastly simplifies mobile development, it is not trivial to get up and running, particularly if you have an existing codebase. Expect to invest a substantial amount of time and energy to integrating React Native into your existing mobile codebase.
When working with native app development, working with a simulator is fine. Chances of breaking after deploying to an actual physical device is very less.
But when it comes to React Native development, start testing on physical device from day one. We might run into problems that are specific to real environment. It is best to identify these problems at an early stage.
Not only will you find a few design inconsistencies every now and then, but you’ll also come across certificate problems, network constraints and spot performance-related issues that the simulator can’t easily reproduce for you. Also keep in mind that there are still people running iOS versions lower than 10 or 9, so make sure to test for these platforms too.
xCode can test, validate, build and upload an app to Appstore. But that might be time consuming. In that case, we can consider apps like Bitrise to do those tasks for us. Microsoft Appcenter is also another product to do the code push.
React is a JavaScript library which can be easily added to any project. If you have worked with jQuery, you know how easy it is to add a jQuery file reference in your web page and start using it. In a similar manner, it is very easy to work with React also.
We are going to create a single HTML file that creates a UI interface using React.
Create a folder hello-world-app. Inside the folder, create an index.html file which is going to contain all our code. Fill the html file with following boilerplate code.
<!DOCTYPE html>
<html lang="en">
<head>
<meta charset="UTF-8" />
<meta name="viewport" content="width=device-width, initial-scale=1.0" />
<title>Hello World React App</title>
</head>
<body></body>
</html>
So far nothing special. Next we will add reference to React library.
In order for React library to run, we need to add reference to two JavaScript files. One is react.js and other one is react-dom.js.
In the <head> section add following two lines.
<script
src="https://unpkg.com/react@16/umd/react.development.js"
crossorigin
></script>
<script
src="https://unpkg.com/react-dom@16/umd/react-dom.development.js"
crossorigin
></script>
The first file react.development.js contains code to create React components. You can visualize a component as portion of UI.
The second file react-dom.development.js does the efficient work to render the component in the browser.
Ideally in a real project, we write component creation code in a separate JavaScript file. Here we are going to write the first component code inside a <script> block.
Just above the closing </body> tag, add the following code inside a <script> tag.
const MyComponent = React.createElement("h1", null, "Hello World!");
Let us understand what happened here. When react.development.js file is added to our page, it adds a React object globally. React object contains a method createElement() which is used to create a component. Our code created a component which will render following html in browser when rendered.
<h1>Hello World!</h1>
In the previous section, we only create a component. But we did not render it in browser. In order to render the component, we need to first set a placeholder in our html page. For that, we are adding a <div> tag with id myComponent inside <body>.
<body>
<div id="myComponent"></div>
...
</body>
Now we need to tell React to render the component inside the div we just created. As mentioned earlier, rendering job is done by react-dom.development.js file. When this file is added to a page, it creates a global object called ReactDOM. This object contains a render() method which places the component inside our div block.
In our <script> block, after creating component, add following line.
ReactDOM.render(MyComponent, document.getElementById("myComponent"));
The render() method accepts two arguments. First one is the component to be rendered and the second is the DOM node where the component needs to be placed.
Here is the final HTML file.
<!DOCTYPE html>
<html lang="en">
<head>
<meta charset="UTF-8" />
<meta name="viewport" content="width=device-width, initial-scale=1.0" />
<title>Hello World React App</title>
<script
src="https://unpkg.com/react@16/umd/react.development.js"
crossorigin
></script>
<script
src="https://unpkg.com/react-dom@16/umd/react-dom.development.js"
crossorigin
></script>
</head>
<body>
<div id="myComponent"></div>
<script>
const MyComponent = React.createElement("h1", null, "Hello World!");
ReactDOM.render(MyComponent, document.getElementById("myComponent"));
</script>
</body>
</html>
This HTML file when opened in a browser displays a H1 tag with "Hello World!" text.
Previous day, all of a sudden my client's development site was not accessible. I was getting a no access error page returned by CloudFlare. When checked with colleagues, IPv6 was the blocker in my MacBook. As a solution, I had to turn OFF IPv6 on my Mac.
I took System Preferences > Network. There I clicked on Advanced option of Wi-Fi. Then under TCP/IP, I could see Configure IPv6 option. The problem is, there was no Off option.

Then the following solution worked for me. I opened the terminal and ran the following command.
networksetup -setv6off Wi-Fi
It turned OFF my IPv6 and then I could see the Off option in the dropdown.

When working with Jest v24 and above, developers are facing an issue with snapshot testing.
In my code, I am working with Jest v26 and Enzyme v3. In unit testing, I am doing snapshot testing with code like below.
import { shallow } from "enzyme";
import App from "./App";
const app = shallow(<App />);
it("renders correctly", () => {
expect(app).toMatchSnapshot(); // check if a component renders correctly
});
When the tests are running, it creates a __snapshots__ folder. But the snapshot is storing an empty object like below.
exports[`renders correctly 1`] = `ShallowWrapper {}`;
However we update our App component, the snapshot is not going to change. This results in always passing snapshot tests, since there is no change when the generated snapshots are compared.
The key issue is, for some reasons the module which converts a component to json string is not working. How to fix it?
Developers are saying this issue started from Jest v24. So most of them are downgrading Jest to v23. If that is ok in your project, you can try that.
In this solution, we are installing an extra package to do enzyme to json conversion.
First of all, install enzyme-to-json as a dev dependancy in your project.
yarn add --dev enzyme-to-json
Now tell Jest to use snapshotSerializers from enzyme-to-json. To do that, add a new key called "jest" in package.json and mention the new serializer.
// package.json
// { ...
"jest": {
"snapshotSerializers": [
"enzyme-to-json/serializer"
]
}
// }
Now when we run the test, correct JSON is written to snapshot file. Now the snapshot written will look like this:
exports[`renders correctly 1`] = `
<div>
Hello World
</div>
`;
React Test Renderer can be used to create snapshots. It is not a helper for Enzyme. Instead it is a replacement for Enzyme. First install it using:
yarn add --dev react-test-renderer
Now the App.test.js file should contain below code.
import React from "react";
import { create } from "react-test-renderer";
import App from "./App";
const app = create(<App />);
it("renders correctly", () => {
expect(app.toJSON()).toMatchSnapshot(); // check if a component renders correctly
});
create() method is similar to shallow() in Enzyme. .toJSON() method generates the json to be written to snapshot file.
Deno is a JavaScript runtime that is built on the V8 JavaScript engine and the Rust programming language. It is built by Ryan Dahl, the author of Node.js.
At the time of writing, Deno just launched v1.0. Let us try to install Deno on our laptop.
My machine is a MacBook Pro. The official site lists many options to install Deno in different operating systems.
First, open the terminal. Execute the following command.
curl -fsSL https://deno.land/x/install/install.sh | sh
When we run the above command, Deno asks us to add some variables to the environment.
...
Manually add the directory to your $HOME/.bash_profile (or similar)
export DENO_INSTALL="/Users/<username>/.deno"
export PATH="$DENO_INSTALL/bin:$PATH"
Run '/Users/joby/.deno/bin/deno --help' to get started
As per the instructions, open .bash_profile in any editor. Add the following two lines as the last lines of the file.
export DENO_INSTALL="/Users/<username>/.deno"
export PATH="$DENO_INSTALL/bin:$PATH"
Replace <username> with your machine username.
Now Deno is successfully installed on your machine. We can verify the installation by typing the following command in the terminal.
deno --version
We can see the following output if everything went well.
deno 1.0.2
v8 8.4.300
typescript 3.9.2
To use enzyme with React 16, I need to use an enzyme adapter. To setup the adapter before any Jest tests, I wrote the code in src/setupTests.js. For some reasons, that file is not being called by CreateReactApp. Instead, I am getting an error like this:
Enzyme Internal Error: Enzyme expects an adapter to be configured, but found none. To
configure an adapter, you should call `Enzyme.configure({ adapter: new Adapter() })`
before using any of Enzyme's top level APIs, where `Adapter` is the adapter
corresponding to the library currently being tested. For example:
import Adapter from 'enzyme-adapter-react-15';

Solution:
I added a flag to test command in package.json file. So now my test command looks like:
react-scripts test --setupFiles ./src/setupTests.js
Then I ran npm run test again and it worked.
In JavaScript, if we need to retain a value for future use, it assigns the value to or stores the value in a variable. Variables are named memory locations. When we declare a variable in JavaScript, it means that a memory location is allocated to store some value and that location can be accessed using the variable name.
Here is an example of variable declaration.
var name;
Here name is pointing towards some memory location in RAM. One of the way to store some value to that memory location is by using assignment operator(=).
name = "Backbencher";
In JavaScript, a variable can be declared using any one of the following keywords.
varletconstvar can declare either global scoped or function scoped variables.
var a;
function baz() {
var b;
}
Variable a is declared outside of all functions. Hence, a is in global scope. Variable b is declared inside a function baz(). Hence, b is in function scope, ie the scope of baz(). The variable b can be used only inside the function baz().
Default value of a variable declared using var is undefined.
var a;
console.log(a); // undefined
A variable declared using var can be redeclared. It does not throw any error even in strict mode.
var a = 3;
var a = 5;
console.log(a); // 5
JavaScript engine is keeping a track of all variables declared. So in line 2, instead of redeclaring a, the engine maps to the memory location created in line 1. In that case, what is the output of below code?
var a = 3;
var a;
console.log(a);
If you expected undefined, it is wrong. The output is 3. Here also in line 2, it is a redeclaration of variable a. JavaScript engine skips that. Since there is no assignment in line 2, previous value(3) is retained.
Variables declared using var are created before executing any code. Before interpreting JavaScript code line by line, JavaScript engine parses through the full code. During this parsing step, the engine allocates memory to variables declared using var and assign undefined. This behaviour is called hoisting of variables.
console.log(a); // undefined
var a;
Here, line 1 is trying to print the value of a. But the variable a is declared only in line 2. Due to hoisting, when JavaScript engine executes line 1, variable a is already created. That is why above code outputs undefined.
Since the memory is allocated during parsing step, for a developer it seems like JavaScript is hoisting or moving the variable declaration to the top of current scope, before execution. For example, the JavaScript code we write looks like below.
console.log(a);
var a;
console.log(b);
var b;
console.log(c);
var c;
After parsing step, the code looks like below for the JavaScript engine.
var a;
var b;
var c;
console.log(a);
console.log(b);
console.log(c);
This can be the reason why this behaviour is called hoisting like in flag hoisting.
During the hoisting process, only the memory allocation is done. Assigning values to the memory location happens only during execution. In that context, what will be the output of following code?
console.log(a); // undefined
var a = 6;
Above code prints undefined as output. It is because, the value 6 is assigned to the variable only when the JavaScript engine reaches line 2. Till that time the value of a is undefined.
When a variable is declared using var in global scope, that variable is added as a non-configurable property to the global object.
var myVar = 4;
console.log(window.myVar); // 4
Here the myVar property of window cannot be deleted using delete operator.
var myVar = 4;
delete window.myVar;
console.log(window.myVar); // 4
Question
What is the output?
var a = b,
b = "A";
console.log(a, b);
Answer
undefined, "A"
Some of you might think the output is "A", "A". But that is not right.
Here, after hoisting, the memory is allocated for a and b and is assigned with undefined. To make things more clear, the code looks like below after hoisting.
var a;
var b;
a = b;
b = "A"; // It is not the other way round
console.log(a, b);
A variable declared using let keyword is block scoped. A block is a section of code wrapped in curly braces({}).
{
let a;
}
console.log(a); // ReferenceError: a is not defined
A variable declared using let will have undefined as the default value.
let a;
console.log(a); // undefined
Just like declaring a global variable using var, we can declare a global variable using let. But, when declaring a global variable using let, it is not added to the global object as var does.
let letVariable = "let it Backbencher";
var varVariable = "var it Backbencher";
console.log(window.letVariable); // undefined
console.log(window.varVariable); // "var it Backbencher"
When a variable is redeclared using let, it throws SyntaxError.
let a;
let a; // SyntaxError: Identifier 'a' has already been declared
Even when the first variable is declared using var, the error appears.
var a;
let a; // SyntaxError: Identifier 'a' has already been declared
A variable declared using let cannot be accessed before its declaration. The variable is treated to be in Temporal Dead Zone. Consider following code.
console.log(a);
console.log(b);
var a;
let b;
Before executing the code line by line, there is a parsing step. During parsing, all the declarations are understood and memory allocation and scope is defined. When memory is allocated for a, a value of undefined is automatically assigned to it. But for b, memory is allocated but not assigned with a value.
After parsing, the execution starts line by line. So when the execution reaches line 2, there is a memory for b, but is in a non-readable condition(Temporal Dead Zone). In line 4, the engine assigns undefined to b after seeing the declaration statement. Statements if any after line 4 can access the variable b.
Question
What is the output?
let a = 10;
{
let a = 20;
console.log(a);
}
console.log(a);
Answer
20
10
Line 1 creates a variable a in global scope. Line 2 creates a new block using {}. Line 3 creates a new variable in the block scope. 20 is then assigned to the new block scoped variable. It does not affect the outer variable.
Question
What is the output?
let a = 10;
{
var a = 20;
}
console.log(a);
Answer
Line 3 throws error.
SyntaxError: Identifier 'a' has already been declared
const is used to declare variables whose values cannot be re-assigned. In effect, const creates constant variables.
const a = 5;
a = 4; // TypeError: Assignment to constant variable
A constant variable need to be assigned at the same time of declaration. If we try to separate the declaration and assignment operation, it throws error.
const a; // SyntaxError: Missing initializer in const declaration
a = 5;
A variable declared using const is block scoped.
{
const a = 5;
}
console.log(a); // ReferenceError: a is not defined
A constant variable cannot be redeclared. The initial declaration can be either through var, let or const.
var a;
const a = 5; // SyntaxError: Identifier 'a' has already been declared
A variable declared using const is not hoisted, just like let.
console.log(a); // ReferenceError: Cannot access 'a' before initialization
const a = 5;
Here note the error message in line 1: "Cannot access 'a' before initialization". That means, the engine knows that the variable is going to be declared later. That awareness is obtained during the parsing step before code execution. In line 1, variable a is said to be in Temporal Dead Zone.
Elements of a constant object can be updated. It is because, when we assign an object to a constant variable, only the reference of the object is saved in the variable. Even when we update the object elements, the reference does not change. When the reference is kept constant, there will not be any error.
const obj = {
name: "Backbencher",
};
obj.name = "Updated";
console.log(obj.name); // "Updated"
| var | let | const |
|---|---|---|
| Function scoped | Block scoped | Block scoped |
| Global variables are attached to global objects | Global variables are NOT attached to global objects | Global variables are NOT attached to global objects |
| Hoisted | Not hoisted(Temporal Dead Zone) | Not hoisted(Temporal Dead Zone) |
| Value can be changed | Value can be changed | Value cannot be changed |
JavaScript is a loosly typed and dynamic language. Variables in JavaScript are not directly mapped with any particular data type. In JavaScript, the type of a variable is decided by the type of value it holds.
let a = "Backbencher";
console.log(typeof a); // "string"
a = 10;
console.log(typeof a); // "number"
typeofis an operator in JavaScript that returns the type of a variable or value as a string.
In line 1, a is assigned with a string value "Backbencher". That makes the type of a as string. In line 3, we reassigned a with a number value 10. That makes a a number type. That is why we say JavaScript is loosly typed.
In languages like Java, which is a strongly typed language, we need to specify the type of variable at the time of declaration.
int i;
Now, the variable i in Java can hold only integer values. When trying to assign a non-integer value to i, Java throws an error.
Next.js is a popular framework built on top of React. It handles several functionalities required for a web app, like routing, server-side rendering, and APIs. Having said that, how easy is it to create a simple website using Next.js? Let us see in this article.
We need Node.js to run a Next.js website. In order to run a site with php files, we need a PHP engine in our server. Only that engine can execute .php files and respond back HTML to the user. Just like that, the Next.js framework executes JavaScript on the server. For that we need a JS engine which can parse and execute JavaScript on the server. And that is the role of Node.js.
We can check if Node.js is installed on our machine by typing the following command in the terminal.
node --version
If Node.js is installed, the above command prints the installed version number in the terminal, like v14.15.0. The version number should be greater than v10.13.0 to run Next.js.
If we do not have Node.js, we can download it from nodejs.org and install it.
We can also install Node.js using NVM. It allows you to install multiple versions of Node.js on the same machine. Whenever required, it is very easy to switch between the versions.
First we need to decide the directory in which we are going to store our Next.js project. I store all my projects under Documents/projects. I am using macOS. You can select any directory of your choice.
Next, navigate to that directory in the terminal.
cd ~/Documents/projects
We do not have to create a folder for our Next.js project. That will be created in the following steps.
Staying in the chosen directory, execute the following command.
npx create-next-app
npx is a global command installed along with Node.js software. It helps to download and run a package in one step. Before npx, we had to install a package globally and then run it. In that case, we had to deal with permission-related issues. npx also ensures that the latest package is used while executing.
create-next-app is an interactive package. It will take the app name as input to configure and set up our Next.js project.
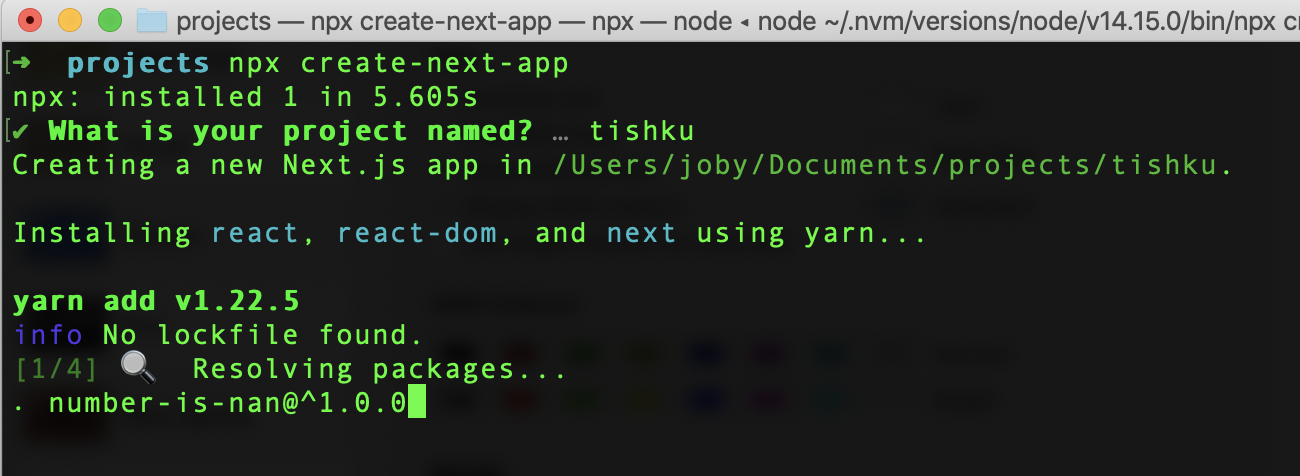
I gave the project name as tishku. Therefore, a folder tishku is created under the projects folder. The tishku folder contains a Next.js boilerplate code.
Now our Next.js app is created. We can change to the project folder in the terminal.
cd tishku
Then we can run the application by executing
npm run dev
This command will run our Next.js application in development mode. By default, the app can be accessed at http://localhost:3000. When we open the link, it looks like this:
Awesome! We just set up and ran a Next.js app. The home page we are seeing is actually taken from pages/index.js. We can edit that file and play around.
Relational operators test for a relationship such as equal to, less than and so on. Relational operators return true or false depending on whether the relationship exists.
console.log(2 < 3); // true
Equality(==) operator checks if two values are same. The two operands can be of any type. If two operands are of different types, JavaScript converts both operands to same type and performs the equality check. Let us understand how == operator performs comparison.
If both operands are of same type and if their values are same, then equality(==) operator returns true.
If both operands are of different types, equality(==) operator applies a set of rules to determine equality.
If one value is null and other undefined, they are equal.
console.log(null == undefined); // true
If one value is number and other one a string, the string value is converted to number and then the comparison is performed.
console.log(3 == "3"); // true
If either of the operands is true, it is converted to 1. If the operand is false, it is converted to 0. After that the comparison is performed.
console.log(true == 1); // true
console.log(true == "true"); // false
console.log(false == 0); // true
console.log(false == "false");
false;
In the above example, note that when true is compared with "true", it retured false. In a relational operation, true and false are always converted to numbers.
If either of the operands is an object and other operand is a number or string, the object is converted to a primitive type using valueOf() or toString() method of the object. Then the comparison takes place.
console.log([2, 4, 6] == "2,4,6"); // true
Above statement is true because an array is converted to a string by joining its elements with comma(,).
Strict Equality(===) operator returns true only if the value and type of both operands are same.
console.log(3 === 3); // true
console.log(3 === "3"); // false
Inequality operator(!=) returns true if both operands are not equal according to equality operator(==).
console.log(3 != 4); // true
Strict Inequality operator(!==) returns true if both operands are not equal according to strict equality operator(===).
console.log(3 !== "3"); // true
Comparison operators test the relative order of their operands. Relative order is calculated based on number or alphabets. There are 4 comparison operators.
<)The < operator evaluates to true if its first operand is less than the second one. Otherwise it returns false.
console.log(1 < 2); // true
console.log(4 < 1); // false
console.log("A" < "a"); // true
When "A" is compared "a", their ASCII codes are compared. ASCII code of "A" is 65 and of "a" is 97.
>)The > operator evaluates to true if its first operand is greater than the second one. Otherwise it returns false.
console.log(6 > 4); // true
<=)The <= operator evaluates to true if its first operand is less than or equal to the second one. Otherwise it returns false.
console.log(4 <= 4); // true
>=)The >= operator evaluates to true if its first operand is greater than or equal to second one. Otherwise it returns false.
console.log(6 >= 4); // true
console.log(4 >= 4); // true
console.log(3 >= 4); // false
Promise in a real life as we all know is an assurance given by someone to deliver something. If we visit a Pizza corner and order a pizza, they will not immediately handover us a pizza. Instead they will handover a piece of paper with a token number. That piece of paper is a promise given to us assuring pizza delivery.
Assume we are creating a function to order pizza. As mentioned earlier, it or the person who takes the order should return a promise.
function orderPizza() {
return new Promise(() => {
// set of instructions to process order
});
}
A new promise(pizza order token) is created using new Promise() and then returned by orderPizza() function. As a user, we have to just call orderPizza(), get the token and wait for the pizza. But inside orderPizza() function body, there should be set of instructions to process the order. And that set of instructions is passed as a callback function to Promise constructor function.
While processing the pizza order, there can be two outcomes. One, the pizza is prepared successfully or in other words the task is resolved. Two, due to some reasons the order has to be cancelled or rejected. To visualize, we can imagine there is a red and green button in the pizza counter. If the order is ready, the counter staff will press green button(resolve), otherwise red button(reject). In our code, we can inject these buttons to handle resolve and reject case. Here is the updated orderPizza() function.
function orderPizza() {
return new Promise((resolve, reject) => {
let pizzaStatus;
if (pizzaStatus === "prepared") {
resolve(); // pressed green button
} else {
reject(); // pressed red button
}
});
}
We just put an if...else to understand how resolve and reject are used. We will change it later.
In the previous section, we created a function to create a promise. Now, let us call the function to order a pizza.
var pizzaPromise = orderPizza();
pizzaPromise is the token number we have received. Let us go in depth on pizzaPromise.
Firstly, since orderPizza() function returns a new Promise(), pizzaPromise is an instance of Promise constructor function. So pizzaPromise have a set of properties and methods defined by Promise constructor function. If we type pizzaPromise. in browser console, we can see the list of keys present in it.
As we can see pizzaPromise is an object with several methods. The methods which we are interested are .then() and .catch(). These are event listeners of a promise, just like a button object have onclick(), onblur() and so on. We will cover more in the coming sections.
For now, we have received a promise object which has some event listeners.
Now the customer has received the token. There is no use in simply sitting with the token. We need to listen to get the update about our order.
.then()As we saw earlier, .then() is a method of pizzaPromise. It is an event listener for both success and failure case of promise. Let us first define two functions to handle resolve and reject cases.
function pizzaIsReady() {
console.log("I am very happy");
}
function pizzaFinished() {
console.log("I am sad");
}
We can now set to call pizzaIsReady() if the promise is resolved or call pizzaFinished() if the promise is rejected.
pizzaPromise.then(pizzaIsReady, pizzaFinished);
Let us now see if the success scenario works. We can modify our orderPizza() function to resolve the promise after 5 seconds, just to mimick that the pizza is ready after 5 seconds. Here is the complete code so far.
// Function that returns a new promise
function orderPizza() {
return new Promise((resolve, reject) => {
setTimeout(() => {
resolve();
}, 5000);
});
}
// Success handler
function pizzaIsReady() {
console.log("I am very happy");
}
// Error handler
function pizzaFinished() {
console.log("I am sad");
}
// Getting and listening to promise
var pizzaPromise = orderPizza();
pizzaPromise.then(pizzaIsReady, pizzaFinished);
This code will print "I am very happy" in console after 5 seconds of page load. If we change resolve() in orderPizza() to reject(), then pizzaFinished() is called.
We just learned that .then() is an event listener. It accepts 2 arguments. First one is success handler for promise and second one is error handler.
.catch()In the previous section, we used only then() to handle resolve and reject. Instead, for better code readability, we can use .then() to handle resolve() and .catch() to handle reject().
pizzaPromise.then(pizzaIsReady).catch(pizzaFinished);
The difference is only in the syntax. Internally .catch() calls .then() and pass the callback as .then()'s second argument.
resolve() or reject()Say we are using promises to fetch data from an API. For demo purpose let us take a public API available on web. Anyone can search for users in Github using their public API. There is no signup process. Here is the API link to search for facebook in users.
https://api.github.com/search/users?q=facebook
resolve() Invocation.then() and .catch()We saw that if a Promise is resolved, .then() is triggered. .then() also returns a Promise object on which we can access the .then() again. So the pseudocode looks like:
wait of something to finish
then do some task until finish
then do some other task until finish
...
catch error at any steps
This is called chaining of promises. It allows a sequential flow control.
.allSettled()allSettled() is a static method of Promise constructor function. It accepts an array of promises as arguments and returns a promise object. The returned promise object will resolve only when all the promises in the passed array are settled. Settled means either resolved or rejected.
// Promise 1
const p1 = new Promise((resolve, reject) => {
setTimeout(resolve, 1000);
});
// Promise 2
const p2 = new Promise((resolve, reject) => {
setTimeout(reject, 5000);
});
Promise.allSettled([p1, p2]).then((data) => console.log(data));
Here p1 is a promise that is resolved after 1 second. p2 is a promise that is rejected after 5 seconds. When both these promises are settled after 5 seconds, the response of each promises is logged in console as an array.
As a fullstack JavaScript developer, I come across different technologies and tools on a daily basis. This is a collection of such tools that might come handy for you as well.
Operators are characters or a group of characters which can perform certain operations in JavaScript. Example, + is a character which can be used to perform an addition in JavaScript.
The values on which the operator acts upon are called operands. Example, in case of an addition like 3 + 4, 3 and 4 are operands.
Arithmetic operators perform arithmetic or numerical manipulations on the operands. Basic arithmetic operators are
*/%+-In case of adding two numbers, the + operator requires two operands. Then only it can work. Such operators are called Binary operators.
Some operators like negation(!) requires only one operand. Example:
!false; // true
Such operators are called Unary operators.
Binary and Unary are a way to classify all operators in JavaScript based on the number of operands required. Operators can also be grouped based on the operations they perform. Example: Conditional operators check if a particular condition is satisfied or not. Arithmetic operators perform mathematical calculations.
?.) (ES11)Optional Chaining operator(?.) helps to safely read the value of a deeply nested object property. It returns undefined, if anyone of the nested object is nullish(null or undefined).
Let us take an example to understand this operator. Here is a JavaScript object.
const obj = {
name: "Backbencher",
age: 34,
};
Assume above object is returned from an API. The developer's assumption was the response contained a field for address also like below.
const obj = {
name: "Backbencher",
age: 34,
address: {
city: "Kakkanad",
pincode: 682030,
},
};
The developer tries to read the value of pincode using:
const pincode = obj.address.pincode;
Since the actual response does not have address property, obj.address is undefined. Trying to access pincode property of undefined throws error as show below.
TypeError: Cannot read property 'pincode' of undefined
To avoid this error developers write a chain of type check like:
const pincode = obj && obj.address && obj.address.pincode;
Above code safely executes and assign undefined to pincode. But, as the depth of object increases, the code becomes unnecessarily lengthy.
Optional Chaining operator helps to do this undefined check easily. Here is how above pincode statement is written using optional chaining.
const pincode = obj?.address?.pincode;
Here is an object in JavaScript.
const profile = {
name: "Backbencher",
};
Assuming, there is a method show() in profile object, we are calling the method.
profile.show();
Since show() method does not exist, above statement throws an error:
TypeError: profile.show is not a function
So here, we need to call a method if only it exists. In that case, we can ensure a valid method using ?. and then call it.
profile.show?.();
What if the profile object already contain a property show like below.
const profile = {
name: "Backbencher",
show: 34,
};
Here, even if we use optional chaining operator, we are trying to execute a number property show as a method. That results in TypeError.
TypeError: profile.show is not a function
Here we are talking about normal functions. These functions are either created as a function expression or function declaration. If we need to safely check if such a function exists, before invoking it, use it like below.
window.theFunction?.();
Why window.? Any global function declared is added as a method to window object. Accessing a non-existent property of an object does not throw error. It simply returns undefined. So it is safe to check the function existence from window object.
If we try to use optional chaining directly on the function name like theFunction?.(), we need to make sure that theFunction variable is already declared. Otherwise, the statement throws a ReferenceError.
Above code was checking if the function exists. Next case is, when we expect an object as return value from a function. We need to first check if the returned value is not nullish and then access the object properties.
function baaz() {
return {
name: "Backbencher",
};
}
console.log(baaz()?.name); // "Backbencher"
Above code does not throw error if baaz() returns undefined.
Here we have a higher order function hoc() that accepts a callback function cb.
function hoc(cb) {
cb();
}
If we call hoc() without passing the callback function, it will throw an error.
hoc(); // TypeError: cb is not a function
Optional chaining operator can check if cb is nullish or not before executing it. The updated function definition looks like below.
function hoc(cb) {
cb?.();
}
Now, after placing the optional chaining operator, what if we explicitly pass a non function value to hoc() like below.
hoc(6); // TypeError: cb is not a function
Again, it throws TypeError which is expected. It is because optional chaining operator checks only for nullish values. 6 is not nullish. Therefore JavaScript engine tried to execute it as a function, which resulted in TypeError.
Properties of an object can be accessed using dot(.) or square brackets([]). When using square brackets, we can use expressions along with optional chaining operator.
obj?.["a" + "b"];
Above statement checks if obj is nullish. If not, it returns the value of obj[ab].
We cannot use optional chaining operator on the left hand side of assignment operator. That means, if we would like to first check if the element is there or not, and then assign a value, we cannot use optional chaining operator. That throws SyntaxError.
const obj = {
name: "Backbencher",
};
obj?.age = 23; // SyntaxError: Invalid left-hand side in assignment
We can check if a particular array element is not nullish and then access it using optional chaining operator.
const arr = ["Backbencher", { address: "Kerala" }];
console.log(arr[1]?.address); // "Kerala"
Above code first checks arr[1], ie the second element is not nullish. Since here the second element is an object, we could read the value of address.
If the left hand side is nullish, optional chaining operator does not evaluate right hand side.
var a;
var b;
a?.[(b = 2)];
console.log(b); // undefined
Since a is undefined in above code, the expression b = 2 will not be evaluated. Otherwise, the value of b will be set to 2.
typeof is an unary operator in JavaScript. It returns the type of the operand supplied to it.
console.log(typeof 42); // "number"
var str = "Backbencher";
console.log(typeof str); // "string"
typeof undefinedisundefinedandtypeof nullisobjectinstead ofnull. That is actually a bug in JavaScript implementation happened years ago.
Numeric separator(_) was introduced to make numbers more readable by creating a visual separation between groups of digits. The separator can be used with decimal, binary, hexadecimal or BigInt numbers. This feature was introduced in ES12.
It is difficult for humans to read large numbers quickly. What about 1000000000? Is it a billion or 10 million?. Numeric separators make developers' life easy.
const num = 1000_000_000; // Definitely a billion
Numeric separator is purely for visual separation. It does not have any impact in the functionality. In fact, comparing a number with separator and that without it, results in true.
console.log(1000_000_000 === 1000000000); // true
The numeric separator can appear anywhere inside the number. Following are valid usages of numeric separators.
1000_000_000
123_02
4567_00
3_4_5_6
Numeric separator is not allowed at the end of a number. Therefore, following number is invalid.
123_00_
Also, if a number starts with _, JavaScript treats it as a variable. In JavaScript, a variable can start with _.
const a = _123;
Here _123 is considered as a variable name. Since that variable is not declared, above code will throw reference error.
Numeric separators can be placed in the fractional part of a number.
12.300_00
1e10_10
Here are some examples that consider different use cases of numeric separator.
A binary literal in JavaScript is denoted by prefixing a binary number by 0b. While writing a binary literal, we can place numeric separator to make it more readable.
console.log(0b11_1); // 7
console.log(0b111); // 7
111 is the binary equivalent of decimal number 7.
A Hexadecimal literal in JavaScript is denoted by prefixing a hexadecimal number by 0x. We can include numeric separator in a hexadecimal number.
console.log(0xf_f); // 255
console.log(0xa_b === 0xab); // true
Note that the decimal equivalent of 0xFF is 255.
A BigInt literal can contain a numeric separator.
const a = 1_309_89n;
console.log(typeof a); // "bigint"
console.log(a.toString()); // "130989"
If we place an underscore _ between the number and final n, it will throw an error.
const a = 1_309_89_n;
Above code results in following error:
SyntaxError: Numeric separators are not allowed at the end of numeric literals
All the major browsers support numeric separators. We can see the precise information by visiting this CanIuse link: https://caniuse.com/mdn-javascript_grammar_numeric_separators
Question:
What are hooks in React?
Answer:
Hooks are a new feature added in React v16.8. It allows to use all React features without writing class components. For example, before version 16.8, we need a class component to manage state of a component. Now we can keep state in a functional component using useState hook.
Question:
Will React hooks work inside class components?
Answer:
No
Question:
Why React hooks was introduced?
Answer:
One reason to introduce hooks was the complexity in dealing with this keyword inside class components. If not handled properly, this will take some other value. That will result in breaking lines like this.setState() and other event handlers. Using hooks, we avoid that complexity when working with functional components.
Class components do not minify very well and also make hot reloading unreliable. That is another inspiration to bring hooks.
Another reason is that, there is no specific way to reuse stateful component logic. Even though HOC and render props patterns address this problem, that asks for modifying the class component code. Hooks allow to share stateful logic without changing the component hierarchy.
Fourth reason is, in a complex class component, related code are scattered in different lifecycle methods. Example, in case of a data fetching, we do that mainly in componentDidMount() and componentDidUpdate(). Another example is, in case of event listeners, we use componentDidMount() to bind an event and componentWillUnmount() to unbind. Hooks instead helps to place related code together.
Question:
How useState hook works? What is/are the arguments accepted by this hook and what is returned by the hook?
Answer:
useState hook is a function which is used to store state value in a functional component. It accepts an argument as the initial value of the state. It returns an array with 2 elements. First element is the current value of state. Second element is a function to update the state.
We import useState first from React by
import React, { useState } from "react";
Later we use useState like:
const [currentStateValue, functionToUpdateState] = useState(initialStateValue);
Question:
Here we have a class component with a state value. Each time the button in component is clicked, the count is incremented.
class Counter extends Component {
state = {
count: 0,
};
incrementCount = () => {
this.setState({
count: this.state.count + 1,
});
};
render() {
return (
<div>
<button onClick={this.incrementCount}>Count: {this.state.count}</button>
</div>
);
}
}
Rewrite this component using React hooks.
Answer:
import React, { useState } from "react";
function Counter() {
const [count, setCount] = useState(0);
return (
<div>
<button
onClick={() => {
setCount(count + 1);
}}
>
Count: {count}
</button>
</div>
);
}
Question:
Below we have a class component. It contains code to update the state based on previous state value.
class Counter extends Component {
state = {
count: 0,
};
incrementCount = () => {
this.setState((prevState) => {
return {
count: prevState.count + 1,
};
});
};
decrementCount = () => {
this.setState((prevState) => {
return {
count: prevState.count - 1,
};
});
};
render() {
return (
<div>
<strong>Count: {this.state.count}</strong>
<button onClick={this.incrementCount}>Increment</button>
<button onClick={this.decrementCount}>Decrement</button>
</div>
);
}
}
Rewrite the above code using React hooks.
Answer:
One can update the value of a state variable just by passing the new value to update function or by passing a callback function. Second technique which accepts a callback function is safe to use.
import React, { useState } from "react";
function Counter() {
const [count, setCount] = useState(0);
const incrementCount = () => {
setCount((prevCount) => {
return prevCount + 1;
});
};
const decrementCount = () => {
setCount((prevCount) => {
return prevCount - 1;
});
};
return (
<div>
<strong>Count: {count}</strong>
<button onClick={incrementCount}>Increment</button>
<button onClick={decrementCount}>Decrement</button>
</div>
);
}
Question:
Here we have class component that updates the state using the input from a form.
export class Profile extends Component {
state = {
name: "Backbencher",
age: 23,
};
onNameChange = (e) => {
this.setState({
name: e.target.value,
});
};
onAgeChange = (e) => {
this.setState({
age: e.target.value,
});
};
render() {
return (
<div>
<form>
<input
type="text"
value={this.state.name}
onChange={this.onNameChange}
/>
<input
type="text"
value={this.state.age}
onChange={this.onAgeChange}
/>
<h2>
Name: {this.state.name}, Age: {this.state.age}
</h2>
</form>
</div>
);
}
}
Rewrite the same component using React hooks.
Answer:
import React, { useState } from "react";
function Profile() {
const [profile, setProfile] = useState({
name: "Backbencher",
age: 24,
});
const onNameChange = (e) => {
setProfile({ ...profile, name: e.target.value });
};
const onAgeChange = (e) => {
setProfile({ ...profile, age: e.target.value });
};
return (
<div>
<form>
<input type="text" value={profile.name} onChange={onNameChange} />
<input type="text" value={profile.age} onChange={onAgeChange} />
<h2>
Name: {profile.name}, Age: {profile.age}
</h2>
</form>
</div>
);
}
The setter function of useState() does not automatically merge if an object is stored in state. But in case of setState() method in class components, auto merging happens.
Here we are merging object properties with the help of JavaScript spread operator.
Question:
What are the differences in using hooks and class components with respect to state management?
Answer:
When using setState() in class components, always the state variable is an object. Where as, the state variable in hooks can be of any type like number, string, boolean, object or array.
When state variable is an object, setState() in class components automatically merges the new value to the state object. But in case of setter function in useState(), we need to explicitly merge the updated object property using spread operator.
Question:
What is the purpose of useEffect hook?
Answer:
The Effect hook lets us to perform side effects in functional components. It helps us to avoid redundant code in different lifecycle methods of a class component. It helps to group related code.
Question:
Here is a class component that prints Boom in console whenever it is mounted or updated.
export class Banner extends Component {
state = {
count: 0,
};
updateState = () => {
this.setState({
count: this.state.count + 1,
});
};
componentDidMount() {
console.log("Boom");
}
componentDidUpdate() {
console.log("Boom");
}
render() {
return (
<div>
<button onClick={this.updateState}>State: {this.state.count}</button>
</div>
);
}
}
Remove the redundant console.log statement using React hooks.
Answer:
componentDidMount() and componentDidUpdate() are lifecycle methods. Such side effects can be done using useEffect hook. useEffect hook is a function which accepts a callback function. That callback function is called every time render happens.
The code can be rewritten as:
import React, { useState, useEffect } from "react";
function Banner() {
const [count, setCount] = useState(0);
useEffect(() => {
console.log("Boom");
});
const updateState = () => {
setCount(count + 1);
};
return (
<div>
<button onClick={updateState}>State: {count}</button>
</div>
);
}
Question:
Understand the code below:
function Banner() {
const [count, setCount] = useState(0);
const [name, setName] = useState("");
useEffect(() => {
console.log("Count is updated");
});
return (
<div>
<button onClick={() => setCount(count + 1)}>State: {count}</button>
<input
type="text"
value={name}
onChange={(e) => setName(e.target.value)}
/>
</div>
);
}
It logs "Count is updated" message even when updating the value in textbox. How can we show the log message only when the count state is updated?
Answer:
useEffect function accepts a second parameter which should be an array. Within this array, we need to pass the props or state we need to watch for. Only if those props or state mentioned in the array change, the effect is executed. So in our code, we add the second argument and specify only count value in the array.
Here is the udpated useEffect code:
useEffect(() => {
console.log("Count is updated");
}, [count]);
Question:
We have got a class component that updates time every second. It uses componentDidMount() to set the timer.
export class Clock extends Component {
state = {
date: new Date(),
};
componentDidMount() {
setInterval(() => {
this.setState({
date: new Date(),
});
}, 1000);
}
render() {
return <div>{this.state.date.toString()}</div>;
}
}
Convert the above code to React hooks.
Answer:
componentDidMount() is a lifecycle method that executes only once in a component lifecycle. We use useEffect to bring effects of componentDidMount(). But useEffect runs on every props or state updation. To prevent it, we make use of second array argument of useState. We keep that array empty. So for React, there are no props or state to watch for. Therefore useEffect runs only once like componentDidMount().
Here is the code using React hooks.
function Clock() {
const [date, setDate] = useState(new Date());
useEffect(() => {
setInterval(() => {
setDate(new Date());
}, 1000);
}, []);
return <div>{date.toString()}</div>;
}
Question:
We have a code snippet from a class component which registers and remove an event listener.
componentDidMount() {
window.addEventListener("mousemove", this.handleMousePosition);
}
componentWillUnmount() {
window.removeEventListener("mousemove", this.handleMousePosition);
}
Convert this code to React hooks format.
Answer:
useEffect(() => {
window.addEventListener("mousemove", handleMousePosition);
return () => {
window.removeEventListener("mousemove", handleMousePosition);
};
}, []);
Question:
Here is a code snippet from a Context consumer component.
import { NameContext, AgeContext } from "./ProviderComponent";
export class ConsumerComponent extends Component {
render() {
return (
<NameContext.Consumer>
{(name) => {
return (
<AgeContext.Consumer>
{(age) => (
<div>
Name: {name}, Age: {age}
</div>
)}
</AgeContext.Consumer>
);
}}
</NameContext.Consumer>
);
}
}
Rewrite the ConsumerComponent using useContext React hook.
Answer:
Hooks can be used only in a functional component. The ConsumerComponent can be re-written as:
function ConsumerComponent() {
const name = useContext(NameContext);
const age = useContext(AgeContext);
return (
<div>
Name: {name}, Age: {age}
</div>
);
}
Question
What is virtual DOM? How virtual DOM boosts React performance?
Solution
Like the actual DOM, the virtual DOM is a node tree that lists elements, their attributes and content as objects and properties. render() method in ReactDOM creates a node tree from React components and updates this tree in response to mutations in the data model caused by actions.
Whenever anything is changed, the entire UI is first re-rendered in virtual DOM representation. The difference between earlier virtual DOM representation and current one is calculated. The real DOM is updated with what has actually changed. Updating virtual DOM is very fast compared to real browser re-render. Hence performance is improved.
Question
In a React project, we add reference to 2 files. One is react.js and other one is react-dom.js. Why we have two include 2 files, instead of one?
Solution
React component library is used in websites and also to create mobile apps using React Native. React.js file is a small file which does the job of creating components. Therefore it is used in both web and React-Native projects. In web, the components are then rendered in browser using react-dom.js. So the 2 files are separated for reusability.
Question
We have a JSX code snippet below.
const content = (
<div>
<h1>Backbencher</h1>
</div>
);
Write the pure JavaScript code after JSX is converted to JavaScript.
Solution
const content = React.createElement(
"div",
{},
React.createElement("h1", {}, "Backbencher"),
);
Question
Explain the parameters of React.createElement() method.
Solution
React.createElement() accepts three arguments.
createElement(tag, attributes, children);
The fist parameter is tag or component to be rendered. Second parameter accepts an object. The key value pair of the object forms the attribute list of the tag. Third parameter can be a string or other component to be nested inside current tag or component. Here is an example.
React.createElement("div", { id: "hello" }, "Backbencher");
turns out to be
<div id="hello">Backbencher</div>
Question
What is JSX? What is the advantage of using it?
Solution
JSX is a syntax extension for JavaScript. It is created to write React components easily. Without JSX, it is very difficult to write big React components in pure JavaScript.
Question
Write an example of React functional component.
Solution
In React, functional component is a JavaScript function that returns a React element.
function Banner() {
return <h1>Backbencher</h1>;
}
Question
What are props in a component?
Solution
When React sees an element representing a user-defined component, it passes JSX attributes and children to this component as a single object. That object, we address as props.
Question
What is a pure function?
Solution
A pure function does not alter its input. It always return the same value for the same input. In React, a component needs to be a pure function with respect to its props. That means for a particular props, the rendered component will always be same.
Question
We have a function component here.
function Banner(props) {
return <h1>{props.name}</h1>;
}
Convert above code to class component.
Solution
class Banner extends React.Component {
render() {
return <h1>{this.props.name}</h1>;
}
}
Question
Here we have a class component.
class Banner extends React.Component {
state = {
text: "",
};
incrementCount = () => {
this.state.text = "Backbencher";
};
render() {
return (
<div>
<button onClick={this.incrementCount}>Click</button>
<h1>{this.state.text}</h1>
</div>
);
}
}
Here when the button is clicked, it should display "Backbencher" text. But that is not happening. What is the cause?
Solution
Here state is updated in wrong way. state value needs to be updated using this.setState(). Only then the UI will be re-rendered.
The incrementCount needs to be updated as
incrementCount = () => {
this.setState({
text: "Backbencher",
});
};
Question
Is setState() method synchronous or asynchronous?
Solution
setState() method is asynchronous.
Question
Following code is giving unexpected result.
this.setState({
counter: this.state.counter + this.props.increment,
});
What could be the reason? How can we fix it?
Solution
Since setState() is asynchronous, setting new state based on previous state can go wrong sometimes. In such scenarios, we can use callback function syntax to set state.
this.setState((prevState, props) => {
return {
counter: prevState.counter + props.increment,
};
});
Question
In a class component, we have set initial state as:
state = {
name: "Backbencher",
age: 23,
};
We then update the state with following code:
this.setState({
age: 24,
});
What will be the current value of state object?
Solution
States are merged in class components. So the state value will be:
{
name: "Backbencher",
age: 24
}
Question
Here we have a class component:
class Banner extends React.Component {
state = {
country: "India",
};
constructor(props) {
super(props);
}
logMessage() {
console.log(this.state.country);
}
render() {
return (
<div>
<button onClick={this.logMessage}>Click</button>
</div>
);
}
}
When the button is clicked, it is showing an error message instead of displaying India.
Uncaught TypeError: Cannot read property 'state' of undefined
What is the reason and how we can solve it?
Solution
Here logMessage function is called when the button is clicked. Since the function is not an arrow function, the value of this inside the function is undefined. We are trying to extract the value of state from undefined. That results in TypeError.
We can solve this by explicitly binding logMessage to the component class using bind method.
constructor(props) {
super(props);
this.logMessage = this.logMessage.bind(this);
}
We can also change logMessage to an arrow function to solve this issue.
logMessage = () => {
console.log(this.state.country);
};
Question
How can we conditionally render JSX in React?
Solution
One technique is to use if operator. We cannot use if...else inside JSX. But we can dynamically return React elements based on a condition.
if (isLoggedIn) {
return <Member />;
} else {
return <Guest />;
}
Another technique is to use logical operators to implement inline if.
<div>{count > 10 && <ShowCount />}</div>
We can implement inline if...else using JavaScript ternary operator.
{
isLoggedIn ? <Member /> : <Guest />;
}
Question
If a component need not render anything, what can we do?
Solution
render() method or the functional component can return null.
Question
Why we provide a key attribute to list of items?
Solution
Keys help React to understand which items are changed, added or removed.
Question
What is a controlled component in React?
Solution
In a controlled component, the value of an input form element is controlled by React.
Question:
What is bundling?
Answer:
Bundling is the process of combining multiple JavaScript files to one single file without breaking the dependency hierarchy. In a React project, we make use bundlers like Webpack or Browserify to bundle files.
Question:
What is Code Splitting? How it helps a React application?
Answer:
In a typical React project, all the components and their dependencies are bundled to one file. Therefore, as the size of application increases, the bundle size increases. This affects performance because to show a single page in the application, we need to load the full bundle first. Code splitting gives control to developer to efficiently load components on demand.
Question:
How can we implement code-splitting in React?
Answer:
One way to implement code-splitting is by using dynamic import() function. Webpack will not add the files included by dynamic import using import() to the main bundle file.
Second technique is to use Lazy and Suspense.
Question:
How Lazy and Suspense work in React?
Answer:
Lazy and Suspense is used to implement code splitting in React. If there is a component like <RelatedProductsWidget /> which needs to be lazy loaded, we can go with Lazy.
First we keep the component ready using Lazy.
const RelatedProductsWidget = React.lazy(
() => import("./RelatedProductsWidget"),
);
And whereever we need to render the component, we use Suspense.
<Suspense>
<RelatedProductsWidget />
</Suspense>
Question:
Here we have a component <App /> which loads <Banner /> component using Lazy.
Banner.js
import React from "react";
function Banner() {
return <div>Here is the banner text</div>;
}
export default Banner;
And here is the <App/> component that loads <Banner />.
import React, { lazy, Suspense } from "react";
const Banner = lazy(() => import("./Banner"));
function App() {
return (
<div>
<h1>Lazy Loading</h1>
<Banner />
</div>
);
}
export default App;
For some reasons the application is not working. What can be the issue?
Answer:
<Banner/> needs to be wrapped inside <Suspense>. Now, React is trying to load the banner component immediately. It is not waiting for the lazy load response. That is why it throws the error.
Question:
What is the purpose of fallback property in Suspense?
Answer:
Suspense lazy loads a component and renders it. During the waiting time, the component which is set as fallback will be displayed.
Question:
Improve the performance of following code using Lazy and Suspense?
import React, { Suspense, lazy } from "react";
import { BrowserRouter as Router, Route, Switch } from "react-router-dom";
import Home from "./routes/Home";
import About from "./routes/About";
const App = () => (
<Router>
<Switch>
<Route exact path="/" component={Home} />
<Route path="/about" component={About} />
</Switch>
</Router>
);
Question:
Will lazy works with React components that does not default exports?
Answer:
No.
Arithmetic Operators are used to perform arithmetic operations on their operands.
The asteriks(*) operator is used to multipy two numbers.
console.log(2 * 3); // 6
Since, the multiplication operator can be used only with numbers, any non-numeric operand results in Not a Number(NaN).
console.log(2 * "A"); // NaN
The forward slash(/) operator is used to divide two numbers.
console.log(6 / 2); // 3
By default all numbers in JavaScript are handled as floating-point numbers. Therefore, the division result can contain decimal places.
console.log(5 / 3); // 1.6666666666666667
The division operator works only with numbers. If any of the operands is a non-numeric value, the result results in NaN.
console.log(5 / "A"); // NaN
In JavaScript, there are two special keywords to mark the both ends of number line, Infinity and -Infinity. When we try to divide any number by 0, the result is Infinity or -Infinity based on the numerator.
console.log(1 / 0); // Infinity
console.log(-1 / 0); // -Infinity
If the numerator is 0, the result of division is always 0.
console.log(0 / 4); // 0
What happens when we divide a 0 by 0? Will the answer be 0 or Infinity? May be, to avoid this debate, JavaScript returns NaN, if we try to divide 0 by 0.
console.log(0 / 0); // NaN
Division operator works only with numbers. If the operands can be converted to a valid number, then JavaScript does automatic conversion before doing the division. If the operands cannot be converted to a valid number, the result will be NaN.
console.log(4 / "2"); // 2
console.log(4 / "A"); // NaN
In order to find the remainder of a division operation, we can use modulo(%) operator.
console.log(10 % 4); // 2
The sign of the result is the sign of the first operand. The remainder will be negative if the first operand is negative. The remainder will be positive integer, if the first operand is positive.
console.log(5 % 2); // 1
console.log(-5 % 2); // -1
console.log(4 % 2); // 0
In JavaScript, modulo operator works with floating point numbers also. But most of the time, we use modulo operator with integers.
console.log(5.1 % 2.3); // 0.5
The subtraction operator(-) is used to find the difference between two numbers.
console.log(5 - 3); // 2
Subtraction operator works only with numbers. So if any of the operands cannot be converted to a number, the result will be NaN.
console.log(5 - "A"); // NaN
In JavaScript, + is used to add two numbers. The operator + is overloaded. That means, it behaves differently based on the type of operands. If both the operands are numbers, + performs addition.
console.log(3 + 4); // 7
If any of the operands is not a number, then the result is calculated based on following rules.
If both the operands are strings, it performs concatenation.
console.log("Apple" + "Banana"); // "AppleBanana"
In any other case, type conversion is required. + operator gives more priority to string concatenation. If either of the operands is a string or an object that can be converted to a string, all operands are converted to string and string concatenation is performed. In all other cases, that is if both operands are not strings or can be converted to strings, addition operation is performed.
Let us consider different cases.
If one of the operand is a string, other operands are also converted to string and string concatenation is done.
console.log("A" + 2); // "A2"
If one of the operand is an object, that can be converted to a string, the string concatenation occurs.
console.log([2, 3] + 5); // "2,35"
If none of the operands can be converted to a string, addition occurs. null and undefined cannot be converted to a string.
console.log(3 + null); // 0
console.log(3 + undefined); // NaN
When addition is done, all operands are converted to numbers. null converts to 0 and undefined converts to NaN.
The + operator has left-to-right associativity. Consider the following statement.
console.log(2 + 4 + "Hello"); // "6Hello"
console.log(2 + (4 + "Hello")); // "24Hello"
First line first performs number addition of 2 and 4. The result 6 is then concatenated with "Hello". Whereas in the second line the default associativity is altered using paranthesis.
JavaScript programs are written using Unicode character set. Unicode is a superset of ASCII and supports most of languages in the world.
Unicode is a standard for consistent representation of text maintained by Unicode Consortium. Unicode Consortium is a non-profit organization based in Mountain View California.
Let us try to print a Japanese text using console.log() statement. I translated "hope" to Japanese using Google translate and it says the Japanese is Nozomu.
console.log("望む");
Above code prints the Japanese text just like that in console.
望む
Since JavaScript supports Unicode character set, it also possible to use foreign languages as variable names.
const പേര് = "Backbencher";
console.log(പേര്); // "Backbencher"
Above code used a word from Malayalam language as an identifier. That is also valid in JavaScript.
Due to either hardware or software limitations, if we are not able input a particular unicode character, we can make use of escape sequence. Any unicode character in JavaScript can be represented using 6 characters. 6 characters include a \, u and 4 hexa decimal characters.
console.log("\u2764"); // "❤"
Above code logs a heart symbol in console.
Another useful case is to write latin alphabets. How to write an é?. We can make use of unicode in this case.
console.log("\u00e9"); // "é"
According to JavaScript engine, both é and \u00e9 are same.
console.log("é" === "\u00e9"); // true
We can write a character in multiple ways using Unicode. Let us take the case of é. It can be written as a single unicode character as seen above.
console.log("\u00e9"); // "é"
é can also be written by combining the normal ASCII e with the acute accent combining mark(\u0301). The combining mark adds the dash on any normal characters.
console.log("e\u0301"); // "é"
console.log("f\u0301"); // "f́"
Even though both techniques produces the same output, they are not equal internally.
console.log("\u00e9" === "e\u0301"); // false
Even though we can use unicode to declare variables or as string literals, its direct usage is very rare. I have not seen anyone giving a Japanese word as variable name. When we declare a variable for maximum readability, it is good to choose English language.
There can be scenarios when we need to insert a special character like copyright symbol. In that case if use unicode, we might save inserting an additional image.
console.log("\u00A9"); // "©"
As the name suggests, globalThis stands for the global value of this. To know the global value of this, we just have to create a JavaScript file with a line to print its value.
console.log(this); // window
The output of above line varies based on the environment in which we run the code. If we run above code in Nodejs, the output is global. Inside a webworker, the output is self.
Now JavaScript is not constrained to a browser environment. So globalThis is an attempt to unify the different global terms. So instead of window, self or global, we can use globalThis from 2020.
console.log(globalThis); // window
Above code is executed in a browser.
This method ensures that all promises are settled, which means either resolved or rejected. In the following 3 promises, second promise is rejecting.
const p1 = new Promise((resolve, reject) => setTimeout(resolve, 1000));
const p2 = new Promise((resolve, reject) => setTimeout(reject, 2000));
const p3 = new Promise((resolve, reject) => setTimeout(resolve, 5000));
Promise.allSettled([p1, p2, p3]).then((values) => console.log(values));
Even though p2 is rejected, we will get the output like below after 5 seconds.
[[object Object] {
status: "fulfilled",
value: undefined
}, [object Object] {
reason: undefined,
status: "rejected"
}, [object Object] {
status: "fulfilled",
value: undefined
}]
Promise.all()cannot handle rejected case. All the promises passed toPromise.all()should be resolved to work.
In JavaScript, we use OR operator(||) to check a value and assign a default value if not present. We have an object here.
const account = {
amount: 4000,
};
We are reading a property which is not there in account object.
const interestRate = account.interestRate;
console.log(interestRate); // undefined
Since we are accessing a non-property of account, it returns undefined. Now, using undefined in mathematical operations can break things. So we need to send a default interest rate if it does not exist.
const interestRate = account.interestRate || 10;
console.log(interestRate); // 10
Now, our account turns to a special account with no interest. So the account object looks like below.
const account = {
amount: 4000,
interestRate: 0,
};
As per our earlier code, if account.interestRate returns a falsy value("", 0, false, null, undefined), number 10 is returned. So, instead of 0, the interest rate will be 10 in all calculations.
So now we need to explicitly check if the value of interestRate property is null or undefined. Here is the updated full code.
const account = {
amount: 4000,
interestRate: 0,
};
let interestRate;
if (account.interestRate != undefined && account.interestRate != null) {
interestRate = account.interestRate;
} else {
interestRate = 10;
}
console.log(interestRate); // 0
Just for doing a undefined or null check, we added lot of code. Nullish Coalescing Operator(??) makes this job easy. ?? checks only undefined or null. So our code can be rewritten as below.
const account = {
amount: 4000,
interestRate: 0,
};
let interestRate = account.interestRate ?? 10;
console.log(interestRate); // 0
Latest babel supports this feature.
Question 1:
What are the data types we have in latest JavaScript?
Answer:
We have 8 data types. They are:
Question 2:
What are falsy values in JavaScript? List the values that are falsy in JavaScript.
Answer:
Those values when converted to a Boolean type results in false are called falsy values. Here are the list of falsy values in JavaScript.
0-0nullfalse ObviouslyNaNundefined"" Empty stringQuestion 3:
What is the output of following code? Please explain your answer.
if ({}) {
console.log("I am true");
} else {
console.log("I am false");
}
Answer:
It prints "I am true" in the console. Any object, even empty object is a truthy value in JavaScript.
Question 4:
In JavaScript, how can we convert a value to boolean type?
Answer:
One way is to use Boolean() function.
console.log(Boolean("A string")); // true
console.log(Boolean("")); // false
console.log(Boolean(0)); // false
console.log(Boolean({})); // true
Another way is to use double negation operator !!.
console.log(!!"hello"); // true
Question 5:
What is the difference between null and undefined?
Answer:
Both null and undefined behaves almost the same way when used in code. But as part of best practice, difference between those two lies in their usage.
null represents intentional absence of an object. That means, if there is a place where the code expects an object, but we are unable to provide one, then we give back null. Example: match() is a string method that returns an array of all matches of a supplied pattern.
const str = "Orange is orange";
const result = str.match(/orange/gi);
console.log(result); // ["Orange", "orange"]
Here the match() method returned an array. After all, array is a type of object. So, we can say that, result is always expecting an object. If there was no match found, then there is no object to return to result. In order to state an intentional absence of an object, match() method returns null if no match is found.
const str = "Orange is orange";
const result = str.match(/Apple/gi);
console.log(result); // null
On the other hand, undefined is the value of a variable that is declared, but not initialized. Also, a function in JavaScript by default returns undefined. So in those context, we can use undefined.
Question 6:
I need to check if the value of variable a is undefined. For that, I wrote the following code:
if (a === undefined) {
console.log("a is declared");
} else {
console.log("a is declared and initialized");
}
What happened is, if a is not declared, above code throws ReferenceError in the first line. How can we resolve this issue?
Answer:
We can use typeof operator.
if (typeof a === "undefined") {
// ...
}
typeof does not throw error for undeclared variables.
Data Types refer to the ability of JavaScript to identify the kind of a value. In JavaScript, a value falls under one of the following 8 types. One of the fundamental characteristics of a programming language is the set of types it supports.
From the list, first 7 types are called primitive data types. So, we can say in JavaScript all non-primitive values are objects.
A primitive value is not an object and does not contain any methods. As discussed in the previous section, Boolean, null, undefined, Number, BigInt, String and Symbol are primitive data types in JavaScript.
Primitive values are immutable. That means a primitive value once created, cannot be changed.
let a = "Backbencher";
a = "Hello";
console.log(a);
In the above code, in line 1, JavaScript is storing a string "Backbencher" to a memory location. JavaScript is naming that memory location as a. This association of a variable name to its memory location is tracked by a lookup table which is internal to JavaScript engine.
In line 2, JavaScript engine is not erasing "Backbencher" and writing "Hello". It cannot be done since primitive values are immutable. It creates a new memory location to store "Hello" and the lookup table is now mapping the variable name a to "Hello"'s location.
Since all this is happening internally, for the developer it seems like primitive values can be updated or mutated, which is not true.
Boolean represents a logical entity. Logical entities are used to write conditions and enable branching in the program. There are only 2 values in JavaScript that are of Boolean type. They are true and false.
// Branching
if (true) {
console.log("I am truthy");
} else {
console.log("I will never be logged");
}
When we use any data types as a logical entity, JavaScript automatically converts that value to a boolean true or false. For example, in the following snippet we use "hello" as a logical entity.
if ("hello") {
console.log("hello is true");
} else {
console.log("hello is false");
}
Here the output is "hello is true". It is because, JavaScript automatically converts a non-empty string to a true. There are some values, when converted to boolean, results in false. Those values are called falsy values. They are:
0-0nullfalse ObviouslyNaNundefined"" Empty stringAll other values in JavaScript are truthy values.
An empty object
{}and empty array[]are truthy values. It is not falsy like an empty string.
The string "false" is a non-empty string. So when it is converted to boolean, it is a truthy value.
We can convert any value in JavaScript to boolean type. This can be done using 2 techniques.
Boolean functionWe can use Boolean function to convert any values to boolean type.
console.log(Boolean("A string")); // true
console.log(Boolean("")); // false
console.log(Boolean(0)); // false
console.log(Boolean({})); // true
!! Double negationIn JavaScript ! can be used as a NOT operator. In Mathematics, if we have a number 23, negating it, results in -23. Again negating it, reverts it back to 23. In similar way, in JavaScript when using !, it negates the value and the output is a boolean value.
Here is an example. A non-empty string is a truthy value. Let us do a single negation first.
console.log(!"hello"); // false
Negating a truthy value resulted in false. We use ! again to get the boolean converted value.
console.log(!!"hello"); // true
null is a primitive type in JavaScript. There is only one value which is of type null. And that value is null. So it turns out that both the type and value is called null.
null represents intentional absence of an object. That means, if there is a place where the code expects an object, but we are unable to provide one, then we give back null. Example: match() is a string method that returns an array of all matches of a supplied pattern.
const str = "Orange is orange";
const result = str.match(/orange/gi);
console.log(result); // ["Orange", "orange"]
Here the match() method returned an array. After all, array is a type of object. So, we can say that, result is always expecting an object. If there was no match found, then there is no object to return to result. In order to state an intentional absence of an object, match() method returns null if no match is found.
const str = "Orange is orange";
const result = str.match(/Apple/gi);
console.log(result); // null
Always use
nullto mark intentional absence of an object. Do not useundefinedin place where we need to usenull. Even though, it might work, we cannot distinguish if theundefinedreturned was intentional or a default return of a function. A function in JavaScript by default returnsundefined.
undefined is a primitive type in JavaScript. There is only one value in JavaScript that is of type undefined. That value is also called undefined. So, both the type and value is called undefined.
A variable which is declared and not been assigned with a value, is by default assigned with the value undefined. So when we print the value of a variable, if it prints undefined, the most likely chance is that the variable is declared but not assigned with a value.
var a;
let b;
console.log(a); // undefined
console.log(b); // undefined
The undefined value is also stored as a property of global(window) object. If we list out all the properties of window, we can see a key named undefined.
console.log(window.undefined); // undefined
What is the significance of this global property? In JavaScript, it is possible to treat undefined as a variable name and assign a value.
(function(){
var undefined = "Backbencher";
console.log(undefined); // "Backbencher"
})();
Line 3 prints "Backbencher". At this moment, if we do a conditional operation with undefined, it results in wrong decision. To avoid such errors, we can do the comparision with the global window.undefined property.
if (myVar === window.undefined) {
// ...
}
We can use window.undefined safely because no one can update its value; That is because the property undefined of window is non-writable, non-enumerable and non-configurable.
window.undefined = "Backbencher";
console.log(window.undefined); // undefined
To check if a variable is declared and assigned, we can use strict equality(===) operator.
var a;
if (a === undefined) {
console.log("a is declared");
} else {
console.log("a is declared and initialized");
}
Above solution throws an error if the variable a is not declared before use.
if (a === undefined) {
// ...
}
Line 1 throws ReferenceError: a is not defined since a is not declared.
More safer technique is to use typeof operator. typeof does not throw error even if the variable is not declared.
if (typeof a === "undefined") {
// ...
}
typeof returns undefined in following cases.
undefined valueIn most of the programming languages, integer values and floating-point(numbers with decimal) values are treated differently. The amount of memory used for both types also varies. But in JavaScript, there is no distinction between integer values and floating-point values.
In JavaScript, both integer and floating-point values are treated in the same way. Therefore, considering the worst case, the memory allocation for a number type should consider floating-point values. Each number in JavaScript occupies 64 bit of memory. The numbers are stored in Double-precision floating-point format as per IEEE 754 standard.
In case of integers, JavaScript can accurately represent all integers between -9007199254740992(-253) and 9007199254740992(253), inclusive. Beyond this range, the precision might lose. Let us try adding one to the maximum range.
console.log(9007199254740992 + 1); // 9007199254740992
The expected output is 9007199254740993. But the actual output is 9007199254740992.
When a number appears directly in a program, it is called a numeric literal. JavaScript supports numeric literals in several formats.
12; // Base 10 integer literal
0xff; // Base 16 integer literal
0377; // Base 8 integer literal
3.14; // Floating-Point literal
6.73e5; // Floating-Point literal
Integers in JavaScript can be represented in 3 ways.
Decimal numbers are sequence of digits with base 10. When we say integers, what come to our minds is decimal numbers. Examples:
0;
23 - 46;
100000;
Hexadecimal integers have their base as 16. Hexadecimal integers can have digits from 0 to 9 and alphabets A to F. In JavaScript, we denote hexadecimal integers by placing either 0x or 0X before the number.
console.log(0xff); // 255
console.log(0xa); // 10
Even though we log a hexadecimal integer, log method converts it to a decimal before printing in console.
Some JavaScript engines support Octal format. Octal numbers have there base as 8. A numeric literal is marked as octal by prepending a zero(0).
console.log(077); // 63
In Google Chrome, above line prints 63. It is supported by Chrome's V8 JavaScript engine. Now prepending a zero to mark a number as octal can lead to unexpected errors. Therefore, octal specification is not there in ECMAScript specification. It is not advised to use octal format because of non uniform support across JavaScript engines.
If we use an octal number notation with a non-octal digit, JavaScript engine does not throw an error. Instead, it simply treats the number as a decimal.
console.log(077); // 63
console.log(099); // 99
Floating-point literals are real numbers that contain a decimal point. They contain an integer part, a decimal point and a fractional part. Some examples:
2.78;
0.912;
Floating-point literals can also be represented using exponential notation. Exponential notation is an e(or E) followed by a positive or negative integer. Here is an example:
3.67e5; // 367000
3.67e-5; // .0000367
e5 denotes multiply the number 3.67 with 100000. In the same line, e-5 denotes divide the number 3.67 by 100000.
NaN is a predefined global variable which holds a Not a Number value. Sometimes, JavaScript need to tell user that the evaluated result is not a number. NaN is for that purpose.
console.log("hello" * 2); // NaN
console.log(0 / 0); // NaN
So is NaN a variable or value? It is both a variable and value. It is something like, there is a variable a which holds the value "a". Coming back to NaN, NaN is a global variable. So we can find it as a property of window object. The value that variable holds is NaN which is a representation for Not a Number in JavaScript.
console.log(window.NaN); // NaN
There is also a property for Number object called NaN. Again, the value of that property is NaN.
console.log(Number.NaN); // NaN
So does NaN evaluates to true when compared with itself? No. That makes sense because NaN is just a representation of Not a Number. For example, "a" is not a number. "b" is not a number. So does that mean that "a" and "b" are equal? No. Just like that, NaN is not equal to NaN.
console.log(NaN == NaN); // false
NaN does not compare true with any value, including itself. So we cannot check if a value is NaN by comparing it with NaN. Instead we can compare a value with itself, and if it returns false, then that value is definitely NaN.
var x = NaN;
console.log(x != x); // true
We can also find if a value is NaN by using isNaN() method. isNaN() method returns true if the argument passed to the method is NaN or a value which cannot be converted to a number.
var x = NaN;
console.log(isNaN(x)); // true
console.log(isNaN("apple")); // true
console.log(isNaN("123")); // false. It can be converted to 123
console.log(isNaN(true)); // false. true can be converted to 1
console.log(isNaN({})); // true
As we discussed in earlier section, NaN is a predefined global variable. In ECMAScript 3, we could both read/write that predefined global variable. But in ECMAScript 5, window.NaN is read only. It is not possible to edit the value of window.NaN.
NaN = 46;
console.log(NaN); // NaN
There are different techniques to convert a non-number data type to number data type.
* is an operator in JavaScript to do multiplication. We know that a number multiplied with one returns the same number. Also, since multiplication(*) applies only to numbers, JavaScript automatically converts all operands of * operator to number data type. We use this automatic type conversion feature in JavaScript to convert any data type to a number type.
// Boolean to Number
console.log(true * 1); // 1
console.log(false * 1); // 0
// String to Number
console.log("123" * 1); // 123
console.log("abc" * 1); // NaN
// Null to Number
console.log(null * 1); // 0
// Undefined to Number
console.log(undefined * 1); // NaN
parseInt() and parseFloat() converts a string to a number.
parseInt() function accepts 2 arguments. First one is the string to be converted and the second being the radix. In mathematics, radix is also known as the base. Default value of second parameter is 10.
console.log(parseInt("42", 10)); // 42
console.log(parseInt("42", 8)); // 34
parseInt() ignores the decimal portion in the string, if present.
console.log(parseInt("42.762", 10)); // 42
parseFloat() can convert a string to a floating-point number.
console.log(parseFloat("42.762", 10)); // 42.762
Number is a global function in JavaScript which can be used to convert any type in JavaScript to a number.
Boolean to number
Number() can convert a boolean value to a number.
console.log(Number(true)); // 1
console.log(Number(false)); // 0
Number() converts a true to 1 and false to 0.
null to number
Number() converts null to 0.
console.log(Number(null)); // 0
undefined to number
Number() converts undefined to NaN.
console.log(Number(undefined)); // NaN
String to number
Number() converts an empty string to 0.
console.log(Number("")); // 0
Number() converts a string with number value to corresponding number.
console.log(Number("42")); // 42
console.log(Number("42.765")); // 42.765
If the string contains a non-numeric character, Number() returns NaN.
console.log(Number("42abc")); // NaN
If we used parseInt() in the above case, we will get 42.
BigInt to number
A BigInt value can be directly passed to Number() to convert it to a number type.
console.log(Number(42n)); // 42
BigInt allows JavaScript developers to have much greater integer representation in their code. The maximum a normal number supports is 9007199254740991(2^53 - 1).
Let us try to increment from the current MAX value.
var num = Number.MAX_SAFE_INTEGER; // 9007199254740991
num++;
num++;
num++;
num++;
num++;
console.log(num); // 9007199254740992
Ideally we expect 9007199254740996 in the console, instead it is printing 9007199254740992. JavaScript is not able to compute beyond that.
BigInt solves this issue. It helps to work on numbers beyond 9007199254740992.
A number is declared as BigInt by appending n to the number.
10; // Integer
10n; // BigInt
We can also use BigInt() function to convert any JavaScript type to BigInt type.
BigInt(23); // 23n
BigInt("23"); // 23n
BigInt(true); // 1n
BigInt(false); // 0n
Trying to convert undefined, null or an object to BigInt results in error.
Let us rewrite the code in above section using BigInt.
var num = BigInt(Number.MAX_SAFE_INTEGER);
num++;
num++;
num++;
num++;
num++;
console.log(num); // 9007199254740996n
We use typeof operator to determine the type of a variable or value. When used with a BigInt variable or value, it returns "bigint".
typeof 1n; // "bigint"
typeof BigInt(1); // "bigint"
In JavaScript, String is a primitive data type. It is used in JavaScript to work with texts.
Here is an example of a string.
"backbencher!";
When we do any operations on a string, it creates a new string. The existing string cannot be mutated.
const str = "hello".toUpperCase();
When .toUpperCase() is invoked, it does not affect the original string "hello". Instead a new string "HELLO" is created in memory and assigned to str.
Each character in a string occupies 16 bits to consider Unicode characters. Since JavaScript supports unicode characters, we can use unicodes in our texts. Here we are going to assign a malayalam language word to a variable.
const fruit = "ആപ്പിൾ";
console.log(fruit); // "ആപ്പിൾ"
A string literal is a string data value that appears directly in a program. To use a string literal in the code, wrap the string value in a matching pair of single quotes('') or double quotes("") or backticks(``).
"Backbencher.dev";
"Backbencher.dev"`Backbencher.dev`;
The backtick(``) syntax was introduced in ES6.
When using double quotes or single quotes, we can write a multi-line string literal using backslash(\).
console.log(
"Backbencher.dev\
is\
rich",
); // "Backbencher.devisrich"
Even though we write the code in separate lines, the output came in single line. That means, the backslash technique is purely to bring code readability. It does not have a difference compared to writing in one line.
The backtick(``) syntax by default supports multi-line literals. We do not need backslash to write new lines. Also, the new lines are considered as new lines by JavaScript engine.
console.log(`Backbencher.dev
is
rich`);
and the output is shown in three lines.
"Backbencher.dev
is
rich"
Any non-string value in JavaScript can be converted to a string in different ways.
String() is a constructor function in JavaScript. It accepts any type as its argument and converts it to a String object.
// Primitive to string
const bool = true;
console.log(String(bool)); // "true"
// Object to string
const date = new Date();
console.log(String(date)); // "Tue Jul 07 2020 12:19:55 GMT+0530 (India Standard Time)"
From the code above, it is clear that String() function can easily handle primitive or object data types.
Any data types except null and undefined can be converted to string using .toString() method.
console.log(true.toString()); // "true"
As you can see toString() is used as a method using dot(.) operator. But we know that only objects have properties and methods. So how a primitive type like true behave as an object?
When JavaScript engine tries to evaluate true.toString(), it understands that the code is trying to treat the primitive value true as an object. So internally, JavaScript engine converts true to its equivalent Boolean object.
Boolean(true); // Boolean object
Now, Boolean is a constructor function object in JavaScript, which is inherited from Object type. That means, any methods in Object can be invoked from its child objects like Boolean. Such an inherited method is .toString().
Boolean(true).toString(); // "true"
Why null.toString() and undefined.toString() do not work?
When we use null.toString(), JavaScript engine cannot convert it into equivalent Null object. Same is the case with undefined. If we try to convert null or undefined to string using .toString() method, it throws TypeError.
null.toString(); // TypeError: Cannot read property 'toString' of null
In JavaScript, we can concatenate two strings using plus(+) operator. If one of the operand is a string, JavaScript automatically converts other operand to a string. We can make use of this capability to convert a value to string.
const str = true + "";
console.log(str); // "true"
This technique works with null and undefined also.
console.log(null + ""); // "null"
console.log(undefined + ""); // "undefined"
Symbol is a new primitive data type introduced in ES6. The Symbol() function returns a value of type symbol.
A variable of Symbol type is created using Symbol() function.
const s1 = Symbol();
console.log(typeof s1); // "symbol"
While creating a symbol variable, we can optionally pass a description.
const id = Symbol("UserId");
const name = Symbol("UserName");
"UserId" and "UserName" are the descriptions. Descriptions help in debugging. Other than that, there is no impact for description strings.
Every symbol value returned from Symbol() is anonymous and unique. We can consider Symbol() function as a magic box which throws out a unique toy each time when we open it.
Let us create 2 symbols.
const symbol1 = Symbol();
const symbol2 = Symbol();
Here, we open the magic box 2 times. Now let us see what toy we have received by printing the symbol variables.
console.log(symbol1); // Symbol()
console.log(symbol2); // Symbol()
Both statements print Symbol() in console. Did you expect a random string? If yes, that is not happening. So, is there any way to see the contents of both variables? No. That is why they say Symbol() produces anonymous and unique values.
In that case, how can we make sure that both the variables are unique? That is a guarantee by JavaScript. Now for our relief, at least we can try comparing them.
console.log(symbol1 == symbol2); // false
Seeing a false is assuring. It means symbol1 and symbol2 are unique.
Having same description, does not create identical symbols. Descriptions are purely for debugging purpose. It does not have any impact on uniquness of generated symbols.
const s1 = Symbol("Disney");
const s2 = Symbol("Disney");
console.log(s1 == s2); // false
s1 is not equal to s2, even though their Symbol description is same.
In JavaScript, an object key should be either a string or a symbol. Other data types are not supported as object keys. Here is an example of an object literal.
const obj = {
name: "John Doe",
age: 23,
};
Now let us add a new Symbol key to obj.
obj[Symbol("id")] = 1234;
We need to use square bracket
[]syntax to add a Symbol key property to an object. Dot(.) notation is not allowed to add Symbols to objects. Following code is invalid.obj.Symbol("id") = 1234;
What is the use of having a Symbol key?
for..inobj object which we created above now have 3 keys(2 strings and 1 symbol). Now let us log the key names using for..in loop.
for (key in obj) {
console.log(key);
}
And the output is
"name"
"age"
We cannot see Symbol("id") in the list. Symbol keys act like private properties(in reality, they are not). They are not looped through when used with for..in loop.
So, is this hiding behaviour applicable for all loops on objects?
Object.keys()The Object.keys() method returns an array of a given object's own enumerable property names, in the same order as we get with a normal loop.
Let us try Object.keys() on obj object. Here is the full code from object creation to printing property names.
const obj = {
name: "John Doe",
age: 23,
};
obj[Symbol("id")] = 1234;
console.log(Object.keys(obj)); // ["name", "age"]
Here also the symbol keys are omitted. Only the string property names name and age are printed.
In JavaScript, we can explicitly convert one data type to another using various techniques. One common conversion is converting a data type to string. All data types have .toString() method which makes this job easy. Here are few examples.
console.log(true.toString()); // "true"
console.log(Number(123).toString()); // "123"
console.log([3, 5, 8].toString()); // "3,5,8"
In similar manner, we can convert a symbol to a string using .toString() method.
const symbol1 = Symbol("Token");
console.log(symbol1.toString()); //"Symbol(Token)";
A symbol when converted to a string, outputs the Symbol() function which created it, along with the symbol description(Token).
There are cases where JavaScript implicitly convert a data type to string. Here are two examples.
console.log(1 + "2"); // "12"
alert([3, 4, 5]); // alerts "3,4,5"
What if we try to alert the value of a symbol? It throws an error. Let us try.
const symbol1 = Symbol("Token");
alert(symbol1); // TypeError: Cannot convert a Symbol value to a string
This says that, if we want to convert a symbol to string, we need to explicitly use .toString() method. Otherwise, implicit conversion to string value results in TypeError.
So far we learned how to create custom symbols. There are a set of built-in symbols in JavaScript called as Well-Known symbols. We can find these symbols as constants of Symbol class. There are 13 such symbols.
Symbol.asyncIteratorSymbol.hasInstanceSymbol.isConcatSpreadableSymbol.iteratorSymbol.matchSymbol.matchAllSymbol.replaceSymbol.searchSymbol.speciesSymbol.splitSymbol.toPrimitiveSymbol.toStringTagSymbol.unscopablesWe can find all these constant symbols, by going to browser console and type Symbol.. Browser will show above symbols in the auto complete.
Well-known symbols are used by various algorithms(like for..of loop) within JavaScript specification. To understand it better, let us take Symbol.iterator. This symbol will be present as a key in any iterable object. Let us verify it.
An array in JavaScript is an iterable object. Whereas an object literal is not iterable.
// Iterable object
const arr = [2, 4, 6];
// Non iterable
const obj = {
name: "John",
age: 20,
};
Now let us see the value present in the Symbol.iterator key.
console.log(arr[Symbol.iterator]); // function values() { [native code] }
console.log(obj[Symbol.iterator]); // undefined
Above statements show that, there is a Symbol.iterator key in an array, but not present in an object. We can therefore test if an object is an iterable object by checking for Symbol.iterator key.
Now let us go little more in depth. We now know, the Symbol.iterator key inside arr contains a function. If we execute that function, it returns an iterator object. Just for users who are new to iterators, an iterator object contains a next() method which returns values one by one upon each invocation. Let us try it.
const arrayIteratorObject = arr[Symbol.iterator]();
console.log(arrayIteratorObject.next().value); // 2
console.log(arrayIteratorObject.next().value); // 4
console.log(arrayIteratorObject.next().value); // 6
console.log(arrayIteratorObject.next().value); // undefined
An object is an unordered collection of properties, each of which has a name and value. In the following code, car is an example of object in JavaScript.
const car = {
model: "GLS",
company: "Mercedes",
};
In the above object, model and company are properties of the object car. Each properties can have a primitive value or another object value.
An object with no properties or methods inside it is an empty object.
const car = {};
Say, we are going to create a student object. But all the properties of student object is not available initially. In that case we start with an empty object at the start of program.
const student = {};
Then as the program progresses, we start assigning properties to student object.
//...
student.name = `${firstName} ${lastName}`;
//...
student.marks = totalMarks;
Finally, we will get a student object with two properties, name and marks.
As seen above, in JavaScript we can literally write an object by wrapping a set of key value pairs inside curly brackets {}.
const car = {
model: "GLE",
company: "Mercedes",
};
In case of strings, we have string literals like "hello", "apple" and so on. Object literals are something in similar lines for Objects.
In our application, we might need to store the configuration of something as an object literal. The key-value pair will be later used in our application.
const config = {
dbName: "library",
host: "localhost",
username: "johndoe",
password: "pass123",
};
As we already discussed, object is a collection of related information. We have an object here student with some properties and method.
const student = {
name: "David",
course: "Computer Science",
subject1Mark: 92,
subject2Mark: 89,
subject3Mark: 91,
getAverageMark: function () {
return (this.subject1Mark + this.subject2Mark + this.subject3Mark) / 3;
},
};
. operatorWe can use dot(.) operator to read the value of an object key. We can read the value of name property using . operator.
console.log(student.name); // "David"
[]We can also access object properties using [] notation.
console.log(student["name"]); // "David"
The syntax looks very similar to how we access elements of an array. That is the reason why objects can also be called as associative arrays.
Sometimes objects have illegal identifier characters in the key.
const person = {
"full-name": "David Tom",
};
person is a perfectly legal object. Now if we are trying to get the value of full-name using . operator, it will not work as expected.
console.log(person.full - name);
In this situation we need to use the bracket syntax.
console.log(person["full-name"]); // "David Tom"
Sometimes the key to extract might reside inside a variable. In that case, we use bracket notation [], to get the value. From the above student object, if we are printing the marks in a loop, we can do like this.
for (let i = 1; i <= 3; i++) {
console.log(student[`subject${i}Mark`]);
}
Above code will output 92, 89, 91 in different lines. Here we used template literal string inside bracket notation.
Say we have an object car with two properties model and year.
const car = {
model: "Mercedes GLS",
year: 2019,
};
Now we are trying to get the value of a property color which is not in car object. Will it throw an error? No. Instead it will return undefined.
console.log(car.color); // undefined
We saw that we can read properties of an object either using dot(.) operator or using bracket notation[]. We can use the same operators to add / edit properties of an object. Here, we have an object car.
const car = {
model: "Mercedes GLS",
year: 2019,
};
In JavaScript, we can dynamically create new properties or methods for an object. It can be done by just setting it. In car object, there is no color property. We can create it by just setting color property.
car.color = "Black";
Now the car object looks like:
{
model : "Mercedes GLS",
year : 2019,
color : "Black"
}
In the above code, we created a new property color using dot(.) notation. Instead, we can also create a new property using bracket notation[]. Here is how it is done.
car["color"] = "Black";
When we set a property of an object that does not exist, that property is created. If that property exists, then the value of that property is updated. In our car object, the model and year property exists. The value of year property is 2019. Now we are going to set the value of year property with a different year.
car.year = 2020;
Now the year property is updated. Now the car object looks like:
{
model : "Mercedes GLS",
year : 2020
}
As in the case of creating a new property, we can also update a property using bracket notation[].
car["year"] = 2020;
Note that when we used bracket notation,
yearis wrapped in quotes to form a string literal. If we use it without quotes, JavaScript engine will consider it as a variableyearand will try to resolve it.
[] to handle dynamic keysWe can use variables inside bracket notation. This can come handy. We have a student object here.
const student = {
name: "David",
age: 33,
};
What if the student "David" have a unique property dreamingAbout? How can we add that?
let dynamicProperty = "dreamingAbout";
let dynamicValue = "Riding Mercedes GLS AMG";
student[dynamicProperty] = dynamicValue;
See how we used variables to add a key value pair for an object. This can be achieved only using bracket notation[]. Now the new property is ready to use.
console.log(student.dreamingAbout); // "Riding Mercedes GLS AMG"
Objects are mutable and are manipulated by reference rather than by value.
var x = {
name: "Apple",
color: "Red",
};
var y = x;
y.color = "Green";
console.log(x.color); // "Green"
Closure is a powerful feature in JavaScript. We all are using closures frequently, when working with JavaScript. Still, many of us are not confident to explain what is a closure. We are going to crack the closure concept smoothly by understanding all the pillars that support this feature in JavaScript.
I have intentionally parked the definition and example of closure towards last. There are few concepts we need to refresh before talking about closures.
In simple terms scope defines a boundary in which a variable can be accessed. We all might have heard about terms like global scope, function scope and so on. In order to understand the concept of closure, we refresh few areas related to scope in JavaScript.
When a user loads a web page with JavaScript, first a request is sent to server to fetch the file. Once the browser receives the JavaScript file, the JavaScript engine within the browser executes the file. The engine does not directly jump into line by line execution. It first does a parsing/compiling step. This is to verify syntax, define scope, do optimization and so on, so that in the next step line by line execution will be fast.
Our focus is on scope. The scope in JavaScript is decided during this parsing phase. Consider following code.
var a;
function baaz() {
var b;
}
Here, variable a is in global scope. Variable b is in function scope, ie in the scope of baaz(). We came to that conclusion by looking where in the code the variable is written. We are not looking anything else like where the variable is used or how it is used.
Our only concern is where in the code, the variable is declared.
This is called lexical scope. That means, this scope is decided during the lexical or parsing phase.
Consider following example:
var a = 10;
function baz() {
console.log(a);
}
baz(); // 10
What is the value printed by baz() in line 7?
It prints 10 in console. Here variable a is in global scope. When function baz() was called, it needs to print the value of a. It is not able to resolve the value of a within itself(baz() scope). So JavaScript engine looks outside baz(). There the engine finds a variable a with value 10 in global scope and that value is printed.
Ok wait! That was very easy to understand. But have you imagined how this scope inheritance is actually implemented by JavaScript engine. We need to skip a lot of details and just understand a very high level picture.
In JavaScript, we can declare a function using the function keyword.
function cling() {
console.log("Cling! Cling!");
}
Later we can assign this function to any variable, just like other first-class values.
var a = cling;
The function can also be passed to other functions as arguments.
otherFunction(cling);
Closure is formed when a function remembers its lexical scope even when executed outside its lexical scope.
One of the easy way to meet this condition to form a closure, is when a function returns another function. That is why usually during interviews, when asked about closures, candidates say "When a function returns another function, that is a closure.".
Example of a closure.
function a(){
const name = "Backbencher";
function b() {
console.log(name);
}
return b;
}
const c = a();
c(); // "Backbencher"
Closure is when a function(b()) remembers its lexical scope(name is part of the scope) even when the function is executed outside(global scope) that lexical scope(scope of a()).
Consider the following code snippet:
function a(name) {
setTimeout(function () {
console.log(name);
}, 1000);
}
a("Backbencher.dev");
Is there a closure formed in above snippet? Yes. Here, the callback function passed to setTimeout() is defined in the scope of setTimeout function. But after 1 second, the callback function is executed by JavaScript engine in Global scope. Still, the function remebers its lexical scope and prints the value of name.
Here is another code using setTimeout(). Our aim is to print numbers 1 to 5 every second.
for (var i = 1; i <= 5; i++) {
setTimeout(function () {
console.log(i);
}, i * 1000);
}
Again the callback function of setTimeout() remembers the value of i even executed after some time. As mentioned above
But when we execute above code, the output is:
6
6
6
6
6
Why? Assume, JavaScript is storing all the callback functions in memory to be executed after 1 sec, 2 sec and so on.
When these functions finally run, it is trying to print the value of i. But there is no local variable i inside the function. So as per lexical scope rules, JavaScript search for a variable i outside, ie in the global scope. There it finds a variable i with value of 6(because the loop is now complete). That is the reason why 6 is printed 5 times.
What modification we can do to print 1 to 5? We need to create a wrap for each setTimeout() calls like below.
for (var i = 1; i <= 5; i++) {
(function (j) {
setTimeout(function () {
console.log(j);
}, i * 1000);
})(i);
}
Here when each callback is executed, the value of j is resolved from the IIFE outside. We found a solution using ES5 way. There is a simpler solution using ES6. In ES6, we can declare block level scopes using let keyword.
for (let i = 1; i <= 5; i++) {
setTimeout(function () {
console.log(i);
}, i * 1000);
}
So what is a module? Module is piece of code that can hide some information and expose only what is required. Hiding the information is called encapsulation.
Here is a code which is trying to be a module:
var bank = {
processingFee: 100,
calculateTotalCost: function (amount) {
return amount + this.processingFee;
},
};
console.log(bank.calculateTotalCost(2300)); // 2400
The above code failed as a module. If it was a module, it would have given access only to calculateTotalCost() function. But now, somebody who is not happy with the processing fees, can update it using:
bank.processingFee = 0;
Now we got the problem. What we want is, there should be a way calculateTotalCost() can access processingFee and at the same time, no one else can access it. This can be achieved using closures. We can make calculateTotalCost() that function which remembers processingFee.
Here is how we do it.
var bank = (function () {
var processingFee = 100;
return {
calculateTotalCost: function (amount) {
return amount + processingFee;
},
};
})();
And above code is an example of Module Pattern.
Arrays in JavaScript represent a list of values. The values can be any valid data type in JavaScript. Here is an example of array with elements, that are of different data types.
[23, "Backbencher", true, 89.65];
Array Literal is a list of zero or more expressions, each of which represents an array element, wrapped in square brackets([]).
["Apple", 23, true, {}];
While creating an array literal, elements can be skipped using commas. The skipped locations are filled by undefined.
const arr = [2, , , 3];
console.log(arr); // [2, undefined, undefined, 3]
Trailing comma in an array is ignored. It does NOT create an undefined element at the last.
const arr = [2, 4, 6];
console.log(arr); // [2, 4, 6]
Trailing commas can create errors in older browsers. So it is better not to use it.
In order to improve the readability of code, explicitly put undefined in place of skipped elements.
Question:
What is the length of following array?
[, , ,];
Answer: The length of the array is 3.
Here the array evaluates to
[undefined, undefined, undefined].
There are multiple ways in which we can declare an array in JavaScript.
[])An array in JavaScript can be declared using square brackets([]). All the list items are wrapped inside a pair of square bracket.
const arr = [2, 4, 6];
An array without any element is called an empty array. An empty array is declared using an empty pair of square bracket.
const arr = [];
An array in JavaScript can also be declared using Array() constructor. The arguments passed as input to the constructor forms the array elements.
const arr = new Array("Apple", "Orange");
console.log(arr); // ["Apple", "Orange"];
When we pass a single number as argument to Array(), it treats the number as array length.
const arr = new Array(2);
console.log(arr.length); // 2
console.log(arr); // [undefined, undefined]
Here line 3 prints an array with 2 elements. Note that it did not create an array [2], with number 2 as its element.
If the single argument passed to the Array() constructor is a non-number, that argument is taken as an array element.
const arr = new Array("Backbencher");
console.log(arr); // ["Backbencher"]
An empty array is created using Array() constructor by not passing any arguments.
const arr = new Array();
console.log(arr); // []
Array() is an overloaded function in JavaScript. It works both as a function and constructor. All things which can be done using Array() constructor can be implemented using Array() function.
const arr = Array("Apple", "Orange");
console.log(arr); // ["Apple", "Orange"];
When we pass a single number as argument to Array() function, it treats the number as array length.
const arr = Array(2);
console.log(arr.length); // 2
console.log(arr); // [undefined, undefined]
An empty array is created using Array() function by not passing any arguments.
const arr = Array();
console.log(arr); // []
Array.of() creates a new array from passed arguments.
const arr = Array.of("Apple", "Banana");
console.log(arr); // ["Apple", "Banana"]
When passed a single number argument to Array(), it creates an empty array of length equal to the passed number. Where as, when passed a single number argument to Array.of(), it creates an array with only that number as its element.
console.log(Array(3)); //[undefined, undefined, undefined]
console.log(Array.of(3)); // [3]
All elements in an array is stored as a list of items with numeric indices. The index starts from 0. An element of the array can be read by passing the index of the element.
const arr = ["Mercedes", "BMW", "Audi"];
console.log(arr[0]); // "Mercedes"
When tried to read a non-existent element from an array, it returns undefined.
const arr = ["Mercedes", "BMW", "Audi"];
console.log(arr[1000]); // undefined
Arrays are internally stored as objects. More details on that is given later. It is possible to read an element from array by passing the index as type string.
const arr = ["Mercedes", "BMW", "Audi"];
console.log(arr["1"]); // "BMW"
Array elements can be set by initializing at the time of declaration itself. The square bracket([]) syntax or Array() syntax can be used for that.
const arr1 = ["Apple", "Banana"];
const arr2 = new Array("Apple", "Banana");
const arr3 = Array("Apple", "Banana");
All the above 3 techniques are valid in JavaScript.
Once an array is declared, the elements in the array can be set using square brackets and element index.
const arr = [];
arr[0] = "Apple";
arr[1] = "Banana";
console.log(arr); // ["Apple", "Banana"]
When an element is set in an array, the array automatically ensures that the length of the array is one greater than the largest index.
const arr = [];
arr[1] = "Second";
arr[5] = "Sixth";
console.log(arr.length); // 6
Normally in a programming language, arrays allocate a contigous block of memory with fixed length. But in JavaScript, arrays are just Object types with special constructor and methods. So internally, JavaScript engine cannot go with contigous memory approach for arrays. It treats an array like an object(hash) internally.
JavaScript approach of handling arrays as objects is required to handle dynamic nature of arrays. In JavaScript, we can keep on adding elements to an existing array using push() method.
const arr = [];
arr.push("Backbencher");
arr.push("JavaScript");
console.log(arr); // ["Backbencher", "JavaScript"]
Different data types in JavaScript like Boolean, Number, String and so on, occupy different memory sizes. In JavaScript, it is possible to update an element of an array to different data type.
const arr = ["Backbencher", "JavaScript"];
arr[1] = 72;
console.log(arr); // ["Backbencher", 72]
Here, the second element of the array is changed from a string type to number type. If arrays are storing elements in contigous memory locations, then we need to shift elements in memory when the data type changes. But since arrays are internally treated as objects, it is easy to make data type changes in an array.
When declaring an array using Array() constructor function, we can specify the size of the array.
const arr = new Array(1000);
When JavaScript engine executes above line of code, is it allocating 1000 memory locations? No. JavaScript cannot do that because it does not know what type of values are going to be in the array. JavaScript is actually creating an Array object and setting the length property of that object to 1000.
Every array(instance of
Array()) has a propertylengthwhich indicates the size of the array.
One of the easy way to delete all elements of an array is to set the
lengthproperty of the array to0.
Arrays in JavaScript are sparse. That means, we can create an array with non-contigous elements.
const arr = [];
arr[1] = "First element";
arr[5] = "Second element";
When JavaScript engine executes above code, it creates an array object with two keys, 1 and 5 and corresponding values are stored. Sparse array approach in JavaScript saves memory usage, since it allocates memory only for elements that have data.
What if we try to print the value of arr[3]? It prints undefined. That is not because JavaScript is filling all gaps with undefined. It is because JavaScript is designed to return undefined when we access a non-existent property of an object.
In the above code snippet, when we assign a value to index 5, JavaScript automatically sets the value of arr.length to 6. That means, JavaScript always sets the length property value greater than the largest index value of the array.
Array() is a function in JavaScript. It is a built-in function, that means the definition of the function is already written inside JavaScript engine.
console.log(typeof Array); // "function"
Array() is an overloaded function in JavaScript. That means, we can use Array() function in multiple ways.
Array() function can be used as a constructor function. That means, we can use Array() function with new operator to create different array objects.
const arr = new Array("Apple", "Orange");
console.log(arr); // ["Apple", "Orange"]
We can also create array objects simply by calling Array() function without new keyword.
const arr = Array("Apple", "Orange");
console.log(arr); // ["Apple", "Orange"]
A function in JavaScript is also an object. Every object in JavaScript has properties. Since Array() is also a function, it has properties. There are 6 own properties for Array() function. These are static properties. So, in order to use these properties or methods, we do not have to create an instance of Array() function.
As per ECMAScript specification, the value of this property is set to 1.
console.log(Array.length); // 1
Any function in JavaScript has a property name, which returns the name of the function.
console.log(Array.name); // "Array"
That is straight forward. The name of the Array() function is "Array".
Array.prototype stores an object. This object has all properties and methods which will be inherited by all array instances in JavaScript.
When we create an array like ["Apple", "Banana"], whatever properties and methods present for that array object comes from Array.prototype object. If we need to add a new method to be inherited by all arrays, we just have to add it as a method to Array.prototype object.
We are covering all properties and methods of Array.prototype later.
isArray() method returns true, if the argument passed to it is an array. If the argument is not an array, isArray() returns false. This is one of the way in which we can find if a value or variable is an array or not.
console.log(Array.isArray([2, 4, 6])); // true
console.log(Array.isArray("[2, 4, 6]")); // false
Array.from() creates a new, shallow-copied array from an array-like or iterable object.
Arrays are a type of object. Therefore, copying an array results in copying by reference.
const arr = ["Apple", "Banana"];
const arr2 = arr;
arr2[1] = "Kiwi";
console.log(arr[1]); // "Kiwi"
We changed the value of arr2, but it also updated the second element of arr1. That is because in line 2, only the reference of arr is copied to arr2. So, both arr2 and arr points to same array. If we actually want to copy the elements of arr to arr2, use Array.from().
const arr = ["Apple", "Banana"];
const arr2 = Array.from(arr);
arr2[1] = "Kiwi";
console.log(arr[1]); // "Banana"
Shallow means not deep. Say, our source array contains nested array.
const source = ["A", "B", ["C", "D"]];
Here source is pointing to an array. Also, the third element of source(source[2]) is pointing to another array ["C", "D"]. Let us copy the source array to another destination array using Array.from().
const destination = Array.from(source);
Now destination is not pointing towards source array. Instead now the shallow(first level) elements of source, ie "A", "B" and memory reference of ["C", "D"] are copied to a new location where destination is pointing to. Note that the location of nested array ["C", "D"] is not changing. The third element of source and destination still points to the original ["C", "D"]. This is shallow copy. Let us see it in action.
const source = ["A", "B", ["C", "D"]];
const destination = Array.from(source);
destination[2][0] = "Apple";
console.log(source); // ["A", "B", ["Apple", "D"]]
We can see that the source array is also updated.
Array.from() accepts 3 arguments.
this inside Array.from()Array.from() accepts an array or any array-like objects like Map or Set and returns a new array.
const set = new Set(["Apple", "Banana"]);
console.log(Array.from(set)); // ["Apple", "Banana"]
Each elements of the input object is passed to the map function one by one. Array.from() returns an array with each elements created using the return value of the map function.
const mapFunction = (element) => {
return 0;
};
const set = new Set(["Apple", "Banana"]);
console.log(Array.from(set, mapFunction)); // [0, 0]
Irrespective of the input, the map function always return 0. That is why the result is an array with 2 zeros.
Third argument passed to Array.from() acts as the this value inside the map function(second argument).
const mapFunction = function (element) {
console.log(this);
return 0;
};
const customThis = { name: "Backbencher" };
const set = new Set(["Apple", "Banana"]);
console.log(Array.from(set, mapFunction, customThis)); // [0, 0]
And the output is:
[object Object] {
name: "Backbencher"
}
[object Object] {
name: "Backbencher"
}
[0, 0]
If the third argument is not there, this will have value of global object.Arrow functions do not respect this. That is why mapFunction is written in ES5 way.
As discussed earlier, Array.of() creates and returns a new array from the arguments passed to the method.
The Array() constructor function has got a property called prototype. Array.prototype stores an object value. Any method of this prototype object is inherited by all instances of Array(). Example, if Array.prototype has a method called boom(), then [2, 4, 7].boom() is a valid method call.
concat() method of an array is used to merge the array with other arrays or values. It does not change existing array, instead it returns a new array.
const arr1 = [1, 3, 5];
const arr2 = [2, 4, 6];
const result = arr1.concat(arr2);
console.log(result); // [1, 3, 5, 2, 4, 6]
Above code does not alter arr1 and arr2.
concat() method does the concatenation in the supplied order of input.
const arr = [1];
const arg1 = [2];
const arg2 = [3];
const arg3 = [4];
const result = arr.concat(arg1, arg2, arg3);
console.log(result); // [1, 2, 3, 4]
It is possible to concatenate a non-array value with an array using concat().
const arr = [1, 3, 5];
const result = arr.concat(true);
console.log(result); // [1, 3, 5, true]
concat() creates a new array instance and returns it. So, if we call concat() method without any arguments, a shallow copy of the array is returned.
const arr = [1, 3, 5];
const copy = arr.concat();
console.log(copy == arr); // false
console.log(copy); // [1, 3, 5]
Above code logged false, because copy and arr is pointing to different array instances.
concat() method does shallow copy. Any object elements of input arrays are copied by reference.
const arr1 = [["Apple"]];
const arr2 = [2, 4];
const result = arr1.concat(arr2);
console.log(result); // [["Apple"], 2, 4]
Here arr1[0] stores an object. So, result[0] is pointing to the same object. Any change in result[0] will affect arr1[0] and vice versa.
// ...
result[0][0] = "Banana";
console.log(arr1);
[["Banana"]];
Also note that, when there is nested arrays, concat() does not flatten the array. It simply merges the input.
copyWithin() method shallow copies part of an array to another location in the same array. The method returns the updated array. The original array is not affected.
const arr = [2, 4, 6, 8];
const result = arr.copyWithin(0, 2, 3);
console.log(result); // [6, 4, 6, 8]
When copyWithin() method is used by passing only the first argument, default value is taken for second and third argument.
For second argument, ie start, the default value is 0. For third argument, ie end, the default value is the length of the array.
const arr = ["A", "B", "C", "D", "E"];
const result = arr.copyWithin(2);
console.log(result); // ["A", "B", "A", "B", "C"]
If a negative value is given as target, the copying starts from the end of array. Eg: If the value of target is -2, then the copying starts from the second last element of the array.
const arr = ["A", "B", "C", "D", "E"];
const result1 = arr.copyWithin(-1);
console.log(result1); // ["A", "B", "C", "D", "A"]
const result2 = arr.copyWithin(-2);
console.log(result2); // ["A", "B", "C", "A", "B"]
When the start position is before target, the copy sequence is trimmed to maintain original array length.
const arr = ["A", "B", "C", "D", "E"];
const result = arr.copyWithin(2, 0);
console.log(result); // ["A", "B", "A", "B", "C"]
In the above code, we need to start copying from index 2. And we have a copy sequence starting from index 0. So, we might think, the output will be ["A", "B", "A", "B", "C", "D", "E"]. But copyWithin() will keep the array length intact. So it trims elements "D" and "E" to keep the original array length of 5.
If the second argument for copyWithin() is a negative number, the copy sequence start position is counted from end.
const arr = ["A", "B", "C", "D", "E"];
const result = arr.copyWithin(2, -1);
console.log(result); // ["A", "B", "E", "D", "E"]
Here the last element, "E" is taken to paste in index 2. It is because we gave the second argument as -1.
The third argument end, of copyWithin() is the zero based index at which to end copying elements from. copyWithin() copies upto, but not including end.
const arr = ["A", "B", "C", "D", "E"];
const result = arr.copyWithin(2, 1, 2);
console.log(result); // ["A", "B", "B", "D", "E"]
Observe that element at position 2, ie "C" is not copied.
If end value is negative, the position is calculated from end.
const arr = ["A", "B", "C", "D", "E"];
const result = arr.copyWithin(2, 1, -2);
console.log(result); // ["A", "B", "B", "C", "E"]
end value of -2 means, two elements from the end of the array ie "D" and "E" is skipped. So elements "B" and "C" is copied.
entries() method returns a new Array Iterator object. The iterator contains the key-value pair of each elements in the array.
const arr = ["Apple", "Banana"];
const iterator = arr.entries();
console.log(iterator.next().value); // [0, "Apple"]
console.log(iterator.next().value); // [1, "Banana"]
console.log(iterator.next().value); // undefined
every() method checks if all the elements in the array satisfies a particular condition. The method returns a Boolean value. It returns true if all the elements satisfy the condition.
const arr = [2, 4, 6];
const result = arr.every((ele) => ele % 2 === 0);
console.log(result); // true
Above code checks if all the elements of arr are even numbers. Each element in the array goes through the callback function to every(). In any iteration, if the callback function returns false, every() returns false.
Irrespective of the condition, every() returns true for an empty array.
const arr = [];
const result = arr.every((ele) => false);
console.log(result); // true
Why true for an empty array? Here we are talking about vacuous truth. If we say "All students should remain silent", the statement stands true even if there are no students.
The fill() method changes all elements in an array to a static value. It returns a new array.
const arr = [1, 3, 5, 7];
console.log(arr.fill(6)); // [6, 6, 6, 6]
If we call fill() method without any arguments, all elements in the array are replaced by undefined.
const arr = [1, 3, 5, 7];
console.log(arr.fill()); // [undefined, undefined, undefined, undefined]
fill() method accepts a second argument which indicates start index. If we specify an array start index, only elements from that index is replaced.
const arr = [1, 3, 5, 7];
console.log(arr.fill(6, 2)); // [1, 3, 6, 6]
fill() method accepts a third argument which indicates end index. Default value of end is the length of the array. That means, by default, all elements from start is replaced.
const arr = [1, 3, 5, 7];
console.log(arr.fill(6, 1, 3)); // [1, 6, 6, 7]
The end index is not inclusive. In the above code, we gave index 3. But, the elements at index 1 and 2 are replaced.
filter() method creates a new array with all elements that satisfies a particular condition. That condition is tested by passing a callback function to filter() method.
const arr = [1, 2, 3, 4, 5, 6];
const result = arr.filter((ele) => ele % 2 === 0);
console.log(result);
[2, 4, 6];
Above code checks if each element is an even number. The callback function returns true if the number is even. Therefore, the final result contains an array of even numbers.
The callback function is executed once for each element of the array.
const arr = [2, 4, 6, 8, 10];
const filteredArray = arr.filter(() => true);
console.log(filteredArray); // [2, 4, 6, 8, 10]
In the above code, the callback function always returns true. That is why the contents arr and filteredArray are same. The result also testifies that the callback function is called only once with each elements.
filter() method takes an element to new array, if the callback function returns a truthy value. Truthy values are those values in JavaScript that can be converted to a boolean true when a boolean value is expected. As an example, all numbers except 0 are truthy values. 0 is considered as a falsy value.
const arr = [-2, -1, 0, 1, 2];
const filteredArray = arr.filter((ele) => ele);
console.log(filteredArray); // [-2, -1, 1, 2];
Here, the callback function is simply returning the array element. When it comes to third element, ie 0, filter() method does not copy the element to the new array.
const arr = [1, , , 2];
const filteredArray = arr.filter(() => true);
console.log(filteredArray); // [1, 2]
In the above code, the filter() method callback always returns true. That means all elements of arr are copied to new array filteredArray. But, the length of arr is 4 and the length of filteredArray is 2. That is because, filter() method does not take deleted or unassigned elements. In our case the index 1 and 2 in arr is unassigned.
Placing empty commas are just for skipping the position. JavaScript is not filling the gap with undefined. What if arr contains explicitly assigned undefined values?
const arr = [1, undefined, undefined, 2];
const filteredArray = arr.filter(() => true);
console.log(filteredArray); // [1, undefined, undefined, 2]
In this case, undefined values are also copied, since that is explicitly assigned. From this example, we can understand that filter() method can be used to convert a sparse array to a condensed array.
The callback function to filter() method has 3 parameters.
const arr = [2, 4, 6, 8];
const filteredArray = arr.filter((value, index, array) => {
console.log(`Value at ${index} is ${value}`);
array[index] = value * 2;
});
console.log(arr);
Here each callback function execution prints the value and index to console. In each loop, the value is doubled and stored to array. Outside the loop, we print the original array arr, to check if array is directly referenced to arr. Here is the output:
"Value at 0 is 2"
"Value at 1 is 4"
"Value at 2 is 6"
"Value at 3 is 8"
[4, 8, 12, 16]
As we can see, when we updated array argument, the original array arr is also updated. That means, arr and array points to the same array.
Other than the callback function, filter() method accepts a second argument. Whatever value passed as second argument is taken as the value of this inside callback function.
Here is a snippet without the second argument.
const arr = [2, 4, 6];
arr.filter(function () {
console.log(this);
});
Above code prints window object to console 3 times. I purposefully used ES5 anonymous function syntax instead of arrow functions. If we use arrow function, the second argument of filter() method does not have any significance.
Now, we are going to explicitly define the value of this using the second argument.
const arr = [2, 4, 6];
arr.filter(
function () {
console.log(this);
},
{ name: "Backbencher" },
);
Above code logs the passed object 3 times in the console.
[object Object] {
name: "Backbencher"
}
[object Object] {
name: "Backbencher"
}
[object Object] {
name: "Backbencher"
}
find() method returns the first element that satisfies a given condition. The condition check is done by a callback function passed to find() method.
const arr = [2, 4, 6, 8];
const result = arr.find((ele) => ele > 5);
console.log(result); // 6
In the array arr, 6 is the first element that is greater than 5. That is why result got the value 6.
The callback function passed to find() method visits the deleted elements also.
findIndex() returns the index of first element that satisfies a specific condition. The condition is setup using a callback function passed to findIndex() method.
const arr = [2, 4, 6, 8];
const index = arr.findIndex((ele) => ele > 7);
console.log(index); // 3
In the array arr, 8 is the first element that is greater than 7. So the index of 8 is returned, that is 3.
The flat() method of an array flattens the array and returns a new array.
const arr = [1, 2, ["A", "B"]];
console.log(arr.flat()); // [1, 2, "A", "B"]
flat() method accepts an optional parameter for depth. Depth specifies the extend to which the array can be flattened.
Here is an array with nested arrays and is 2 level deep.
const arr = [1, 2, ["A", "B", ["C", "D"]]];
console.log(arr.flat(1)); // [1, 2, "A", "B", ["C", "D"]]
console.log(arr.flat(2)); // [1, 2, "A", "B", "C", "D"]
Depth value of 1 did not flatten the innermost sub-array. Depth value of 2 flattened all levels.
The default value of depth parameter is 1.
const arr = [1, 2, ["A", "B", ["C", "D"]]];
console.log(arr.flat()); // [1, 2, "A", "B", ["C", "D"]]
Passing Infinity as depth in flat() method flattens an array completely, irrespective of its nesting.
const arr = ["A", ["B", ["C", ["D", ["E"]]]]];
console.log(arr.flat(Infinity)); // ["A", "B", "C", "D", "E"]
flat() method skips array holes.
const arr = ["A", , "B"];
console.log(arr.flat()); // ["A", "B"]
flatMap() is a combination of 2 array methods, map() and flat(). First, the mapping function is executed on the elements of the array. Then, flattening of the array is done of depth 1. flatMap() returns a new array.
const arr = [1, 2, [3, 4]];
// All number elements are made 0
const result = arr.flatMap((ele) => {
if (typeof ele === "number") {
return ele * 0;
}
return ele;
});
console.log(result); // [0, 0, 3, 4]
Here, the output of the map() method will be:
[0, 0, [3, 4]];
On the result, flat() method is applied to get:
[0, 0, 3, 4];
In a typical React project, we use Babel and Webpack. Babel is used to convert JSX and ES6 to pure ES5 code. Webpack is used as the bundler. It will be helpful if we have a code base to start with any React project. That is what we are trying to do.
We need Node.js and NPM to download and install Node packages like React, Webpack and so on. We can download and install from their official site. When we install Node.js, automatically NPM is also installed.
We can also install Node.js using NVM. If we use NVM, it is very easy to switch between multiple Node versions.
Once we complete Node.js and NPM installation, we can verify it by typing
> node --version
v12.14.1
> npm --version
6.13.4
Let us create a new folder anywhere with name react-starter. In the terminal, navigate to the project folder.
In a Node project, package.json file stores the information about the project like its name, license, scripts, dependencies and so on. We can create a package.json file with default values using
npm init -y
-y flag is for setting default values. Now a package.json file is created inside the project folder with following contents.
{
"name": "react-starter",
"version": "1.0.0",
"description": "",
"main": "index.js",
"scripts": {
"test": "echo \"Error: no test specified\" && exit 1"
},
"keywords": [],
"author": "",
"license": "ISC"
}
We structure our project folder in a way that all source files reside in one folder named src. Later, when we build our project, the deployable files will be generated and reside in /dist folder.
So, first create a folder src in the root. Now this folder will contain all the React component code written using JSX, styles written using SCSS and a template HTML to render the React components. When we build the project, all the JSX will be converted to JavaScript, all the SCSS will be converted to pure CSS, the HTML will be updated with needed file references and copied to /dist folder.
As a starting point, let us create the index.html file inside src folder. This file is the template HTML.
<!DOCTYPE html>
<html lang="en">
<head>
<meta charset="UTF-8" />
<meta name="viewport" content="width=device-width, initial-scale=1.0" />
<title>React Starter</title>
</head>
<body>
<div id="root"></div>
</body>
</html>
Few points about this index.html source file. The about-to-be created React component(s) will be rendered inside the div tag. Right now, we are not seeing any reference to any JavaScript or CSS files inside html. Those will be added in the generated html file during the build step. How? We will see later.
We prepared the HTML to show our React component. It is time to create our React component. For that, create index.js file in /src folder. Paste following code.
import React from "react";
import ReactDOM from "react-dom";
const App = () => {
return <h1>Hello React 16,Webpack 4 & Babel 7!</h1>;
};
ReactDOM.render(<App />, document.getElementById("root"));
Let us understand what is happening above. We import react package to create our App component. We import react-dom package to render our component in the html.
You might be thinking that, the
Appcomponent is not usingReactanywhere to create the component. Then why adding theReactimport? It is because, when the JSX is converted to JavaScript, the code will have a line withReact.createElementin it. At that time, this React dependency is required.
But, we have not added react and react-dom packages to our project. Let us do that now.
npm install react react-dom --save
Now we fulfilled all dependencies for index.js file.
So far our source codes are lying in /src folder. We do not have any files which can be deployed to server. What happens if we just copy both index.html and index.js to a web server like nginx or Apache? It simply renders the index.html in browser. Since there is no reference to index.js, it is ignored.
So we need someone to stitch both files and set it ready for deployment inside /dist folder. That someone is Webpack. Webpack is a bundler. In simple terms, we can say that Webpack wraps all dependencies of a project to a single bundle file and places it in the /dist folder.
Here is how we can install Webpack.
npm install --save-dev webpack
Once webpack package is installed, we need to give instructions to webpack on what to do. For that we need to create webpack.config.js file in the project root. Webpack always checks this file to understand how to bundle the project.
Create webpack.config.js file in project root. Paste the following contents.
var path = require("path");
module.exports = {
entry: "./src/index.js",
output: {
path: path.resolve(__dirname, "dist"),
filename: "bundle.js",
},
};
Now when webpack reads this config file, it understands that it needs to start creating the bundled file from the index.js file inside src folder. After creating the bundle, it needs to find dist folder and place the bundled file and name it bundle.js.
Now its time to tell webpack to do the task as per the config file. For that, let us create a script in package.json file. Inside our current package.json file, we can see:
"scripts": {
"test": "echo \"Error: no test specified\" && exit 1"
}
We do not need the test command now. Instead replace that line with a start command which executes webpack. The scripts block looks like this:
"scripts": {
"start": "webpack"
}
Now to run the start script, go to project root folder in a terminal and type the following.
npm start
We expect our bundle.js file to be present in /dist folder. Instead, we are seeing an error in console.
One CLI for webpack must be installed.
...
You need to install 'webpack-cli' to use webpack via CLI.
What the error message says is, since we want to use webpack as a command line tool, we need to install webpack-cli also. For that, go to the terminal and type:
npm install webpack-cli --save-dev
After installing webpack-cli, let us try npm start command again.
When we run the command, webpack starts the bundling process. When it approached, /src/index.js, it found some characters which should not be found in a JavaScript file. So now webpack is throwing a different error in console.
Module parse failed: Unexpected token (5:9)
You may need an appropriate loader to handle this file type, currently no loaders are configured to process this file. See https://webpack.js.org/concepts#loaders
Now, this error has nothing to do with webpack. Basically, webpack is a bundler. It is trying to create a single bundle. On the way, it is not able to crunch the JSX syntax inside index.js. In order to understand and convert the JSX syntax to JavaScript, Babel is there to help.
Babel is a transpiler, which means it can convert one type of code to a different type. In our project, we are using Babel to convert JSX to JavaScript.
Babel can stand alone and convert JSX to JavaScript. But, we have given the job to bundle the file to Webpack. So in order for webpack to use Babel to handle JSX files, Webpack requires babel-loader.
Loaders are like different types of ammunitions collection of Webpack. Webpack might use a
babel-loaderto crunch a JSX file or ES6 file. Again, it might use asass-loaderto understand a SCSS file.
babel-loader just loads the Babel functionality to webpack. It does not have any other powers. So in order for babel-loader to work, we need to install the core babel package @babel/core. We also need to install @babel/preset-env @babel/preset-react to convert ES6 and JSX to ES5 respectively.
npm i @babel/core babel-loader @babel/preset-env @babel/preset-react --save-dev
Now, all the babel requirements are installed. But we have not told webpack to use babel-loader to parse a JavaScript file. Let us add that part in webpack.config.js file. Add the following code in the same level as that of entry key.
module: {
rules: [
{
test: /\.(js|jsx)$/,
exclude: /node_modules/,
use: {
loader: "babel-loader"
}
}
]
}
Above code sets a rule in webpack config file. The rule is applicable for .js or .jsx files, excluding files in node_modules folder. Since this rule is present, whenever webpack needs to add a JavaScript file or JSX file to the bundle, it uses babel to transpile the code and then add the output to the bundle.
Webpack calls babel using babel-loader. Babel needs to know what all capabilities it needs to have or in other words, what all presets needs to be defined. For that, we create a .babelrc file in the project root and add the following text.
{ "presets": ["@babel/preset-env", "@babel/preset-react"] }
Let us now go to the terminal and run npm start. This time, webpack successfully creates the bundle.js and place it inside /dist folder. We can see an output like below in console.
> webpack
Hash: 8e96f900f4a0ada759de
Version: webpack 4.41.6
Time: 7229ms
Built at: 02/18/2020 09:43:53
Asset Size Chunks Chunk Names
bundle.js 1.08 MiB main [emitted] main
Entrypoint main = bundle.js
[./src/index.js] 255 bytes {main} [built]
+ 11 hidden modules
Our current state is we now have a bundle.js in /dist folder. There is no HTML file in /dist folder to be deployed. During the build process, we want Webpack to create a HTML file in /dist folder to serve the bundle.js file. HtmlWebpackPlugin is a webpack plugin who can help us here. Install it first using:
npm install --save-dev html-webpack-plugin
Once it is installed, we need to tell Webpack to use it. We need to modify webpack.config.js for the same. Please have a look in the code below to know the modifications to be done.
var HtmlWebpackPlugin = require("html-webpack-plugin");
var path = require("path");
module.exports = {
entry: "./src/index.js",
//...
module: {
/*...*/
},
plugins: [
new HtmlWebpackPlugin({
template: "./src/index.html",
}),
],
};
Here we added the HtmlWebpackPlugin to plugins array inside webpack.config.js. The plugin accepts a template option, where we can specify the source template html file, we have created.
Now when we run npm start, webpack creates both bundle.js and index.html inside /dist folder. The generated index.html file contains the reference to bundle.js.
We can open the index.html file in browser to see our React component rendered!
Our project is running fine. But during the development process, each time we need to run the webpack command and wait for the build to complete. Then open the html file in browser to see the output. This is time consuming.
Webpack has its own web server called webpack-dev-server. It automatically refreshes the browser with new change if any files are changed in source. First lets install webpack-dev-server.
npm i webpack-dev-server --save-dev
Now we can update the scripts in package.json file as follows.
"scripts": {
"start": "webpack-dev-server --open --hot",
"build": "webpack"
}
In the start script, instead of building the project, we are directly serving the output in browser. webpack-dev-server can use webpack internally and store the bundle.js and index.html in the memory. Then serve the html file directly from the memory. It will not create a physical file in /dist folder.
--open flag is to open the default browser automatically. --hot is to set a watch for file changes and automatically reloads the browser when a change occurs.
Run npm start in the terminal.
We can see webpack-dev-server serving the output in a browser. We can go to /src/index.js and make any modifications in the React component. As soon as we save the file, the output in the browser gets updated. This is how webpack-dev-server makes development very easy.
Now we have a code base to start trying any React project. This is just a starter. A lot can be improved before moving to actual production. Through this course, we learned that:
/src and /dist to distinguish between our source files and deployable files.webpack.config.js file in project root.webpack command in command line, we need to install webpack-cli package.babel-loader..babelrc file which is located at project root.WebpackDevServer to serve our output file in a browser and automatically refresh the browser when a change in file occurs. This is called hot-reloading.From ES6, there is an operator in JavaScript to spread. Spread what? From ES6, we can spread Arrays. From ES9, we can spread Objects.
For understanding the concept, let us take an array.
const cards = [2, 7, 9];
In your brain imagine the array cards as an array of playing cards. We now have 3 cards with value 2, 7 and 9.
Spread operator looks like this: .... If you see the spread operator with an array, then it means, we are telling JavaScript engine to take the array(set of cards) and distribute it(spread it) one by one. It will be like taking the 3 cards and giving one card each to some one. We will see different scenarios where spread operator makes things easy for us.
We need to add 2 more elements 3 and 5 to our cards array and return a new array. Using spread operator it is written like this.
const newCards = [...cards, 3, 5];
We can easily do a shallow copy of one array to another.
const cardsCopy = [...cards];
Above code just copies the contents of cards array to cardsCopy array.
Above code snippets might give you a hint to use spread operator to merge two arrays.
const arr1 = [1, 3, 5];
const arr2 = [5, 3, 9];
const arr = [...arr1, ...arr2];
console.log(arr); // [1, 3, 5, 5, 3, 9];
Spread operator can easily pass the elements of an array as separate arguments to a function.
const numbers = [2, 9, 5];
const max = Math.max(...numbers);
console.log(max); // 9
Spread operator when used with objects helps to extract the different elements of an object. At the time of writing, this is a new feature. Spread operator with objects was added in ES9. We can do many tasks quickly using spread operator like copying objects and adding new properties.
We can use spread operator to shallow copy an object. Here, we have an object with 3 elements.
const car = {
name: "Mercedes",
model: "GLS",
year: 2019,
};
Our intention is to copy the elements of car to a new constant called newCar. We can do that with spread operator.
const newCar = { ...car };
Here ...car picks all elements of car and distributes it to form the different elements of new object. The newly created object is then assigned to newCar.
In some cases, we need to add a property to an object based on a condition.
const obj = {
name: "George",
age: 65,
};
const data = {
...obj,
...(obj.age > 60 ? { retired: true } : {}),
};
console.log(data);
/* Output:
{
age: 65,
name: "George",
retired: true
}
*/
This conditional way of adding new properties will help when using JSX syntax.
Since it is a new feature at the time of writing, my Babel is not able to understand the syntax and throwing an error. When webpack compiled, it throwed an error saying "Module build failed: SyntaxError: Unexpected token" and is pointing to the line containing
...car.
There is a babel plugin which brings the support for object spread operator. It is called babel-plugin-transform-object-rest-spread in Babel v6 and @babel/plugin-proposal-object-rest-spread in Babel v7.
In Babel 6, we can install it by running following command in project folder.
npm install --save-dev babel-plugin-transform-object-rest-spread
or you can install using yarn by
yarn add --dev babel-plugin-transform-object-rest-spread
Once the plugin is installed, add "transform-object-rest-spread" to the plugins array inside .babelrc file. Thats all to make object spread operator to work. Now you can run the project to see it working.
Destructuring syntax was introduced in ES6. It allows us to work more easily with Arrays and Objects.
In order to explain destructuring with objects, first we need to have an object to play with.
const car = {
company: "Mercedes",
model: "GLS",
year: 2019,
};
Our next job is to print the model and year from the car object. For that we are going to assign those 2 properties to a new variable.
const model = car.model;
const year = car.year;
console.log(model, year); // GLS 2019
There is no big rocket science here. But we tried above lines just to understand the easiness which destructuring brings. In the above lines, you can see we have used the constant names same as that of object properties. That is not by accident. Next, we are going to see how the same assignment operation can be done using destructuring.
const { model, year } = car;
console.log(model, year); // GLS 2019
What destructuring syntax tells JavaScript engine is that "Go and find out the value of model and year from car object and assign it to corresponding variables." Now, did you get why we used variable names same as that of object properties? What will happen if the code was like this:
const { mymodel, year } = car;
It will be like "Go and find the value of mymodel and year from car". But, since there is no mymodel property inside car, mymodel will have the value as undefined.
In the previous section, things worked because we used the variable name and object property name same. But what if we want to have a separate variable name? Then we need to use the renaming syntax.
const car = {
company: "Mercedes",
model: "GLS",
year: 2019,
};
const { model: mymodel, year } = car;
console.log(mymodel, year); // GLS 2019
We need to place a colon(:) after the original property name and then give the new variable name.
Once we give a new variable name, in our case
mymodel, we cannot then usemodel. A new variable with namemodelwill not be created.
Here is our car object.
const car = {
company: "Mercedes",
model: "GLS",
year: 2019,
};
There is no information about the make of car in the object. So if we are requesting for make of the car, it returns undefined.
const { make } = car;
console.log(make); // undefined
We can set a default value in destructuring. We are going to set a default value of "German" to make.
const { make = "German" } = car;
console.log(make); // German
So if the value of make is undefined in car object, it will take the default value which is "German" or else the value of the property. So that leads to test an interesting scenario. What if there is a property make present in car and its value is undefined. See my intended object below.
const car = {
company: "Mercedes",
model: "GLS",
year: 2019,
make: undefined,
};
In this case, what will be the output of following code?
const { make = "German" } = car;
console.log(make);
If your guess is undefined, that is wrong. It will print German.
We learned about setting a default value and also about renaming a variable. We can combine both these functionality like below.
const { model: mymodel = "No Model" } = car;
Just like object destructuring helped us to pull out the elements of an object, Array destructuring helps us to pull out elements of an Array.
const fruits = ["Apple", "Banana", "Peach", "Pineapple"];
const [a, b] = fruits;
console.log(a, b); // Apple Banana
Here we have a fruits array with 4 elements. We then extracted first 2 fruits to a and b. Notice the [] syntax instead of {}. That is one difference compared to object destructuring. Also, we can use any variable names because here the elements are mapped based on their order inside the array. In the above case, since we gave only 2 variables, first 2 fruits are assigned to a and b.
In the earlier code snippet, since we supplied only 2 variables for destructuring, first 2 fruits were copied. What if we need the first and fourth fruit to be assigned to a and b. We can skip elements by putting commas.
const fruits = ["Apple", "Banana", "Peach", "Pineapple"];
const [a, , , b] = fruits;
console.log(a, b); // Apple Pineapple
Just like we set defaults in case of object destructuring, we can set default values in array destructuring.
const fruits = ["Apple", "Banana"];
const [a, b, c = "Other"] = fruits;
console.log(c); // Other
In the example above fruits array have only 2 elements. So c is assigned with undefined if default assignment is not present. But since we have set a default value, c has the value "Other".
JavaScript is known to be as prototype-based language. That itself shows how important is prototypes in JavaScript. We will see what it is and what role it plays in JavaScript.
prototype?When asked this question, I have heard several answers like prototypes are link from one object to another object or it brings inheritance and so on. But in order to visualize something, we need to give a shape to it. So the right answer is prototype is an object.
Oh! are you saying that prototype is just an object? Yes it is. It is an object which JavaScript engine has given a special meaning. Assume, God has given you two buckets. Whatever you put in one bucket needs to be consumed before you die. Whatever you put in second bucket will be inherited by your children. Now in JavaScript world, the two buckets are just two objects. The second bucket's name is prototype. So if you see a bucket kept in a house with label prototype, it means the contents are kept for getting inherited. God in story is the JavaScript engine and it decides the meaning and purpose of prototype object.
Function.prototype and __proto__We have seen both and most of us are confused. We dont know if both are same or something different. The correct answer is Function.prototype and __proto__ are different. Some people try to argue that both of them point to same object, so they are same and so on. I do not agree with that. It is like saying donkey and horse are same because both of them have many common properties.
prototypeEvery function in JavaScript is an object. prototype is a property in every functions. Below we have a simple function that does nothing.
function f() {}
After executing above line, go to console and type f.. We can see a set of properties and methods for f. One property will be prototype.
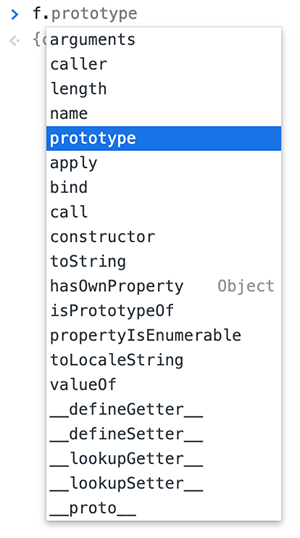
For a normal function, this property does not have an importance. But when a function is used as a constructor function, then this prototype property has the main role.
__proto__Any object in JavaScript has a property called __proto__. This property holds reference to the object's parent. You can visualize __proto__ object as the stairway to parent object.
We don't have to manually create __proto__ property. It is automatically created by JavaScript to have the link to the object parent.
If every object has __proto__, let us create a very simple object literal.
var obj = {
name: "Apple",
age: 33,
};
Run the above code and go to browser console. There type obj. to see the list of properties and methods in obj.
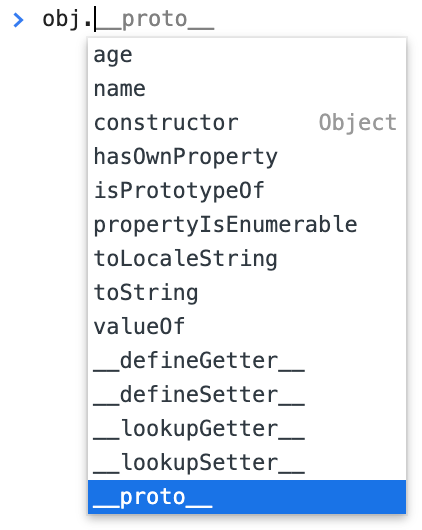
Now print the value of obj.__proto__ in console.
Now you saw the value of obj.__proto__. It is an object containing different methods like constructor(), toString() and so on. If you recollect what we discussed above, this object is the parent object of obj. Oh!, in that case, what is this parent object? from where it came? who assigned it?
Even if you are new to JavaScript, I am going to tell few things. Just believe it. When we create a new object literal like obj, it is actually an instance of Object() constructor function. This Object() function is native code or in other terms inbuilt in JavaScript. So we can see obj as an object which is a result of an operation something like below.
var obj = new Object();
So if obj is created from Object(), obj's parent will be Object.prototype. So let us go to browser console and see the value of Object.prototype.

As we can see obj.__proto__ and Object.prototype is same. Both point to same object. In other words, we can see this common object as a common drop/pickup point. Object puts methods which can be inherited in this common object using Object.prototype, something like a giver. On the other hand, every object instances like obj is linked to the common object using __proto__ to consume the inherited methods or properties, something like a taker.
Callbacks are functions that are passed as arguments to another functions. A function that receives a callback function as its argument is called Higher Order Function.
function callback(name) {
console.log(`Hi, ${name}`);
}
function higherOrderFunction(nameArg, callbackArg) {
callbackArg(nameArg);
}
higherOrderFunction("Backbencher", callback); // "Hi, Backbencher"
In the above code snippet, higherOrderFunction is a Higher Order Function because it is expecting a function as its second argument. We then supplied a function callback to higherOrderFunction, which is later invoked.
We were using callbacks in lot of places without even knowing they were callbacks. Let us go through different code snippets where a callback function is involved.
Array.map()
The ES6 map() method of Array object requires a function as its argument. Here is an example.
[2, 4, 5, 7].map((item) => console.log(item));
setTimeout()
We all are very fluent with this setTimeout() method. It is a function that takes a function as its first argument.
setTimeout(() => {
console.log("I am ready");
}, 5000);
Above code prints "I am ready" in console after 5 seconds.
jQuery button click handler
We use .on() method to attach event handlers in jQuery. In order to attach a click event handler to a button with id myButton, here is the code in jQuery.
$("#myButton").on("click", function () {
console.log("Button clicked");
});
Here also we are passing a function as second argument to .on() method. The second argument which is an anonymous function is also a callback function.
AJAX request
In jQuery, we can use $.getJSON() to do an AJAX call for JSON request. An example code will be:
$.getJSON("ajax/test.json", function (data) {
console.log(data);
});
Here the passed callback function receives response data in data variable.
If you observe the case of
setTimeout(), button click handler or AJAX request, the passed callback functions are not immediately executed. In case of ofsetTimeout()it is executed only after 5 seconds. In case of click handler, the callback function is executed only when a user clicks on the button. Therefore we can say that callbacks help us to delay the execution of a function to a later point in time.
How can callbacks create a hell like situation? Let us try to understand that. In the following code, we are waiting for the response of a login API.
function codeAfterAJAX() {
console.log("Here I continue rest of the functionality");
}
$.ajax({
method: "POST",
url: "api/login",
data: { username: "John", password: "John123!" },
}).done(codeAfterAJAX);
Here we make an AJAX call. If the AJAX response come successfully, we execute codeAfterAJAX to continue our logic. What if the jQuery AJAX function had some bug and calls the callback function twice? Or what if the callback is never called? Things might not end well.
So in case of callbacks, we are blindly trusting some code and ask that code to execute a callback when ready. There happens an inversion of control in this place. There can be some times when things wont work as expected and create a hell like situation.
Many developers believe that callback hell is caused due to a series of nested callbacks.
setTimeout(() => {
console.log("I am from first callback");
setTimeout(() => {
console.log("I am from second callback");
setTimeout(() => {
console.log("I am from third callback");
setTimeout(() => {
console.log("I am from fourth callback");
setTimeout(() => {
console.log("I am from fifth callback");
}, 1000);
}, 1000);
}, 1000);
}, 1000);
}, 1000);
We can observe a pyramid structure formed due to indentation. In a big program, this pyramid of nested callbacks affects the readability of code in a negative way. Even though it affects the readability, it does not create a hell like situation. There are various ways to avoid indentation of above program and make things better.
So we can conclude that callback hell is due to inversion of control in callbacks. The JavaScript community came up with a solution for inversion of control problem and that is Promises.